You are browsing camaro6 
 03-17-2023, 02:54 PM
|
#29 |
  Drives: 2018 Camaro SS 1LE Join Date: Jul 2018
Location: Stuttgart, Germany
Posts: 807
|
Cylinder heads have been returned! .5 mm removed off the decks, valve seats minor ground (45 degree angle on the intakes for the titanium valves), and fresh PSI 1516 valves springs installed.
 Also received new o-rings for the ICT Billet supercharger to LT1 cylinder head plates - $15 shipped. 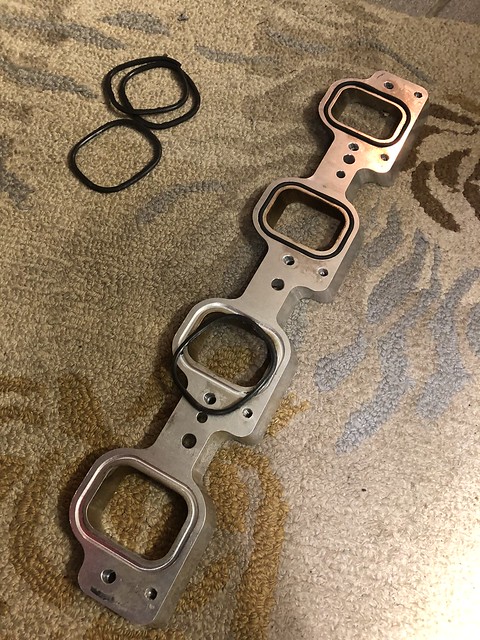 Also received in the mail is our Goodwood Festival of Speed tickets for the July event in UK! The Camaro is considered an exotic in Europe so get special parking (last time was next to Paganis at the start line! Guess I've got a target to get this thing running! 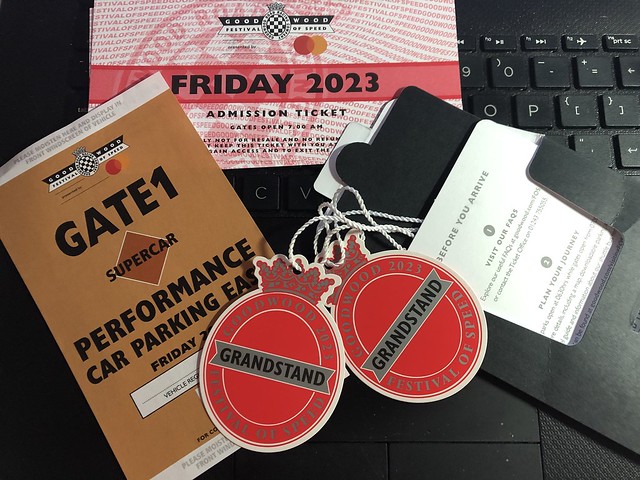
__________________
|

|

|
|
03-30-2023, 04:52 PM
|
#30 |
|
Drives: 2018 Camaro SS 1LE Join Date: Jul 2018
Location: Stuttgart, Germany
Posts: 807
|
More USPS gifts arrived:
Rock Auto shipped a new oil pan. Note: even comes with filter and all hardware along with couple of sensors. This cast unit is a long way from the original sheet metal pieces from Moroso!:  Full length windage tray (this is the bottom with scraper/fences):  Look at the size of the inlet pipe!:  Rinsed it out and found next to no debris...cool: 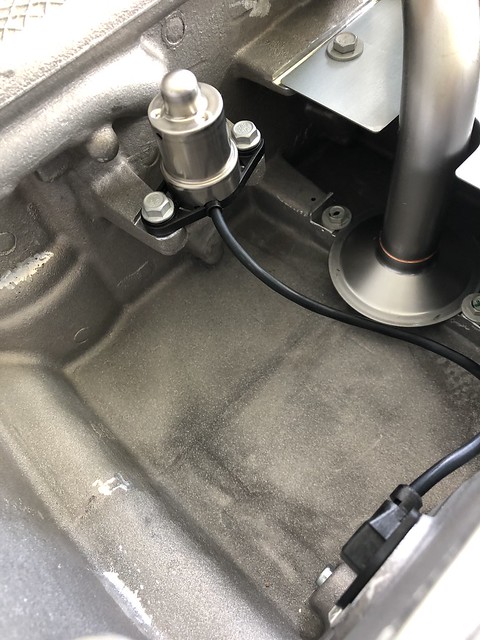 Added a new oil cooler:  Backside - mainly did this as unsure if I had an debris in the oil (bearing, etc). Note nice rubber seals and includes hardware:  Installed:  Soaking the Johnson Lifters for a few hours...really not sure this helps. I tried to pump the lifters as I've done on Gen 1 and 3 SBC's, but it wouldn't budge with my weak strength!  Prepped to install the cylinder heads to check pushrod length and the company shipped me LS9 head gaskets...dowel pin hole is different! Just bought another 3 weeks of delay...:   This is not going to work...: 
__________________
|
|
|
|
|
04-02-2023, 01:07 AM
|
#31 |
|
Drives: 2018 Camaro SS 1LE Join Date: Jul 2018
Location: Stuttgart, Germany
Posts: 807
|
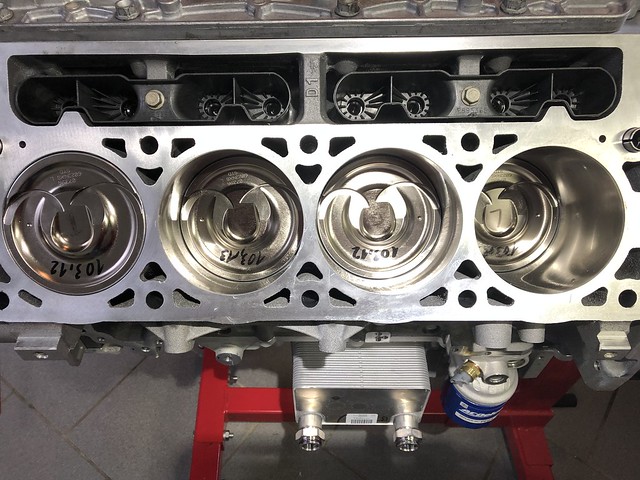 Further eyeballing the static engine while we wait for head gaskets...I notice that the 'dot' on the pistons are not all the same on each side. Hmm. 2 dots are toward the front of the piston and 2 are toward the rear...on each side. Which begs if they are installed incorrectly. I recall searching the internet about this before with nothing definitive - other than possibly facing the same direction per side. A more recent search shows that there is indeed a difference - possibly a pin offset issue. I then called Wiseco who gave slightly confusing info, but did state there is a .030 piston pin offset and they should be installed with the 'R' on the passenger-side and 'L' on the driver-side! Looking closer the piston top has a part number etched into it...ending in L or R, denoting the side of the engine. Unfortunate! I then asked why I had to grind on the piston bottom...he replied they should be clearanced when installed correctly. This was not true for my set...#8 was the correct right side piston. I was disappointed that this information was not more readily apparent in their included instructions - admittedly our set came from Texas Speed who may have removed the documentation...then again, no one on the internet referenced installation instructions... So Saturday was disassembling 4 cylinders, moving the rings to the other pistons (since those were spec'd per specific hole) and re-installing. Always a concern of damage or mixing parts with this messy action.  Injectors were returned with new seals and flow tested. Interestingly these injectors have 11,000 miles on them...I didn't think they were that bad although been sitting for ~2 years!  LS3 front main seal installed:  Test fit the colorful Katech oil pump:  And finally a temp install long block...amazing all aluminum construction!  We are still looking at valve spring setups. We had settled on PSI 1516 springs...some of the stiffest beehives, but noticed the GM Ti valves have a different lock position - making the installed height on the order of 1.6 inches when 1.8 inches is preferred. Will call a few companies for their recommendations.
__________________
|
|
|
|
|
04-02-2023, 03:00 PM
|
#32 |
|
Drives: 2018 Camaro SS 1LE Join Date: Jul 2018
Location: Stuttgart, Germany
Posts: 807
|
Refocused on the car...
Having the right tool makes easy work...of pulling the balancer:  and:  Also pulled the alternator, starter, and lower covers/stress plate. Next weekend hope to start on the AC compressor/exhaust/transmission. Not looking forward to that.
__________________
|
|
|
|
|
04-02-2023, 05:41 PM
|
#33 |
|
Old badass
Drives: 14GMC 2.9 16GMC Turbos 2020Silv.6.2 Join Date: Mar 2020
Location: Arlington Tx
Posts: 240
|
It seems at least to me from several threads through the years TSP misses things. Is that the norm for the performance industry? I don't hear that with LME or Katech. It's a question not a dig. Nice build sure glad you noticed!
__________________
I've had 7 Camaro's. All gone...for now.
Current build in progress 2016 GMC4x4 RCSB twin hair dryers ~1k whp fbe port inj 1/8 mi & stealth street terror  |
|
|
|
|
04-03-2023, 01:51 PM
|
#34 |
|
Drives: 2018 Camaro SS 1LE Join Date: Jul 2018
Location: Stuttgart, Germany
Posts: 807
|
ZO6Ted: The piston swap was all me. I would point toward Wiseco if there were instructions dictating which piston goes where. I received the rotating kit from TSP - the only discrepancy for them is the missing crank timing chain gear (which they later shipped once they were made aware. They did balance the kit and it appeared to me all the pistons were interchangeable - all same weights/profile, etc. I missed the part number.
__________________
|
|
|
|
|
04-03-2023, 10:27 PM
|
#35 | |
|
Old badass
Drives: 14GMC 2.9 16GMC Turbos 2020Silv.6.2 Join Date: Mar 2020
Location: Arlington Tx
Posts: 240
|
Quote:
__________________
I've had 7 Camaro's. All gone...for now.
Current build in progress 2016 GMC4x4 RCSB twin hair dryers ~1k whp fbe port inj 1/8 mi & stealth street terror |
|
|
|
|
|
04-18-2023, 03:45 PM
|
#36 |
|
Drives: 2018 Camaro SS 1LE Join Date: Jul 2018
Location: Stuttgart, Germany
Posts: 807
|
Took a bit of vacation...and Cometic .040 gaskets arrived!:
 With the low compression pistons, -.020 decking on the heads, new block...CR should be IVO: 10.5. I enjoyed the bark it had with the 11.5, but this will allow more ignition timing and likely less knock. Hate to cover it up:  Cometic .040 gasket:  ARP bolts called for 115 lb/ft. Exceeded my high end digital torque wrench and had to break out the Sears Craftsman clicker. Started looking at pushrod lengths... Pattern on the left is +.100 pushrod and right is OEM length (7.85): 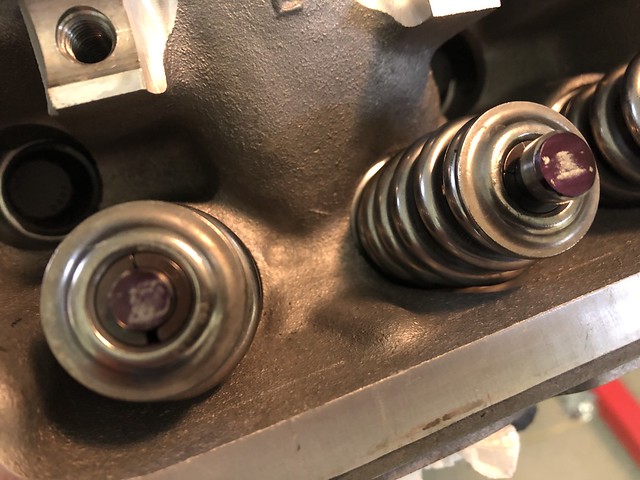 Based on the Johnson 2110K lifters, Cammotion cam, head work, it appears I need a shorter pushrod. On the order of 7.700 for .5 turn from zero lash which falls into the .035-.045 preload required by Johnson. Seems a bit odd, but a call to Katech returned this is not unusual. Ordered up a set of Comp Cams .080 wall pushrods - luckily they have them in stock this time!
__________________
|
|
|
|
|
05-09-2023, 01:37 PM
|
#37 |
|
Drives: 2018 Camaro SS 1LE Join Date: Jul 2018
Location: Stuttgart, Germany
Posts: 807
|
Rethought the pushrods and elected to go with BTR 3/8 .080 wall pushrods...7.725 along with +.050 locks to gain a bit more seat height. Will see if they fit the bill this weekend. The taper looks like strength!:
 I've also dropped the exhaust/driveshaft and working on the transmission removal...getting closer!
__________________
Last edited by Tim M; 05-09-2023 at 02:11 PM. |
|
|
|
|
09-15-2023, 02:00 PM
|
#38 |
|
Drives: 2018 Camaro SS 1LE Join Date: Jul 2018
Location: Stuttgart, Germany
Posts: 807
|
Can't believe this car has been down for nearly 2 years. Life has settled a bit and the Evo is no longer requiring much attention so...took two days off to get dirty (gave up on the son - his life is too busy as a senior!)
Finalized the valvetrain setup: Katech provided the thin seats and deep dish retainers for the Ti intake valves along with -.050 locks gave me 145 psi on the seat and 370 over the nose. The same poundage for the Katech extreme duty exhaust valves but with OEM seats and BTR tool steel retainers along with the -.050 locks. I also updated to 'another' set of pushrods after my calculations were in error - I now have 2/3 of a turn when tightened with BTR 3/8 pushrods in 7.725 sizing:  Next was the front cover and the insides - torquing and thread locking the high dollar tensioner:  Next the oil pump...except for the oil pressure harness! I neglected to buy a second of these and this torpedoed my attempt to swap engines in one day...since I had to now switch to pulling the original LT1 out so I could disassemble to access the original oil pressure harness - crazy this is bathed in hot oil. A new one would have been preferred... Trans was a pain! It gets stuck on the firewall unless you drop the cradle fully (off the alignment pegs) and that is not for the faint of heart on jackstands and a trolley jack! Nonetheless, engine is on the hook:  Engine lift in work...borrowed engine hoist was missing its extended legs...had to counterbalance it with 200 pounds of stuff from the garage - sketchy!:  Empty - ready to be cleaned (quite clean actually!):  Yanking the pan to get to the original oil pressure harness:  Dang harness:  Installed:  Front cover installed:  Rear cover installed:  Final bottomend shot before sealing it up: 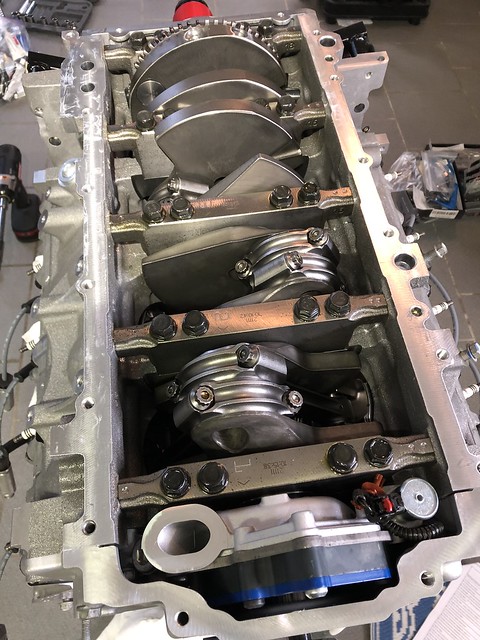 Complete - ready to install once I transfer a few more parts (mounts, etc):  Original LT1 ready for teardown...may let the local Boy Scout troop dissect for Automotive Maintenance Merit Badge! I will keep only the block and covers... 
__________________
Last edited by Tim M; 09-15-2023 at 02:15 PM. |
|
|
|
|
09-17-2023, 02:17 PM
|
#39 |
|
Drives: 2018 Camaro SS 1LE Join Date: Jul 2018
Location: Stuttgart, Germany
Posts: 807
|
While the engine was out...finally installed my sound tube block off from Chevrolet. I slotted it to allow the wideband wiring and boost hose to also use the firewall hole. Much cleaner install that before with black tape...
Unfortunately, it dawned on me that I never installed the VVT lock out in the timing gear. What happens when the project has been on and off for 2 years...Bummer - so 6 steps back before one step forward. Back on the engine stand, off with the oil pan, off with the front cover and off with the timing gear. Watched a few videos and installed the VVT lock out as recommended by Cam Motion. Pretty easy: Remove spring tension - remove screws:  The block:  Installed (the solid block):  And upon reinstallation, the C5R chain seemed quite slack and when turning the engine over, the chain slapped as tension grew/waned with the cam/valve springs. I elected to use a new OEM tensioner...since Katech ran one with their 8000 RPM monster...I think we will be fine.  Final shot of the oil pump:  I also noticed the pan/covers came off quite easily. Possibly, I failed the proper prep with the Hondabond...so this time around I elected Permatex Ultra Gray. Second time around is certainly easier! Flywheel - OEM bolts at 74 (with blue thread locker) and OEM pressure plate bolts at 52 (with thread locker). Interesting the OEM flywheel is 37 pounds! Bolted the trans together while on the hoist - definitely the way to go IMO. With my assistant's helping hand...Going in!:  On its mounts! Installation as engine/trans was 100% easier than trying to lug the trans into position especially on one's back/side! With the cradle dropped 1.5 inches, the hoist just barely cleared front bumper as the oil pan slip past the front crossmember while jacking up the tailshaft from underneath. Quite the dance!  With lots of luck, it will run again before the snow flies in Germany: 
__________________
|
|
|
|
|
09-18-2023, 11:28 AM
|
#40 |
 Drives: blue velvet Join Date: Jul 2018
Location: Austin, TX
Posts: 126
|
amazing work! looking forward to more updates.
|
|
|
|
|
09-21-2023, 01:57 PM
|
#41 |
|
Drives: 2018 Camaro SS 1LE Join Date: Jul 2018
Location: Stuttgart, Germany
Posts: 807
|
atx_traveler: Appreciate the comments. Still a 50/50 chance we'll be pulling it again for some snafu!
Few images I didn't include: Firewall plug with wire/boost hose pass thru:  Cradle gap at the rear - required to get the trans out!  AC compressor fully installed:  Clutch bled tonight! 8 mm wrench and its reservoir is the brake master cylinder...careful it is divided and will run out even if the master looks full! Oops...took a few more bleeds to get a full pedal. This will allow us to install the trans fully.  Been two years from taking most of it apart...scratching one's head on what is next!
__________________
|
|
|
|
|
09-21-2023, 03:14 PM
|
#42 |
|
Geoff

Drives: 2020 ZL1 Green Join Date: May 2013
Location: Houston
Posts: 1,720
|
Amazing build with the kiddos. Two years, you have patience mate. I'm looking forward to completion and you taking it on the ring......as I'm sure you are.
__________________
|
|
|
|
|
|
|
|
|
Post Reply
|
|
|


