You are browsing camaro6 
 04-25-2016, 03:53 PM
|
#1 |
 Drives: Camaro 2016 2SS Join Date: Feb 2016
Location: Pittsburgh PA
Posts: 129
|
Dash Cam fuse
Hello, looking to install a dash cam, was going to buy this wiring kit which makes it easy to hard wire your dash cam...
http://www.amazon.com/gp/product/B00...?ie=UTF8&psc=1 My question is...Does anyone know which fuse I would use if I bought this kit and routed it to the engine fuse compartment ? It needs to be a fuse that turns on when car is on and turns off when car is off..Dont want it running hot all the time due to battery drain. Any help on this would greatly be appreciated. |

|

|
|
04-25-2016, 04:03 PM
|
#2 |
  
Drives: 2SS, Hyper Blue Join Date: Feb 2016
Location: Greenville NC
Posts: 835
|
Why not just wire to the plug in the wiing above the mirror? Fuse value would be based on the Dash cam draw...
There are a few fuses you can tap in the engine bay that are switched (Steering wheel heater, NPP, etc.), but the wiring is a PITA. Just use a tap above the mirror. Purple/White for swithced + and Black to black for the negative. Search any of the Radar installs for more info. Just be sure to use a 5V Micro USB hard wire kit.
__________________
Steve
Hyper Blue 2SS, 6M, NPP, Sunroof, Nav |
|
|
|
|
04-25-2016, 04:54 PM
|
#3 | |
|
Drives: Camaro 2016 2SS Join Date: Feb 2016
Location: Pittsburgh PA
Posts: 129
|
Quote:
http://www.camaro6.com/forums/showthread.php?t=440419 But was a little confused as to what wire goes where? Regarding the install at the above link, what would I tap into? What wires go where if I got this... http://www.amazon.com/gp/product/B01...?ie=UTF8&psc=1 Thanks again. 
|
|
|
|
|
|
04-25-2016, 05:04 PM
|
#4 |

Drives: 16 Camaro SS Join Date: Jul 2012
Location: Menifee
Posts: 820
|
You were looking at the right thread, but did not read it. Read it again.
http://www.camaro6.com/forums/showpo...13&postcount=3 The Red wire on your converter goes to the Purple/White and the black wire goes to black.
__________________
Interior: Adrenaline Red. SS/2SS, M6, NPP, Sun Roof, 8" Nav. Black 5 Spoke Wheels.
 |
|
|
|
|
04-25-2016, 05:06 PM
|
#5 | |
|
Drives: 2SS, Hyper Blue Join Date: Feb 2016
Location: Greenville NC
Posts: 835
|
Quote:
Black into black and you'll be good to go..(What MGD said!)
__________________
Steve
Hyper Blue 2SS, 6M, NPP, Sunroof, Nav |
|
|
|
|
|
04-25-2016, 05:13 PM
|
#6 |
|
Drives: Camaro 2016 2SS Join Date: Feb 2016
Location: Pittsburgh PA
Posts: 129
|
Thanks again guys.

|
|
|
|
|
04-25-2016, 05:20 PM
|
#7 |
|
Drives: 16 Camaro SS Join Date: Jul 2012
Location: Menifee
Posts: 820
|
After all that, you better come up with some pictures of the install. Good Luck.
__________________
Interior: Adrenaline Red. SS/2SS, M6, NPP, Sun Roof, 8" Nav. Black 5 Spoke Wheels.
|
|
|
|
|
05-01-2016, 10:20 AM
|
#8 |
|
Drives: Camaro 2016 2SS Join Date: Feb 2016
Location: Pittsburgh PA
Posts: 129
|
Finally got my dash cam installed yesterday. Was a little bit of a PITA but managed to get it done...
Thanks so the various forum members, if it wasnt for your hep, I wouldn't haven been able to do this myself. Got this dash cam from Amazon... http://www.amazon.com/KDLINKS-X1-Das...8&s=car&sr=1-8 First I had to take off the overhead console area, pretty easy, just got a screw drivers with a rag around it so it wouldn't scratch the plastic. That seems to pop the clip with hardly any effort. Unhooked all the little plugs to get it out of the way. 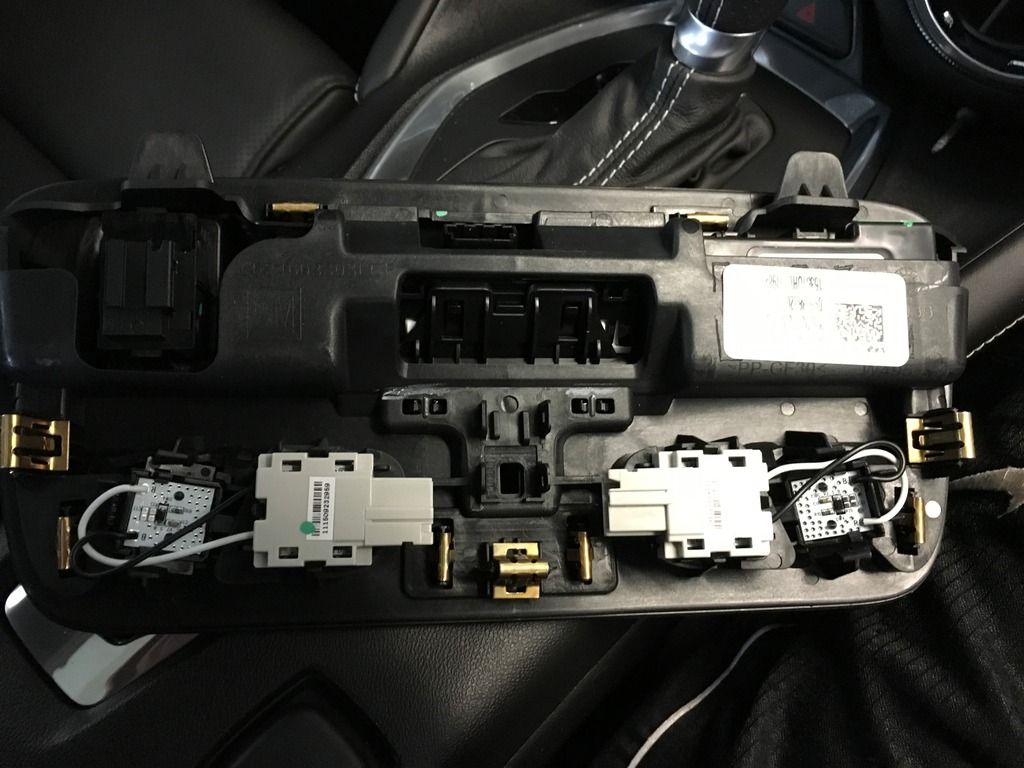 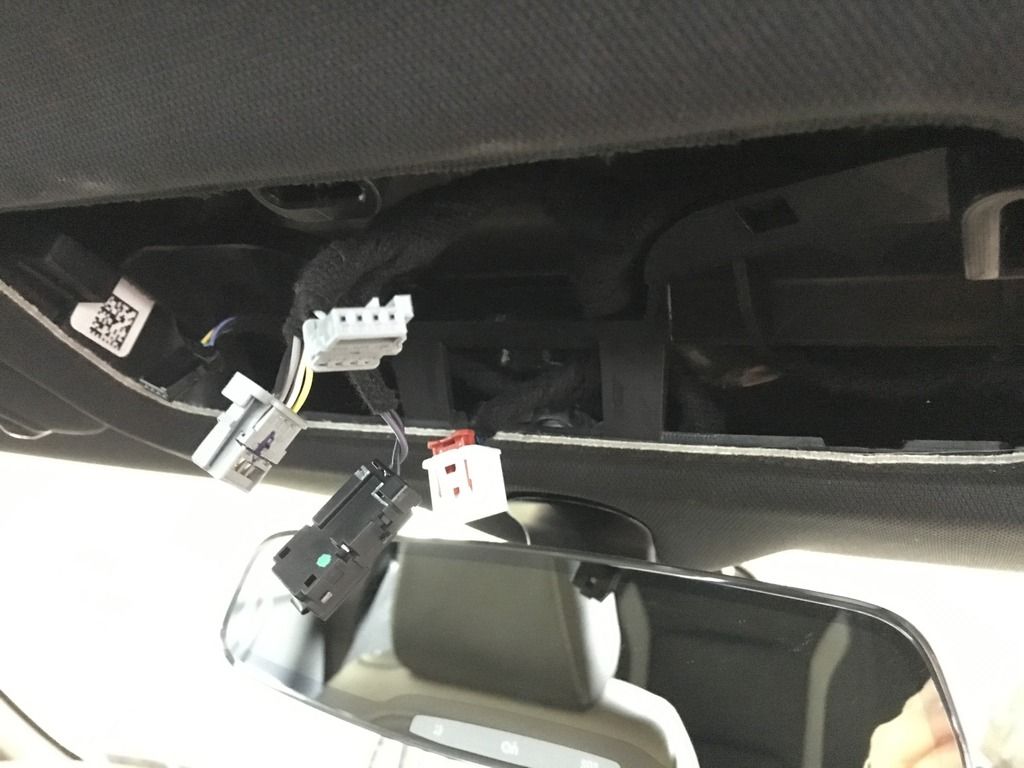 I then bought this from Amazon... http://www.amazon.com/SimpleUSB-Auto...ilpage_o02_s00 Next was to simply stick the Red wire into the Purple/White for + (positive) and the Black for - (negative) Its a tight fit so if not done right the first couple tries, they will snap. 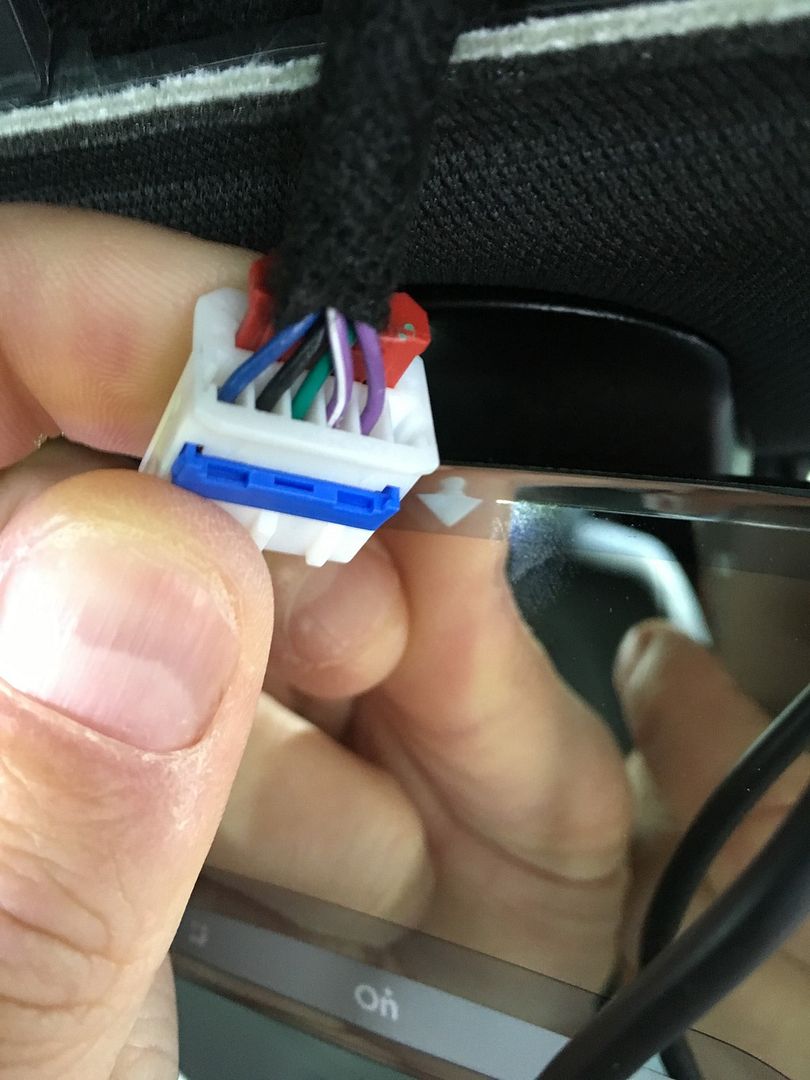 Problem with this was the little wires sticking out are really fragile and when trying to push them into the Purple and White wire for + (positive) and the Black for - (negative). They snapped and broke off. So I have to cut the wire own to its bare wires. 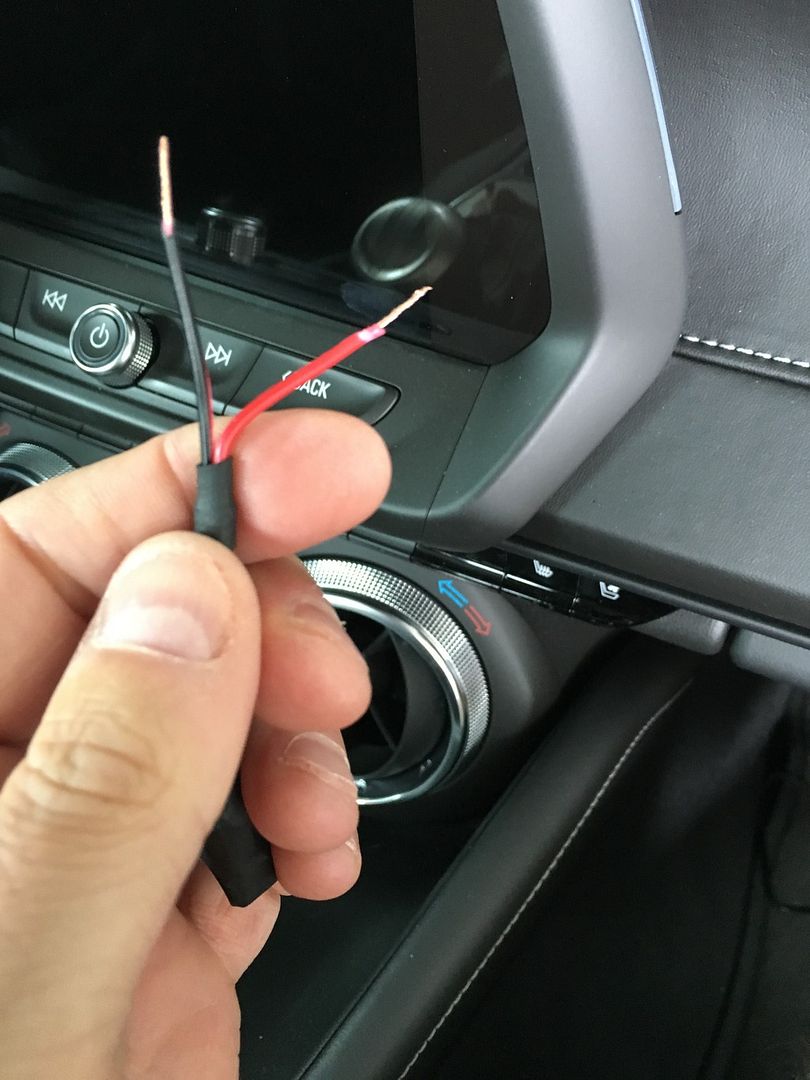 There is a little blue bar looking cap on the front side of the plug seen below... I pulled that out with a small headed screw driver and exposed the metal connects of each wire. I then slid the adapters wires I got from Amazon into the Purple/White for + (positive) and the Black for - (negative). Made sure they were lined up on their respective connect. Pushed the Blue bar back into place which tightened the wires and pushed them against the metal for a secure connection. Taped up the wires for extra security and also added a zip tie to attach to the existing wires 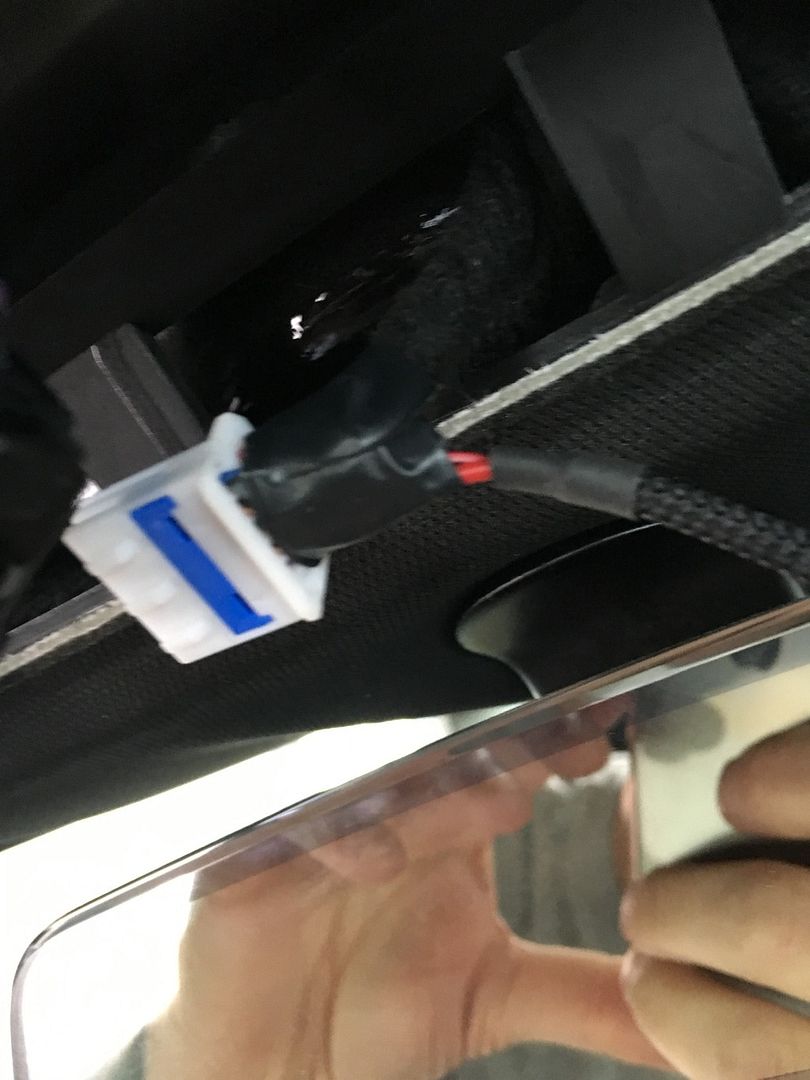 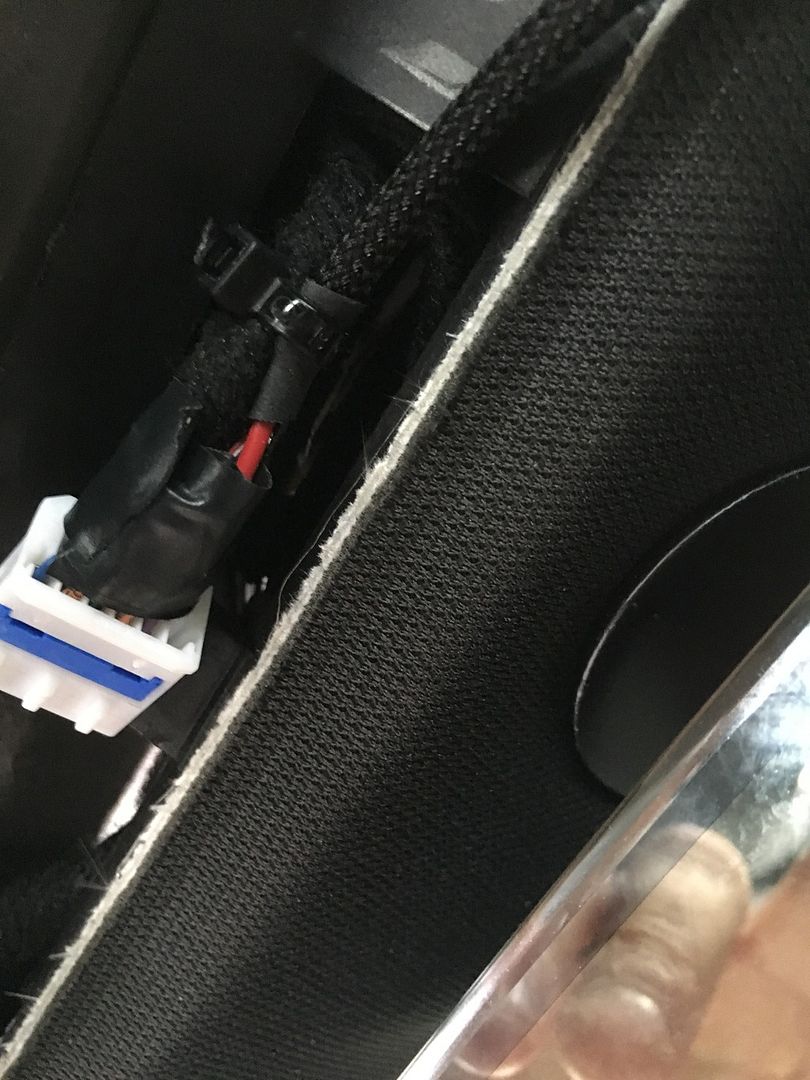 Zip tied the USB cable so I could shove it up in the available space inside the overhead. 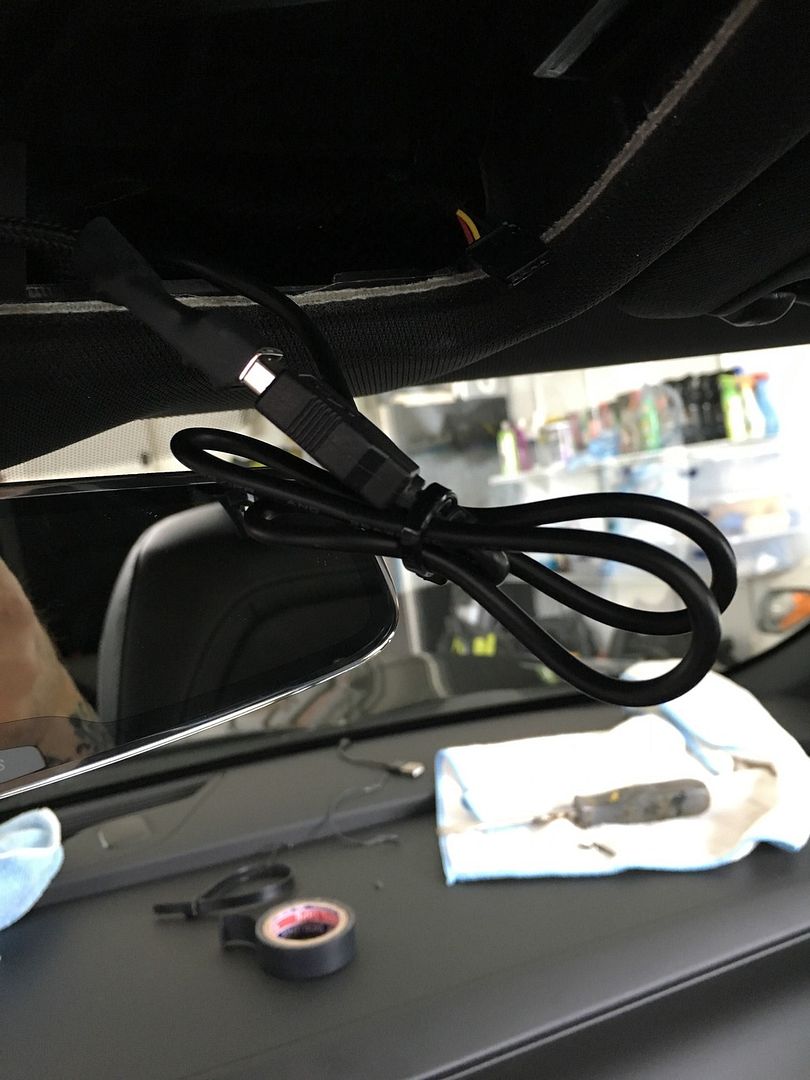 Connect all the plugs back, clipped the overhead back and done. Really wasnt that hard, other then when I had to modify the USB adapter I bought from Amazon. But now I have a clean install without running wires to engine or trunk fuse box. 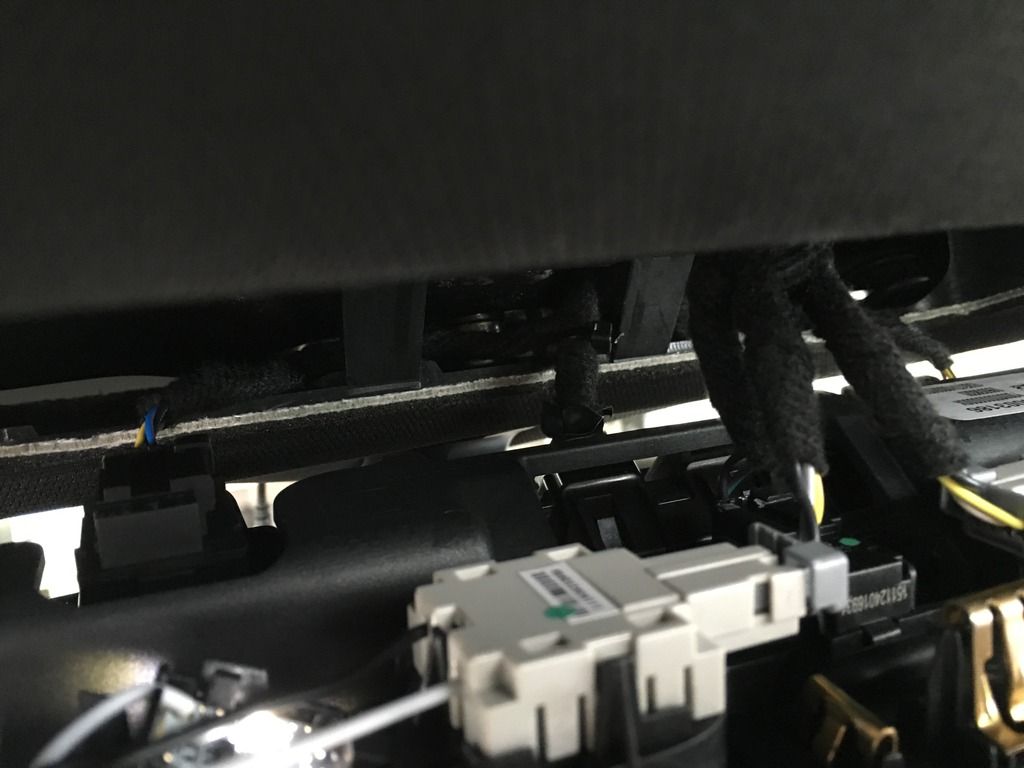 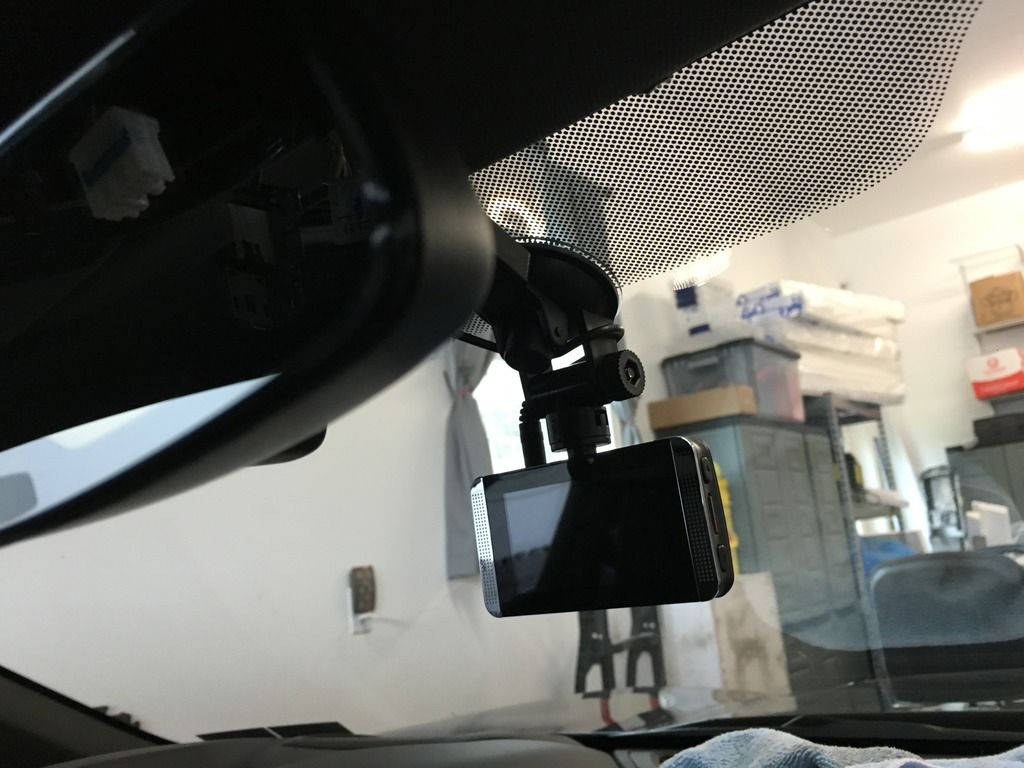
|
|
|
|
|
05-01-2016, 11:12 AM
|
#9 |
|
Drives: 16 Camaro SS Join Date: Jul 2012
Location: Menifee
Posts: 820
|
There you go. Good job. Easy as cake. Looks good.
__________________
Interior: Adrenaline Red. SS/2SS, M6, NPP, Sun Roof, 8" Nav. Black 5 Spoke Wheels.
|
|
|
|
|
03-16-2017, 09:12 AM
|
#10 |
 
Drives: 2017 SS 1LE Artic Blue Join Date: Jan 2017
Location: Michigan
Posts: 59
|
The purple/white wire is + "switch on" wire. Is one of those wires in the mirror console a "constant on" wire? Maybe one of the other 3 (the solid blue, green, or purple wires)?
__________________
SS 1LE PDR Artic Blue (VBWZZJ )
ordered - 1/17/2017 1100 - 1/27/2017 3100 - 2/06/2017 TPW 2/27 3400 - 2/21/2017 TPW 2/27 4200 - 2/28/2017 Built 190751 delivered - 3/5/2017 |
|
|
|
|
03-17-2017, 12:08 PM
|
#11 | |
|
Drives: 2017 SS 1LE Artic Blue Join Date: Jan 2017
Location: Michigan
Posts: 59
|
Quote:
So I wired my dash cam with voltage regulator to the passenger power seat. That worked out very well.
__________________
SS 1LE PDR Artic Blue (VBWZZJ )
ordered - 1/17/2017 1100 - 1/27/2017 3100 - 2/06/2017 TPW 2/27 3400 - 2/21/2017 TPW 2/27 4200 - 2/28/2017 Built 190751 delivered - 3/5/2017 |
|
|
|
|
|
05-03-2017, 04:37 PM
|
#12 |
 Drives: 2016 Camaro 2SS 8Spd Auto Join Date: May 2016
Location: Maryland
Posts: 1
|
Just a note for people like myself who want to run the dashcam to the trunk fuse box. Looks like F15 is constant 12V power.
Bought some add a circuit wires/fuse taps from amazon and going to wire it in that way. I have a BlackVue with the Power Magic Pro Voltage Regulator (you set at what Voltage to cut off the camera so you can still crank the engine). I had no idea where I would have put that box. So it is going to reside in my trunk and I'll run the wire up to the windshield. (Our fuses are Micro2 ATR) |
|
|
|
|
05-04-2017, 11:18 AM
|
#13 |
|
Drives: 2017 Camaro 1LT HBM Join Date: Sep 2016
Location: Newfoundland, Canada
Posts: 171
|
I have the black vue 2 channel to install and waiting for someone to post the best way to wire it into the front fuse panel under the hood. barring that I will strike out on my own once it gets a bit warmer around here!
|
|
|
|
|
06-13-2020, 09:08 AM
|
#14 |

Drives: 2017 2SS MRC NPP Join Date: Jun 2016
Location: Caledonia
Posts: 68
|
What wiring kit do you use, the link is no longer valid?
__________________
 2017 2SS MRC NPP 2017 2SS MRC NPP |
|
|
|
|
|
|
|
|
Post Reply
|
|
|


