You are browsing camaro6 
 07-07-2025, 07:29 PM
|
#15 | |
       
Drives: 2018 Camaro 1SS 1LE Join Date: Sep 2018
Location: Front Range, CO
Posts: 2,204
|
Quote:
__________________
 |
|

|

|
|
07-07-2025, 07:55 PM
|
#16 | |
|
Drives: 2018 Camaro 1SS 1LE Join Date: Sep 2018
Location: Front Range, CO
Posts: 2,204
|
Quote:
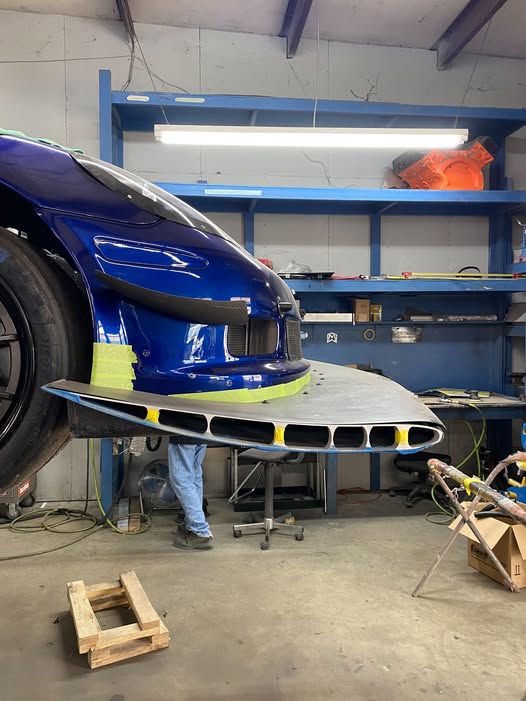
AJ has some diffuser-like shaping in his Camaro splitter but it's built-in and looks fairly subtle. On cooling, I'm going to cover the cooler hole, but there'll be a decent gap in between the splitter and the hole for air to move through. If it needs more air I'll try to replicate the slot design the BMW splitter in the video uses. My PA hardware and the plywood were both delivered today. I don't want to install the splitter before the wing so I have some time... I'll make the splitter first and then mount it when the wing gets here. The PA hardware looks really nice. They sent me the right angle brackets with the threaded holes for the QR mounts which was a nice upgrade from the cheaper unthreaded brackets I ordered. They are indeed aluminum but very thick. I got the Ti skids for under the support rods and corners, they look really good too. I am excited to get aero on my car! 
__________________
|
|
|
|
|
|
07-09-2025, 07:47 AM
|
#17 | |

Drives: '94 Z28+ '15 Z/28 Join Date: Jun 2009
Location: Cheektowaga, NY
Posts: 1,320
|
Just came in here to add that the best way is to buy another trunk lid. I bought a trunk lid from a local parts recycler. It was $150, and then I bought a can of spray paint in the factory red.
I tested my own aero stuff with a load cell mounted in my trunk. I race autocross so my speeds are significantly slower than at a road course. All I can say is don't trust their computer data. Test your car and see how it feels with the wing at all sorts of different angles. In my testing, the downforce was way better at steeper angles. I did a bunch of tests from 0-65mph. Then tried again at higher speeds. It wasn't until I hit 100+ mph that the popular shallow angles of 3 degrees or 0 degrees took over. My wing+second element are around 6sq/ft. At 100mph~ish the 3 degree setup was at 130lbs of downforce or something like that (going off of the top of my head here).
__________________
1973 Mach 1, 351C cruiser
'15 Z/28 Red Hot, A/C 1980 Z28- resto-mod project 1979 Y84 Trans Am 1986 IROC-Z  |
|
|
|
|
|
07-09-2025, 10:14 AM
|
#18 | ||
|
Drives: 17 hyper blue 2SS M6 Join Date: Mar 2018
Location: NorCal
Posts: 745
|
Quote:
|
||
|
|
|
|
07-09-2025, 02:59 PM
|
#19 | ||
|
Drives: 2018 Camaro 1SS 1LE Join Date: Sep 2018
Location: Front Range, CO
Posts: 2,204
|
Quote:
What wing? AJ's Dual 12 (Apex-12) is supposed to give 400-600 lbs of df (at the rear end) at 100 mph. I went with the Single 12 (Fulcrum-12) which is about 50% less df/drag. I still have stock power so I wanted the least drag I could get away with, and AJ said the Fulcrum-12 would balance out a 6" splitter. I know you posted about this elsewhere but it's been a while. If you have a link to the previous posts or are willing to copy/paste here that would be awesome, thanks. https://ajhartmanaero.com/6th-gen-ca...ment-wing-kit/
__________________
|
||
|
|
|
|
07-09-2025, 07:32 PM
|
#20 |
 Drives: '18 ZL1 1LE Join Date: Sep 2021
Location: St Louis
Posts: 81
|
It's good to keep in mind that the blade profile AJ Hartman or Zebulon splitters show dramatic improvement over flat splitters only at quite low ride heights, like 35mm. At 80mm, there was hardly any difference in downforce on CFD (Hartman video). You could still see some benefit at the higher ride height because the ground clearance decreases at high speed and under braking, but then the effect is probably going to be pretty variable, and will depend on spring rate, driving style, aero balance etc. For instance my data suggests that my front ride height still increases a little bit at high speed because my rear aero is so aggressive.
So far I have felt an obvious improvement in front grip at OIR, where there is a ton of compression under braking and many uphill turns. At NCM where there are not as many turns like that, the grip didn't feel nearly as impressive. I have to run a pretty high ride height due to my OEM springs and 8" splitter overhang (otherwise it scrapes like crazy), so I can't take complete advantage of the splitter until I get stiffer springs and lower the ride height. If I could do it all over again I'd do the largest single element Hartman wing and his profiled splitter, enlarged and with the trans cooler covered. And plan from the start to buy new front suspension lol. |
|
|
|
|
07-10-2025, 04:23 AM
|
#21 | ||
 Drives: 2021 Camaro 1SS 1LE Join Date: Aug 2014
Location: Virginia
Posts: 406
|
Quote:
|
||
|
|
|
|
07-14-2025, 07:47 AM
|
#22 |
|
Drives: '94 Z28+ '15 Z/28 Join Date: Jun 2009
Location: Cheektowaga, NY
Posts: 1,320
|
My wing is just a generic wing off of eBay but it's not a 100 dollar piece or anything. It was done by a legit aero guy, came in pieces and the uprights had to be welded on. He is a fabricator by trade and also a racer. People get too caught up in the latest/greatest imo. Wings from airplanes in the 60's don't look much different than wings of today. The base wing on my car is only around 4.5-5sq/ft, and the second element is just a narrow piece of flat aluminum. It definitely helps, and showed it during my testing.
The load cell required a bunch of simple fabrication. Basically I removed the trunk latch mechanism. I mounted the cell to the underside of the lid on a floating collar. The cell itself has 2 bar ends on it. I just hard mounted a simple rod and the bar end of the cell went around the rod. Then I attached another rod through the bar end of the bottom of the cell. As you close the trunk. the load cell would swivel and I built 2 "V" wedges attached to the chassis. The rod going through the bar end of the cell would nestle itself into the wedges. You have to make sure that the cell can float, because if it binds up, you will get skewed numbers. There's a thread here from a few years ago with an interesting chart showing testing on a setup with crazy angles. 52 degrees to be exact. It put out well over 1000lbs of downforce, but obviously a lot of drag was created. https://www.camaro6.com/forums/showthread.php?t=617496
__________________
1973 Mach 1, 351C cruiser
'15 Z/28 Red Hot, A/C 1980 Z28- resto-mod project 1979 Y84 Trans Am 1986 IROC-Z |
|
|
|
|
07-14-2025, 06:28 PM
|
#23 |
|
Drives: 2018 Camaro 1SS 1LE Join Date: Sep 2018
Location: Front Range, CO
Posts: 2,204
|
__________________
|
|
|
|
|
08-29-2025, 12:49 PM
|
#24 |
|
Drives: 2018 Camaro 1SS 1LE Join Date: Sep 2018
Location: Front Range, CO
Posts: 2,204
|
Splitter is nearly done, just have to install the airdam. Will do so and post pics later of the finished splitter installed on the car.
I've saved details like splitter diffusers until later, I want to do some testing and adjust splitter height so the diffusers transition into the rest of the underbody as smoothly as possible. I was going to be on my way to Solo Nats but I got covid yet again last week, and I already have issues with long covid. Luckily this one wasn't too bad but it leaves me fatigued. If I run out of energy I can't drive properly, like the brain / body connection is glitchy. So hopefully next year if I make it that long, lol. I think it's nearly impossible to accurately predict results without paying for professional help, but I tried to use some general guidelines in shaping the front and trailing edges. I have some data from High Plains Raceway I can compare with and have also experimented with adding a wicker to the oem SLE spoiler, which was quite noticeable but also cost me a lot of speed on the straights and around 3 mpg driving to/from the track. Pic of the splitter is the underside, the front edge is doubled up, so 24mm and then shaped using a sanding wheel on an angle grinder followed up by a random orbital. The ply was marine grade Meranti Hydrotech and I was a little surprised by how rough the grain is, if I was do do it over again I'd be more careful to fill the grain before finishing. However, it seems like the final coating, a vinyl wrap, is adhering to the splitter.  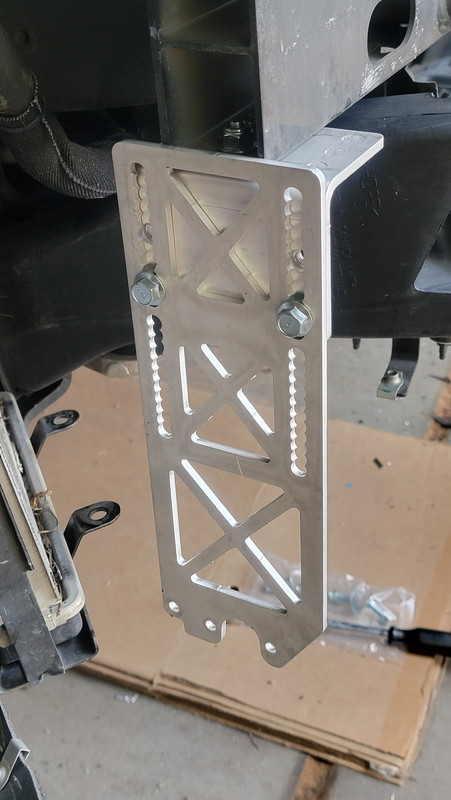 
__________________
|
|
|
|
|
08-30-2025, 02:46 AM
|
#25 | |
|
Drives: 17 hyper blue 2SS M6 Join Date: Mar 2018
Location: NorCal
Posts: 745
|
Quote:
|
|
|
|
|
|
08-30-2025, 12:14 PM
|
#26 | |

Drives: 2020 SS 1LE Join Date: Aug 2020
Location: NorCal
Posts: 880
|
Quote:
|
|
|
|
|
|
08-30-2025, 06:38 PM
|
#27 |
|
Drives: 2018 Camaro 1SS 1LE Join Date: Sep 2018
Location: Front Range, CO
Posts: 2,204
|
Ok, wrapped it up today, testing on track at High Plains Sep 5th.
I'll almost definitely need to extend the air dam around the center portion of the oem splitter but that's pretty easy. Until I get the ride height established I'll just use some gaffers tape, lol... I'll also add some endplates and tire spats eventually. The Professional Awesome QR mounting brackets and support rods are really nice. I can drop the splitter in under 1 min. Adjusting splitter height will be a moderate PITA w/o removing the front bumper cover, but should be doable. Installing the splitter and rods is a 5 min job. You can drive the car around as-is but when the splitter gets down to a more ideal ride height I think it'll scrape a lot, so I'm pretty happy to have the QR system. I also have the AJ Fulcrum 12 wing installed on the junkyard trunk lid... I'll have to wash the car and take some pics. 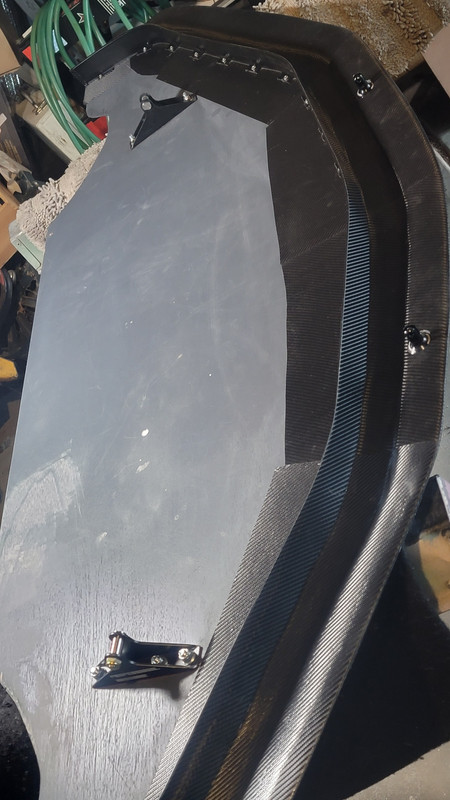 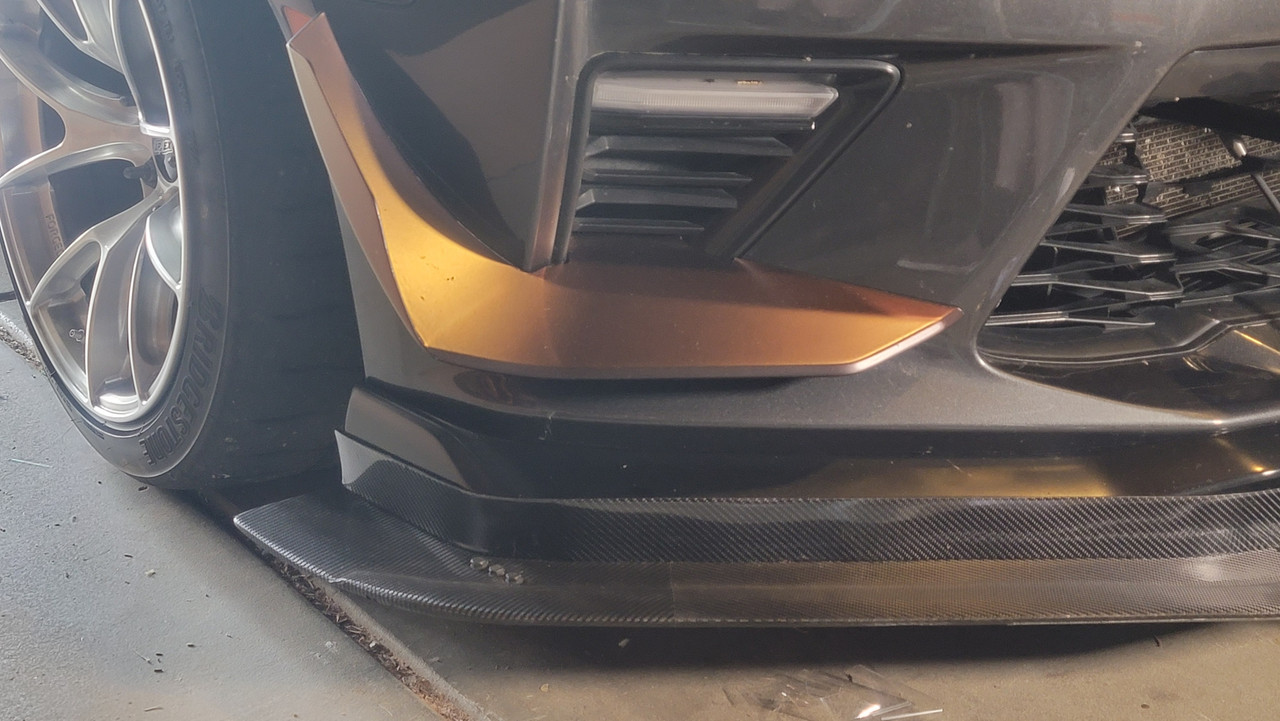 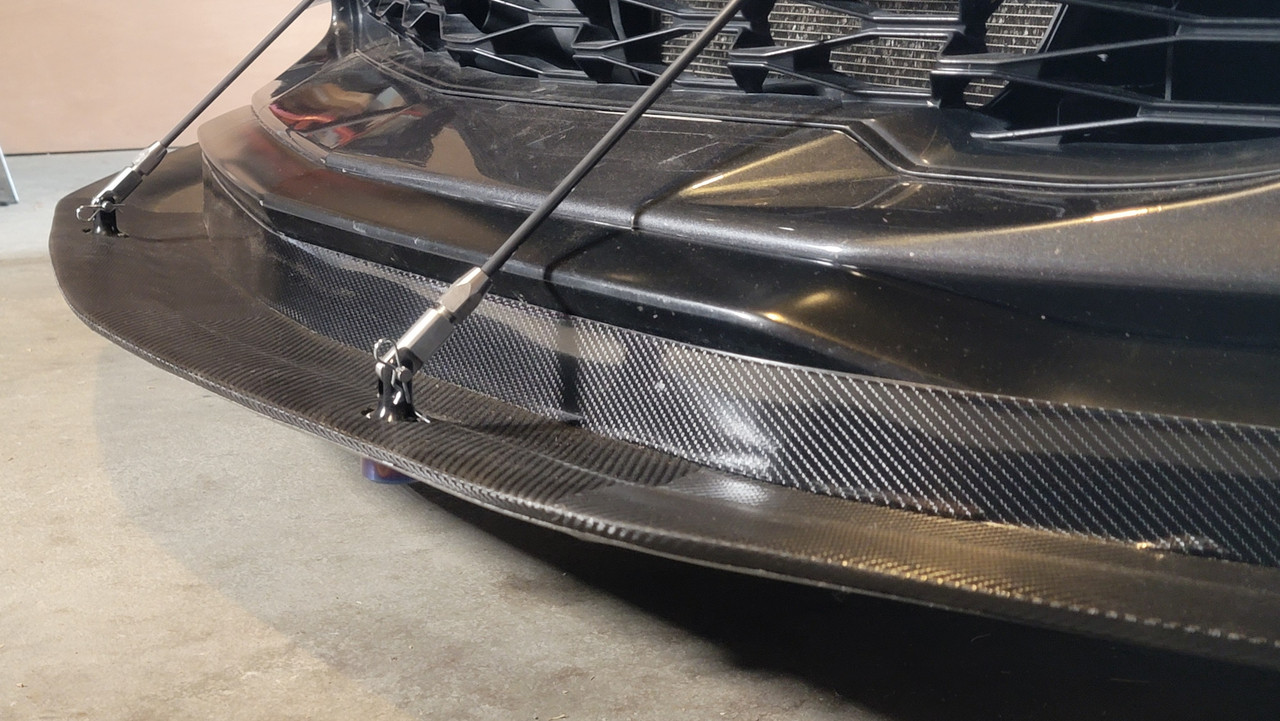 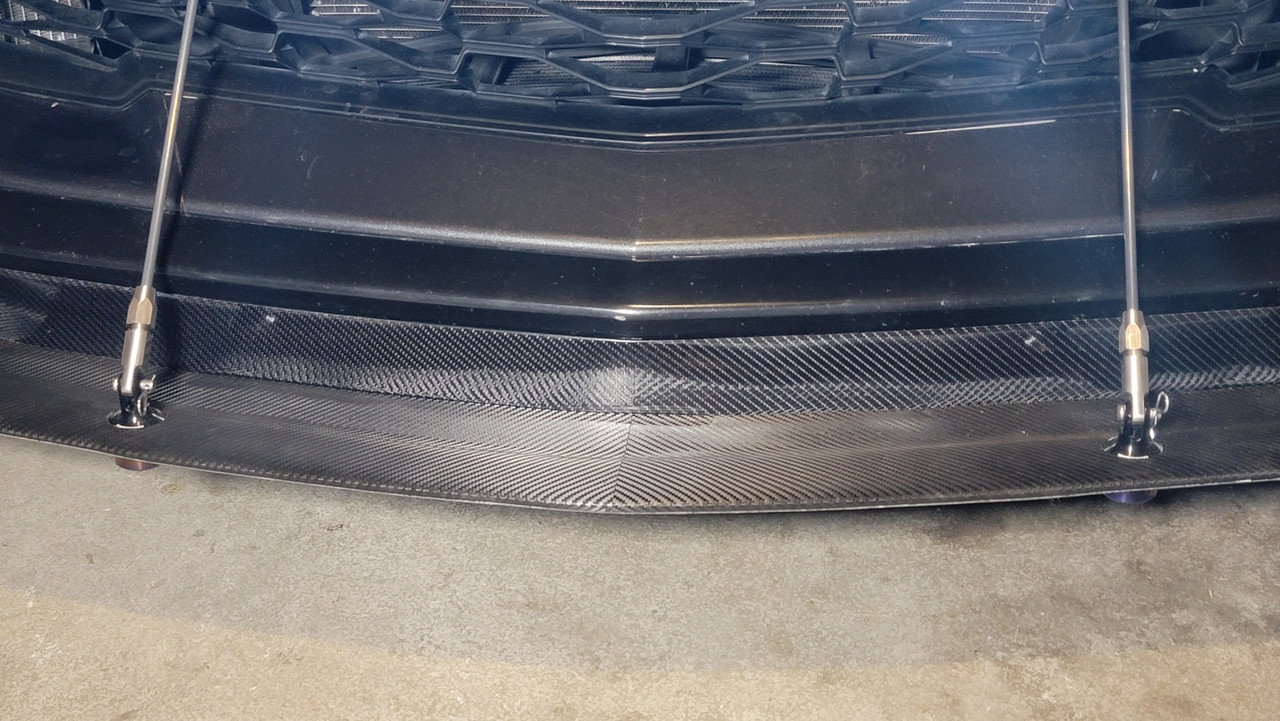 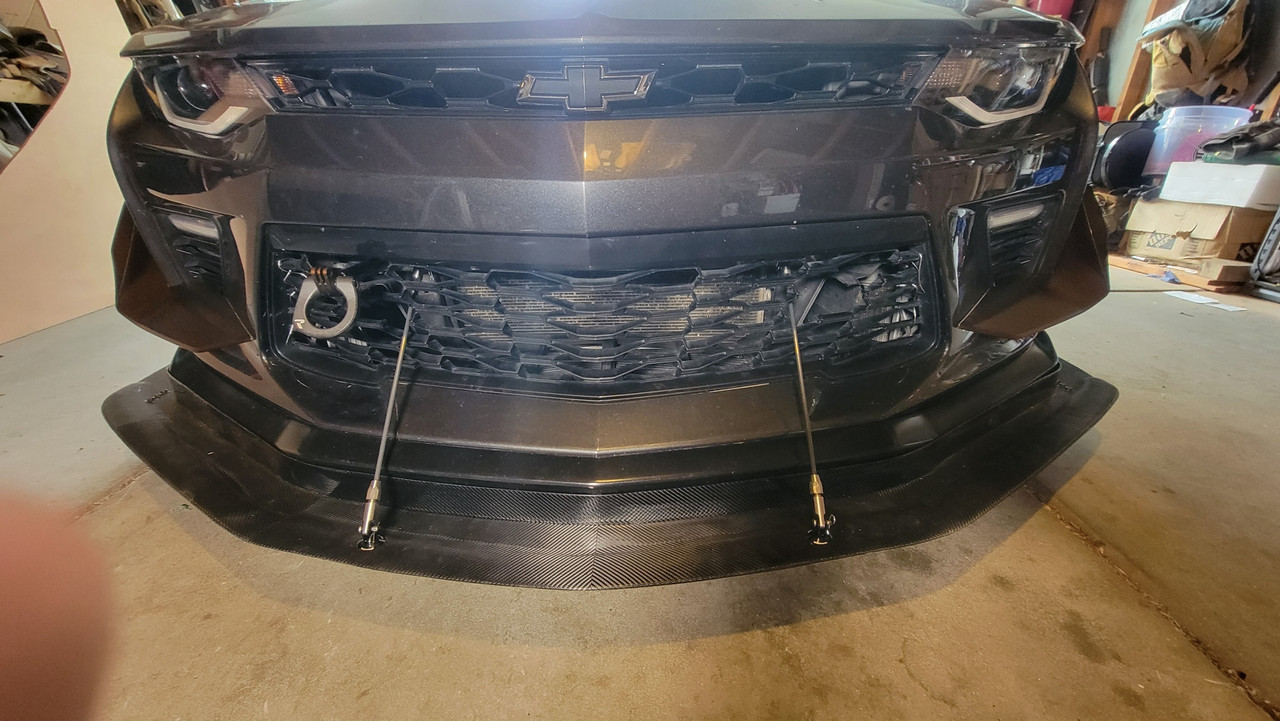
__________________
Last edited by DaveC113; 08-30-2025 at 10:33 PM. |
|
|
|
|
09-04-2025, 12:49 PM
|
#28 |
|
Drives: 2021 Camaro 1SS 1LE Join Date: Aug 2014
Location: Virginia
Posts: 406
|
I look forward to hearing how this goes tomorrow, Dave.
Interesting that you chose to keep the stock splitter; the AJ Hartman splitter pulls it off. P.S. If anyone wants rear aero, I have a carbon fiber wing and trunk lid for sale in the member classifieds. |
|
|
|
|
|
|
|
|
Post Reply
|
|
|