You are browsing camaro6 
 12-08-2016, 09:23 AM
|
#15 |
|
San Diego Head Tuners

Drives: 2016 Camaro 1SS ,NPP,MagRide, A8 Join Date: May 2009
Location: Temecula, CA
Posts: 2,440
|
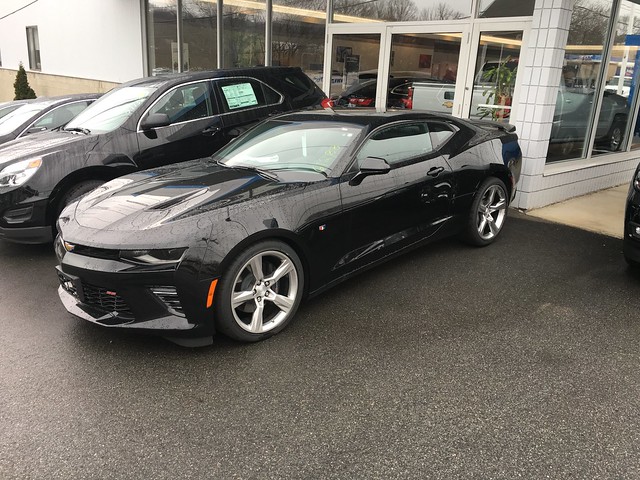
Snap a picture with both your cars !
__________________
2016 1SS A8, NPP, MagRide, Black Rims
My 5th Camaro (3 Gen5, 1 Gen4) Member of San Diego Head Tuners https://www.youtube.com/c/MojaveKY https://www.instagram.com/mojaveky/ https://twitter.com/MojaveKY http://dinowax.refr.cc/bryanm 15% off DinoWax orders |

|

|
|
12-08-2016, 11:16 PM
|
#16 | |
  
Drives: 2017 ZL1 Join Date: Oct 2016
Location: Ny
Posts: 859
|
Quote:
 I had a K&N air box on it and when that vtec hit, that sound was glorious! I had a K&N air box on it and when that vtec hit, that sound was glorious!Sorry about the pic, had to edit me out. 
|
|
|
|
|
|
12-31-2016, 07:17 PM
|
#17 |
|
Drives: 2017 ZL1 Join Date: Oct 2016
Location: Ny
Posts: 859
|
Thought I'd update this thread with more recent mods!
Splash guards / mud flaps Difficulty is a 4 outta 10: You do not need to take the wheels off to install them. For the front where you need the most room, crank the wheels to one side for more access for the riveter. For the rears, I used a right angle adapter for my drill, but you could get right angle star drive wrenches. This is the best $15 tool!! http://www.homedepot.com/p/DEWALT-Ri...RA50/203867866 -Align the mounting plate for the fronts right against the outer edge of the fender. I was worried it would not snug the guards close enough (they do not naturally sit flush), but it all snugged up when tightening things. -predrill holes in the carpet for the rivets - its too thick to easily push them through. -Use a tiny hose removal tool to help pull the carpet forward while you install the rivet. I had to do this or the rivet wouldn't have snuck behind the carpet. (Mine is like this http://ricksfreeautorepairadvice.com...moval-tool.jpg ) -This may be obvious, but use alcohol on the car to prep it and dont peel off the VHB tape liner until the screws are in place (front and rear). Its near impossible to get them to seat all the way if the vhb tape is exposed. Start the vhb release liner by folding 1" at 90deg before offering it to the car - then you have a little starting tab to pull from. -The rears are a bit easier than the fronts - just bolt on with no fender liner pull back needed. Note that the kit has smaller head screws for the rear which makes them seat better. I didn't realize this at first because they were stuck under the box flap and had a hard time getting the top ones to start on the threads! -I heard they will need to be trimmed if you plan to use side skirts, but it is doable. I hope someone comes out with a side skirt kit that works with the splash guards. -Install time should be about 1hr for a first timer taking their time.  They sit very flush - I had concerns about this on the front ones but the mounting plate snugs them up.  Red knee pads and red outline mats. Difficulty is a 1 outta 10: I really wanted the red interior, but end of year 25% savings led me to an all black interior, but I'll be changing that as time goes on. I installed the red outline Camaro mats and knee pads. The pads come off very easy with a stiff tug - up on the center ones, and out on the door ones. Later I'll likely dye all of the stitching, already bought the pens, just want to do it when its a bit warmer out.    SEMA Red Hot Grille. Difficulty is a 6 outta 10 on the mod scale : To get to the grille, the front of the car must come off. It seems daunting, but it was not as bad as I thought and it went smoothly. Look up Lethals video on youtube. It did this mod by myself in a few hours. Front of the car comes off - no need to remove the driver's side PITFA connector.  A shot from behind - the padded center part comes off very easy - two clips.  After this, you remove a bunch of clips and put the new grille back on. It is easy to remove the clips- put a needle nose plier in the back of the clip vertically and squeeze - this will open the clip up slightly and give you leverage to pull back. Now is a good time to do the illuminated bowtie too! Illuminated bowtie emblem. Difficulty is a 6 outta 10 on the mod scale: It appears some dont, but I had an issue where the bowtie wouldnt illuminate after plugging into the passenger side driving marker. It turns out the wiring loom was wired wrong on some of these.. so here is how you fix that: Pull back the loom and weather wrap. Offset cut the wires to keep the package smaller and prolong wear resistance! Black to gray, gray to black. Solder and heat shrink  Rewrap and voila!     Here is a pic of the passenger side DRL marker connection. Its brainless and easy to remove the plugs on this side. I used a few zip ties and drilled a few holes in the back side of the bumper's inner flanges to support the wire going to the emblem.  You will need to modify the area behind the emblem to make room for the lighted one. The back has a raised area and the plug itself, so the hole needs to be quite large. I cleaned up the hole after this shot was taken, but it ends up screwing up the two inner clip areas. I managed to save one side of each clip so they still function.  Trunk lid handle and booster seat. Difficulty is a 3 outta 10: I missed the handle on my BMW and Lexus so I didnt have to get my hands all dirty (winter salt etc) when closing the lid. I installed a strap that I raped off of my kids booster seat. $13 at walmart, and free handle! I just ripped it off the seat - its supposed to hold onto the seatbelt or something, I dunno, I never will use it. BTW, this booster fits great in the seats of the SS and my stingray.  If you pop off three of the topmost trunk lid push trees, you'll have enough access to the underside of the lid. The plastic around the latch just pops off. I made the strap about 6" long and melted two holes at each end with a lighter and hot poker. Inside, I removed the central nut that secures the wing, and placed the straps over the stud.  The nut has an encapsulated and rotating washer, which was perfect to give the straps a bit more strength. Here the strap is secured and you can see the backside of the 1" slit I made at the corner of the trunk lid liner.  Here it is installed, and it works awesome! No more dirty fingers. This mod took me about 30 minutes, and no cost.  Strut Tower Brace Difficulty is a 1 outta 10: The kit supplies the bar, two longer bolts for the two inner holes and a GM Performance sticker (not shown but its just like the one we already have in the engine bay). Torque bolts to 16 ft lbs. Install this on level ground. I am still on snows, but I think it did tighten up the initial turn in on corners. I'll know for sure when summer hits! Note my brothers SS in the background - installed a brace in his car too. We both bought a SS in the last month!  Escort Max Radar Detector hardwire to cigarette lighter socket. Difficulty is a 3 outta 10: I know some others have tapped off a purple/white wire (off of a black square connector under the steering column), but I didnt know what that powered and after many years installing car audio gear I've learned to play it safe. It was a little more effort to tap under the cigarette lighter but I knew if I did it I'd never have to worry about anything/warranty claim etc. Lifting the center console is pretty easy. Someone on here told me how to do it, sorry I dont have their name handy, so thanks. But basically you remove the knee pads, two bolts either side, then two at the rear under some plastic covers. Hardest part is the lip that hides under the rear seat - you can get it off pretty easy but getting it back under later was a pita till I realized I could sit in the rear seat and have much better leverage on the padding. Start at one side and squish and push the console down. Top tip; once the center console is loose, and if you're lucky enough to have a sunroof - the sunroof shade can hold the console up.  Random under console pic:  This is a shot under the cigarette lighter socket. The purple wire is the 12v+. I suppose you could also tap 12v- from the black wire here too, but I always like to go to a more solid grounding lug if possible (can sometimes avoid audio system noise).  Under the cig lighter area is an easily accessible grounding lug. The stock Escort ring terminal fit right on. The escort also has a 2a fuse inline with the 12v+. I hope it never blows!   Testing before its all put back together.. looks good.  This is where I mounted the remote faceplate (bluetooth version) with some VHB tape. Its right off of my knee and very convenient. I had it mounted here in my M3 and its a good spot - you can notice the alert light if you happen to be looking down a bit. The wire is easily routed past the gear shift and by the carpet. Length on the wire was perfect, good job Escort!   I used the sticky mount on the passenger side of the rear view mirror for the detector. Its a tad far away, but its not in my vision at all. I couldnt deal with it mounted before the mirror. Eventually I'll design a hard mount for it, because the thing bounces around if it backs off a bit on the mount (bad job Escort!). Routing the wire up to the detector was pretty easy. I was able to stuff it under the door seal and the roof liner, but I did have to pop off the top of the left apillar to get the wire by there neatly. It pops off pretty easy. Last edited by Sub; 12-31-2016 at 08:23 PM. |
|
|
|
|
12-31-2016, 07:23 PM
|
#18 |
 
Drives: 2017 2SS M6 Silver Ice Metallic Join Date: Aug 2016
Location: Great Lakes
Posts: 220
|
Love the look of the grille on your car, Sub. Nice!

__________________
 My First Camaro! 2017 2SS 6M, Silver Ice Metallic, 20" Low Gloss Black Wheels, Red Fender Hashes, Ground FX, NPP, MRC, Sunroof, Black Bowties. Ordered 4-22-16, Picked up 7-16-16. |
|
|
|
|
12-31-2016, 07:26 PM
|
#19 | |
|
Drives: 2017 ZL1 Join Date: Oct 2016
Location: Ny
Posts: 859
|
Quote:
Next mod... Getting a local shop to make the dash piece red to match the oem red knee pads I added. Got a quote for $125 for that today. I want to visit one other place for a quote. 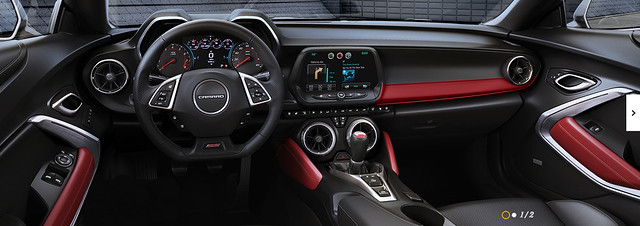
|
|
|
|
|
|
12-31-2016, 10:31 PM
|
#20 |
 
Drives: 2016 2SS Join Date: Nov 2016
Location: NA
Posts: 67
|
Your car looks great and thank you for the posts
|
|
|
|
|
01-01-2017, 05:09 AM
|
#21 |
 Drives: 2016 Camaro SS - Red Hot Join Date: Mar 2010
Location: Greensboro, NC
Posts: 343
|
Congrats and enjoy...
|
|
|
|
|
01-01-2017, 10:30 AM
|
#22 |

Drives: 2016 2SS, Red Hot, NPP, Nav, M6 Join Date: Jul 2016
Location: Eagle Creek OR
Posts: 783
|
Do the stitching! It will complement you red interior accents well. I've done mine & am very happy with the results.
Great write up also! |
|
|
|
|
01-01-2017, 10:52 AM
|
#23 |
|
Drives: 2017 2SS Hyper Blue Join Date: Dec 2016
Location: Houston TX
Posts: 550
|
Congrats, like you I traded a BMW. In my case a 135i with PPK. My bimmer was black and I had to get something different this time, so Hyper Blue came to the rescue. Agree completely on the sunroof. Standard suspension works fine for me.
|
|
|
|
|
01-01-2017, 03:28 PM
|
#24 | |
|
Drives: 2016 Camaro 2SS Join Date: Nov 2016
Location: North Jersey
Posts: 603
|
Quote:
It's funny, I was trying to buy that one too but it sold before I could get it. Also called Mirak but they weren't willing to come down at the time. Mind me asking how much you got it for? Sent from my iPhone using Tapatalk |
|
|
|
|
|
01-01-2017, 04:53 PM
|
#25 |
|
Drives: 2017 ZL1 Join Date: Oct 2016
Location: Ny
Posts: 859
|
Thanks for the compliments guys! I'm really enjoying the car. Red stitching is definitely on the agenda. srctc, I sent a PM.
__________________
My Car Blog and mods. Previous Chevys: 2016 2ss, 2015 C7 z51, 2004 C5 Z06
|
|
|
|
|
01-02-2017, 08:23 PM
|
#26 | |
|
Drives: MK7GTI, 21 Traverse Join Date: Jul 2016
Location: NY
Posts: 214
 |
Quote:
You have a history of track time and success. How you feel about the V6's performing at Limerock? congratulations! |
|
|
|
|
|
01-03-2017, 09:11 AM
|
#27 | |
 
Drives: 2017 Camaro 2LT-217CI Join Date: Aug 2015
Location: Wantagh, NY
Posts: 170
|
thank you
Quote:
nice fix for the trunk close issue. I wish someone would find a fix for the narrow front seat pressing on our left sides causing uncomfortable seating issue.  thanks again 
|
|
|
|
|
|
01-03-2017, 10:19 AM
|
#28 | |
|
Car Enthusiast

Drives: 2017 Camaro SS FIFTY Join Date: Jul 2016
Location: Naperville, IL
Posts: 163
|
Quote:
__________________
2017 SS Camaro FIFTY
6MT, Nav, NPP, Black Bowties, Mishimoto OCC, Skip Shift Eliminator, GM Footwell Lighting, NGM Splash Guards, GM Blackout Tail Lights (SOLD)  Last edited by Mr. Grumpy; 01-03-2017 at 12:57 PM. |
|
|
|
|
|
|
|
|
|
Post Reply
|
| Thread Tools | |
|
|