You are browsing camaro5 
|
|
 11-11-2013, 01:51 PM
|
#1 | |
 
Drives: 2010 Camaro 2LT RS Join Date: Sep 2010
Location: South Miami, FL
Posts: 388
|
I completed my stereo build a little over a year ago but never created a thread for it. And since I made a video highlighting the stereo this past weekend for my official build thread, I decided why not post it here as well   My stereo modifications include: (2) 15 Mmats Pro Audio Dreadnauts subwoofers (2) 1,500 W-rms Mmats Pro Audio Class D amplifiers (1) 700 W-rms Mmats Pro Audio full range amplifier Mmats Pro Audio MP-5 Parametric Equalizer and crossover Kicker KS Component 6.5 speakers Kicker 6x9 three-way speakers (2) Optima batteries Stinger audio accessories (fuses, isolators, breakers, etc) Dynamat Sound insulation The entire stereo was built by my father and myself. 3,000 watts RMS going to the two 15" Mmats Pro Audio subwoofers. We were told by other shops that 15" subwoofers could not be done in the trunk of a 5th Gen Camaro and of course, we had to prove them wrong. The design for the box is unique. Three sides, the floor, and partial roof of the box are constructed with MDF wood and the trunk lid encloses the box. To put it simply; when the trunk lid is closed, the trunk becomes the box and the ports direct air into the cabin of the car. Alternatively, if the trunk is open and the doors/windows are closed, the box inverts itself and the interior of the car becomes the box and the ports push air in the opposite direction. One quality that often goes unnoticed with this stereo build is the easy access to batteries and wiring. The inability to access these crucial areas always surprises me with major builds. So as you'll see in the pictures below, seamlessly maintaining access was a high priority for me. I cannot begin to describe the amount of sound insulation we put into the car. There are multiple forms of sound insulation in every space, crack, and crevice imaginable. However, it has really done its job, and while the bass can make body panels flex like plastic, the car does not rattle. Just some knocking as my sunroof bounces up and down  haha! haha!  First pieces of Dynamat...  Majority of Dynamat laid...  Backseat coming together All the fabric is black suede.  MDF floor; the hinge near the the back wall of the trunk allows wider access to batteries and wiring without the need to tear anything apart...  A view behind the side wall; including insulation and electric ram that controls lowering of the rear seat.  The side wall; the removable panel allows the entire MDF side to be sealed without losing access to wiring.  Back seat completed. The electric ram allows the back seat to remain at any position.  The passenger side port can be seen on the far wall of the car. The two amps in the rear seat amplify the two subwoofers.  Trunk completed. The amp mounted to the roof of the trunk amplify the mid/high range speakers.  Top panel and plexiglass are easily removed to access batteries.  Mmats Pro Audio MP-5 Parametric Equalizer located in glove box.  And finally the video 
__________________
My build thread: http://www.camaro5.com/forums/showthread.php?t=299684 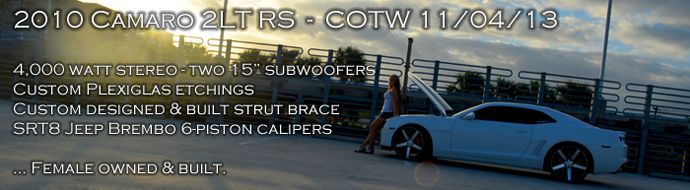 Last edited by Go big or Go home; 02-03-2014 at 09:14 PM. |
|

|

|
|
11-13-2013, 10:18 AM
|
#2 |
|
Aural Assault Vehicle

Drives: 2010 IBM 2SS/RS, 2015 Sierra Denali Join Date: Jun 2011
Location: Garner, NC
Posts: 792
|
I love the IB setup. You get to have 15's and a trunk. Very nice build.
__________________
My amplifier pop/click/thump solution thread
Power Mods * K&N Typhoon CAI, Flowmaster American Thunder cat-back exhaust, Hurst Short Throw Shifter Exterior Mods * Black Phantom Grille * 22" T.I.S. 537MS wheels w/ Nitto INVO rubber * OEM body kit Suspension Mods * BC Racing Coilovers * Lakewood Strut Tower Brace Audio Mods * Stinger SPP 2250 Battery * Mosconi 6to8v8 w/ RCD * Pioneer AVH-X7500BT * Scosche Dash Kit * 2 - Mosconi AS200.4 * 2 - JL Audio 13W6v2 * Focal 165KRX2 Power (active) * Mosconi Gladen One 240.2 * Rockford Fosgate Power T1692 |
|
|
|
|
11-13-2013, 12:15 PM
|
#3 | |
|
Drives: 2010 Camaro 2LT RS Join Date: Sep 2010
Location: South Miami, FL
Posts: 388
|
Quote:
__________________
My build thread: http://www.camaro5.com/forums/showthread.php?t=299684 |
|
|
|
|
|
11-26-2013, 03:34 PM
|
#4 |
 
Drives: 13' Sw 2ss Ls3 Join Date: Dec 2012
Location: porterville ca
Posts: 543
|
Now this is what I want..!! Although 15s may b out of the question but definitely 2 12s n a band pass enclosure with the port firing into the cabin undecided on location of the port yet
Awesome setup im surprised those pic frames in the vid werent jumpimg off the wall lol Last edited by the barber; 11-26-2013 at 03:39 PM. Reason: typo |
|
|
|
|
11-26-2013, 04:44 PM
|
#5 |
       
|
Luv luv luv it....sweeeeet set up....very nice

__________________
|
|
|
|
|
11-26-2013, 05:09 PM
|
#6 |
|
Da WHALE

Drives: 2014 Stingray, 2015 Panamera 4 Join Date: Dec 2011
Location: Oceanside, Ca - Originally from KCMO
Posts: 8,878
|
Bass in yo face! That's what I'm talking 'bout. Nice job!
__________________
Project MantaRay...Underway
|
|
|
|
|
11-26-2013, 05:17 PM
|
#7 |

Drives: 2011 Camaro LS Join Date: Feb 2011
Location: Southern California
Posts: 2,920
|
wow
__________________
|
|
|
|
|
11-26-2013, 11:43 PM
|
#8 |
|
Account Suspended
Drives: 2012 2SS Join Date: Aug 2013
Location: United States
Posts: 32
|
Two thumbs up for you
|
|
|
|
|
11-27-2013, 08:24 AM
|
#9 |
 Drives: 2014 Crystal Red ZL-1 Join Date: Apr 2013
Location: Virginia
Posts: 30
|
Outstanding job. By the way, I noticed from the video that you trunk lid where it meets the body by the back window vibrates a lot. Mine does too with just 2 10's. It vibrates so bad that you can sometimes hear it through the music. Did you do anything special to that forward trunk lid area or just dynamat the the main part of the lid. The pressure pushed the lip of the lid up where it meets the trunk seal which is difficult to stop. Thanks
|
|
|
|
|
12-05-2013, 10:04 AM
|
#10 | |
|
Drives: 2010 Camaro 2LT RS Join Date: Sep 2010
Location: South Miami, FL
Posts: 388
|
Quote:
__________________
My build thread: http://www.camaro5.com/forums/showthread.php?t=299684 |
|
|
|
|
|
12-05-2013, 10:08 AM
|
#11 | ||||
|
Drives: 2010 Camaro 2LT RS Join Date: Sep 2010
Location: South Miami, FL
Posts: 388
|
Quote:
Quote:
Quote:
Quote:
__________________
My build thread: http://www.camaro5.com/forums/showthread.php?t=299684 |
||||
|
|
|
|
12-05-2013, 10:20 AM
|
#12 | |
|
Drives: 2010 Camaro 2LT RS Join Date: Sep 2010
Location: South Miami, FL
Posts: 388
|
Quote:
__________________
My build thread: http://www.camaro5.com/forums/showthread.php?t=299684 |
|
|
|
|
|
12-21-2013, 10:10 AM
|
#13 |
|
Drives: 2013 Murdered Out 2LT Join Date: Nov 2013
Location: Phoenix
Posts: 7
|
Paige:
I posted this in your journal log a few days ago, but it looks like you have not visited that thread in a while. One other quick question, when you attached the suede fabric to the various surfaces around the car, did you cover any of the plastic interior panels, and if so what method did you use to make sure it stuck permanently? Well, thanks for your time. here's the original post: I have had my 2013 LT for a couple of months and since it is the first Gen 5 I have ever owned, when it came time to do the system, I was checking out all of the build logs for some visuals to verify if the ideas I had were legit. When I came across your thread, I was floored. It was everything I wanted to do, but better! I have been doing my own audio systems (and systems for a few other people as well) and it seems that every time I get a new car I tell myself that I am not going to do such an elaborate install this time, and of course, as soon as I start that goes out the window. Long story short, I didn't even make it to the start of my build before my plans were toast, thanks to the awesome job you and your dad have done with everything in your car. If you do not mind, I am going to use some of the inspiration that your build has given me and combine that with my original plans, to complete what is no doubt, going to be one of the biggest projects I have ever attempted by myself. I do have a few questions for you, if that is cool. 1.) As far as the MDF floor, walls, and ceiling in the trunk, did you guys bolt the angle iron frame to the car and then attach the wood to the frame, or did you put each section together outside the car and then slide each one in and connect them? If you did bolt the frame, how did you determine the spots to attach them and did you just drive a lag bolt in or use threaded inserts? (I know that is more than one question. Sorry ) 2.)I see you used two Optima batteries. I am using two Kinetiks and keeping the OEM battery for the car functions. I am actually installing my amps in the spare tire well and am going to have the batteries on either side, behind the false wall. My question (finally!) is what did you do as far as the electrical system, to handle such a large set up? Did you install a beefed up alternator? Do you use an isolator or capacitors? Did you run another 0 gauge cable from the alternator or did you splice the factory 0 gauge? 3.) Lastly, for now any way, because I am sure I will have more questions as this build progresses, where did you ground the various components? I know there are quite a few large bolts throughout the interior and I am leaning towards utilizing some of those, but I have had issues in the past where they were not always solidly connected under the surface of the sheet metal, and tracking down a ground fault in a complicated, completed install, is a nightmare. Thanks again for letting me ramble and pick your brain. I have included a few pics of my black LT and where I am in my install. For now, I am keeping the factory Mylink head unit and using a signal processor with an LOC to integrate my amps. I have already installed my Infinity Kappa component speakers in the doors, sound proofed every inch I could (including the floorpan and the ceiling/top), and have started on the wiring. You have given me a lofty ideal to aspire to, so I had better get back to work! |
|
|
|
|
12-22-2013, 09:55 PM
|
#14 | ||||
|
Drives: 2010 Camaro 2LT RS Join Date: Sep 2010
Location: South Miami, FL
Posts: 388
|
Quote:
I know what you're saying about originally wanting to keep things simple. I think I say that every time and somehow end up doing something more elaborate every time, it never fails haha! Quote:
Quote:
Quote:
As for your question about the suede, I didn't cover any original plastic panels. There is A LOT of suede in the car but everything was originally fabric (like the headliner), custom built pieces (such as the portion of the ports inside the cabin of the car) or wood. If you have any other questions, don't hesitate to ask. I'd love to see pictures as your build processes! Did you start a build thread?
__________________
My build thread: http://www.camaro5.com/forums/showthread.php?t=299684 |
||||
|
|
|
|
|
|
|
 |
|
|


