You are browsing camaro5 

|
 01-20-2014, 03:30 PM
|
#1 |
|
Moderator

Drives: 2018 Harley-Davidson Street Bob Join Date: Nov 2007
Location: San Diego
Posts: 14,769
 |
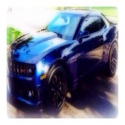
Demon SS
PARTS I AM CURRENTLY SEEKING:
This will be a long-term build project. The idea is to build a Camaro that will endure incredible amounts of time, and be all the good things that Camaros arefast, fun, and badass. This post will be updated with every mod that takes place in the order I received or completed them, whichever makes more sense. If you're interested in your products being part of my build, send me a PM. This will be an ambitious project, and you should be a part of it! As a preface, I will note several of my previous plans. Every time I have a crazy, new build idea, I've posted it here on Camaro5. Here are my previous Camaro ideas:
__________________
RDP Motorsport//GEN5DIY//Cultrag Performance//JPSS//Rodgets Chevrolet//
Operation Demon//Buy at Invoice//RACECARWEAR RESPECT ALL CARS. LOVE YOUR OWN. warn 145:159 ban |

|

|
|
02-15-2014, 01:58 PM
|
#2 |
|
Moderator
Drives: 2018 Harley-Davidson Street Bob Join Date: Nov 2007
Location: San Diego
Posts: 14,769
|
Thanks to My Vendors!
I want to thank the outstanding companies who have been instrumental in this build. Your logos have been added to my signature! If you want to be part of my build, let me know what we can build together! Gen5DIY I got some help from Ofer at Gen5DIY. That guy is knowledgeable and 100% interested in the satisfaction of his customers. Here's what I got from him:
Here's that red dome light. All you need is a flathead screwdriver. If your install has a flicker, make sure the connection is good. Really push that bulb up there.     DIY Red Stitching I applied fabric dye to my stitching. The result looks great!  Florida is very bright, so the ink came out a little magenta in the photo. I assure you that I did not dye my stitching pink. UPDATE: I decided the stitching was a bit magenta. I decided to use a darker shade and a marker instead of ink.  DIY Plastidip Blackout Panel Originally, I planned to paint it. I still want it painted, but I lack the skill and equipment to do it properly. If you are local and can help, I'd appreciate it! ******** ******** hooked me up with a T-harness for my Boston Acoustics system, and a driver-side box for my 10" sub. The install was easy, but unfortunately my Xplod amp exploded due to being a crappy amp. I upgraded to Alpine, and here are my results. The equipment was packaged very carefully.   To use the harness, take off the back piece of plastic on your trunk. The knobs screw off by hand. Peel back the fabric on the left side. The Boston Acoustics amp is right there.   Now you have RCA outs. The battery is also in the trunk. No splicing is required, thanks to ********. 
__________________
RDP Motorsport//GEN5DIY//Cultrag Performance//JPSS//Rodgets Chevrolet//
Operation Demon//Buy at Invoice//RACECARWEAR RESPECT ALL CARS. LOVE YOUR OWN. warn 145:159 ban |
|
|
|
|
02-15-2014, 03:27 PM
|
#3 |
|
Boosted Moderator

Drives: Bone Stock LS3 Join Date: Sep 2009
Location: Marion Tx
Posts: 15,473
 |
Subscribing to this on... Go Blur...
__________________
If the car feels like it is on rails, you are probably driving too slow. -Ross Bentley
Horsepower is how fast you hit the wall. Torque is how far you take the wall with you. If everything seems under control, you're just not going fast enough. Mario Andretti If you can turn, you ain't going fast enough... |
|
|
|
|
03-10-2014, 03:33 PM
|
#4 |
|
Moderator
Drives: 2018 Harley-Davidson Street Bob Join Date: Nov 2007
Location: San Diego
Posts: 14,769
|
Today, I installed a speaker grille on my sub. This should help protect it from stuff in the trunk. I picked this up from Amazon. It was cheap and very easy to install. I recommend using tape to hold it in place while you drill.
 Tomorrow, I have an appointment to complete the functional mail slot install. This part came from Gen5DIY.
__________________
RDP Motorsport//GEN5DIY//Cultrag Performance//JPSS//Rodgets Chevrolet//
Operation Demon//Buy at Invoice//RACECARWEAR RESPECT ALL CARS. LOVE YOUR OWN. warn 145:159 ban |
|
|
|
|
04-10-2014, 09:33 AM
|
#5 |
|
Moderator
Drives: 2018 Harley-Davidson Street Bob Join Date: Nov 2007
Location: San Diego
Posts: 14,769
|
I wanted to provide an update. I finally plugged in the GoPro so you can get a proper exhaust clip.
For more insights on these parts not posted on Camaro5, please visit General Overdrive. Leave feedback when you visit!
__________________
RDP Motorsport//GEN5DIY//Cultrag Performance//JPSS//Rodgets Chevrolet//
Operation Demon//Buy at Invoice//RACECARWEAR RESPECT ALL CARS. LOVE YOUR OWN. warn 145:159 ban |
|
|
|
|
04-10-2014, 09:50 AM
|
#6 |
|
Moderator
Drives: 2018 Harley-Davidson Street Bob Join Date: Nov 2007
Location: San Diego
Posts: 14,769
|
I've decided to split up the first post. I will be moving some posts further down to keep this thread organized. Stand by for updates.
__________________
RDP Motorsport//GEN5DIY//Cultrag Performance//JPSS//Rodgets Chevrolet//
Operation Demon//Buy at Invoice//RACECARWEAR RESPECT ALL CARS. LOVE YOUR OWN. warn 145:159 ban |
|
|
|
|
04-10-2014, 09:50 AM
|
#7 |
|
Moderator
Drives: 2018 Harley-Davidson Street Bob Join Date: Nov 2007
Location: San Diego
Posts: 14,769
|
SLP 1 3/4" ceramic-coated headers with high-flow catalytic converters
These were provided by Carl at Pete Moore Chevrolet's parts counter. He's a local car enthusiast and the only SLP Master Dealer for some distance. Disappointingly, he's a Mustang guy, but that doesn't stop him from selling some of the highest quality parts for Camaros. SLP headers provide more power lower in the power band than the 1 7/8" headers available at most shops.  I did this install with only the moral support of Mrs. Blur. The auto hobby shop on base provided drive-on lifts and unlimited tools for $5/hour.
__________________
RDP Motorsport//GEN5DIY//Cultrag Performance//JPSS//Rodgets Chevrolet//
Operation Demon//Buy at Invoice//RACECARWEAR RESPECT ALL CARS. LOVE YOUR OWN. warn 145:159 ban |
|
|
|
|
04-10-2014, 09:50 AM
|
#8 |
|
Moderator
Drives: 2018 Harley-Davidson Street Bob Join Date: Nov 2007
Location: San Diego
Posts: 14,769
|
Cold Air Inductions black 4" intake
Cold Air Inductions produces the best intake I've ever seen. Not only is the fit perfect, but the pipe leads to an insulated compartment. By insulating the compartment, CAI has effectively separated the heat of the engine from the filter. Heat transfer takes time, and it takes a lot more time with more stuff in the way of transferring that heat. Many intake brands have adopted this compartmentalized style, but they fail to reduce temperatures and produce as much power as CAI brand. This product came from RDP Motorsports. For those concerned about flexibility, this intake has a generously flexible rubber fitting where the intake filter meets the 4" pipe. The pipe is able to move in any direction without resistance. Additionally, the engine side of the pipe lines up nicely with the throttle body. Instead of going inside or around the unit, they sit side by side. The large rubber coupling wraps around this point and has two screws to tighten it into place. This ensures a snug fit with flexibility in the event of significant engine motion, reducing wear on the throttle body and the intake alike.  This installation took only 45 minutes at the Navy base auto hobby shop. A good chunk of that time just me moving slowly, so you can do it faster if you've done this previously. CAI provided thorough instructions, although I doubt you'll need them. Unlike some vehicles, the Camaro intake is easy to access, and it is not necessary to take apart your front end to get this installed. You do not need to remove the washer bottle, but it is a tight fit with the bottle in place.
__________________
RDP Motorsport//GEN5DIY//Cultrag Performance//JPSS//Rodgets Chevrolet//
Operation Demon//Buy at Invoice//RACECARWEAR RESPECT ALL CARS. LOVE YOUR OWN. warn 145:159 ban |
|
|
|
|
04-19-2014, 01:15 PM
|
#9 |
|
J.T.
Drives: Camaro 2SS w/RS package, Imp. Blue Join Date: Jan 2012
Location: Sarasota, FL
Posts: 441
|
Subscribed.
__________________
2011 Camaro 2SS/RS L99
Mods done: 1LE replica wheels, black tail light bezels, LED driving lights (spliced to running lights), VMax CNC ported TB, No tune Vararam, and Rx catch can Mods planned: heritage grille, 1LE splitter, led signals, tune, and possibly LT Headers Love this car! |
|
|
|
|
02-22-2015, 05:53 PM
|
#10 |
|
Moderator
Drives: 2018 Harley-Davidson Street Bob Join Date: Nov 2007
Location: San Diego
Posts: 14,769
|
I haven't been in this thread for a while, so I owe some updates on this build. I've promised pics and vids of some of the parts, so hold tight while I get those done. I apologize to dynosteve for taking so long! The following work took place at the Corry Station Auto Hobby Shop. I performed the work. If you're in the military and not taking advantage of the MWR facilities at your disposal, you have no idea how much you can save on labor and learn about your car.
Dynatech Supermaxx 2.5" catback exhaust with X-pipe This is a ferocious exhaust system. I had previously installed a Pypes axleback system—this unit is for sale, by the way—that sounded great but didn't have the same intensity as a catback. I chose to upgrade to this system based primarily on price and other good reviews. While I have a lot of admiration and respect for the high-dollar systems out there, I believe that a pipe is still a pipe, despite the engineering concepts that go into its design, whether it's manufactured by Dynatech or someone that wants to charge $41k for this Bugatti system.  Below, you'll see the only obstacle here. The kit did come with spacers for the stock driveshaft tunnel brace, but the brace won't maintain its stock geometry with spacers. For that reason, I'm open to any used or particularly inexpensive options for tunnel braces that will clear the resonated center of this exhaust system. Even with the spacers that came with the exhaust, I've heard some minor contact.  Here's an undershot of my pretty, new exhaust. It has no mufflers, but you can see a resonated pair of pipes where the OEM resonator used to be. The volume of these resonators is much smaller than the old system, and I wish I had done a weight comparison now that I'm writing this because the weight difference is substantial. Installing this exhaust was so easy that I left the instructions at home. It directly bolted into the SLP high-flow cats at the front of the kit. Dynatch provided good exhaust clips, and the kit hangs from OEM hangers. Because the exhaust has multiple bolt-on components, I easily adjusted the pipes so that the tips came out the diffuser where I wanted.  You can't have an exhaust in your build thread without an exhaust clip. A shipmate filmed this for me. https://vimeo.com/120319804
__________________
RDP Motorsport//GEN5DIY//Cultrag Performance//JPSS//Rodgets Chevrolet//
Operation Demon//Buy at Invoice//RACECARWEAR RESPECT ALL CARS. LOVE YOUR OWN. warn 145:159 ban |
|
|
|
|
02-22-2015, 05:57 PM
|
#11 |

Drives: Camaro Justice Join Date: Jun 2007
Location: Virginia
Posts: 20,174
|
  
|
|
|
|
|
02-22-2015, 06:52 PM
|
#12 |
|
Jan

Drives: 2010 Camaro 1LT Red Jewel tintcoat Join Date: May 2010
Location: Springfield, TN
Posts: 16,225
|
__________________
 |
|
|
|
|
02-24-2015, 11:54 PM
|
#13 |
 
Drives: 2010 camaro SS Join Date: Jun 2014
Location: South Carolina
Posts: 186
|
What process did you use to dye your stitches on your seats?
__________________
2010 CGM 2SS
Blackwing SLP CAI TSP 2" LT headers 1.25 pfadt lowering springs 18x10 Forgestar CF5 all four ZL1 Front conversion Tune  |
|
|
|
|
02-25-2015, 03:47 AM
|
#14 |
 
Drives: 2015 Camaro Coupe Join Date: Feb 2015
Location: New Orleans, La
Posts: 10
|
Very nice job, Blur! Your work is inspiring me to start a little project myself.
|
|
|
|
|
|
|
|
 |
| Tags |
| badassery, blur ss, blur's camaro, the_blur |
| Thread Tools | |
|
|


