You are browsing camaro6 
 06-10-2017, 02:01 PM
|
#1 |
|
Big Samoan ina little car

Drives: 2016 camaro Join Date: May 2014
Location: Tofiga Island
Posts: 1,872
|
HOW TO: SS Hood vent retrofit into LT Hood
So AlphaCamaro7 came up, and this crazy Samoan had an idea. Lets cut hood vents into our cars. We both had the idea for a few months now and there's a post in cosmetic section about it but the guy never got around to it.
No worries, I'd figure this to be easy as I snuck a GT500 hood vent into my 2007 charger hood. blasphemy? I don't care... FUNCTIONAL. that's my goal, get the heat out!  So to start on this, you can make a template many ways. I basically started with the original outline of the actual vent. easy to trace, and then measure from the edge of the vent to how far in to the clips. the front half of the vent where the water drains, its EVEN all the way around. But the bottom half of the outline will have 3 sections where the clip is actually a bit LESS of an indentation.  By the time today came around, I stopped at FedEx/Kinkos to use the cutting machine, cutting board and duplicated the original template. there's a small trick I learned after the only mishap on mine. and its due to cheap tools, which I'll gladly point out shortly. I made sure to work on mine first, so no F-ups would be done to anyone else's car. being a car guy, I can live with scratching, denting, my own stuff. Not cool with doing it to someone else's car, especially when it would be learning on the first car, then perfecting by the second car. so here's the final version of the Hood Template.  now to make this even easier, see the parts where the TAB goes... instead of doing the cutting for the tabs, first, make the inner perimeter all the way around the same distance, like at the top. Then after you make the outline of where to cut, where the tabs go, just dremel sand away an extra mm or so. this will make it far easier than going in and out, in and out where the tabs go. Now once you have a template, keep the inner and outer template together. the inner line where you cut, don't cut 360 degrees around. leave just the ends (curved sections) attached. this will keep everything located. you can score or trace the inner line of the template by eye 1st step, once you got everything is removing the under hood liner. the areas to cut are already there. and unlike the 5th gen, there's NO inner hood structure to cut through as well. just an open single panel. use a trim tool, or panel fastener remover. 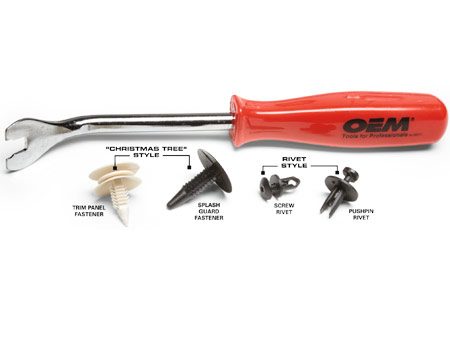 once that's out, be careful removing it, it CAN and WILL TEAR if forceful.....place your template in that area, and tape it there. afterwards, I drilled 3 holes spaced out. it'll make sense shortly.    So now that you have the 3 holes drilled as you can see above on the underside, there will just be 3 holes on the top side  flip the template over 180 degrees and now you can transfer the same template from underneath to on top. use pegs, screws, dremel bit to put in the template holes and align it on top. tape the edges if need be to make it easier to stay put. I had a spare under bumper screw from when I added the splitter, a self tapping screw, and a dremel bit of 1/8 diameter that I put in the 3 holes.    So after all is aligned, just start cutting on the line, all the way around... eventually once all is cut, you'll "have a hole in your hood"  But then, you can plug something in the hole.   Basically you repeat the same for the opposite side. also you can cut the peg tabs off the ends. its there for alignment, but its extra holes you gotta drill in the hood. As for the under hood liner.... easy, no brainer. its already scored on where to cut. and to show how easy it is, I have a key knife. looks like a key, in the middle there's a small utility knife. that's what I used to cut out the felt liner thingy for fire suppression and noise reduction.    Now that you got it cut, put the hood liner back in, there's 3 tabs near the bottom to put in the back of the hood. helps with alignment, so don't bend em. and just lift the hood back in place and reinstall the 7-9 hood fasteners.    Now that I had the first car, MINE done, out the way and learned from mistakes....aka don't use cheap harbor freight diamond disc cutting tools on aluminum metal.  even though it said it could be used, they didn't cut nearly as good as I would expect "diamond" to cut. so I rang up ETMX183 from Camaro5 forums, and he gave me the tip to use the dremel carbon based cutting discs. not the really thin cheaper ones that are dime size, but these are about the size of a silver dollar. this is the exact pack I bought... about 23$ at ace hardware. 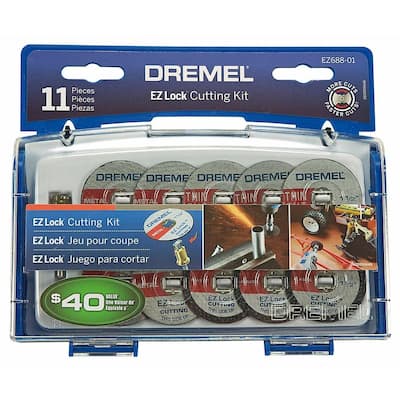 After the mishap of the harbor freight gimmick, heating up, and the shaft bent to an L shape and thumped my hood, the dremel did the job 10 times quicker, cleaner, and smoother. I spent about 30 min to cut 5 inches with the harbor freight ones, and I spent about 10-15 min each for the rest of the 3 hole openings I had to cut (right side of my hood, and both for AlphaCamaro7's hood) So lesson learned. His hood though, quick, and NO CASUALTIES    Once I cut Alpha's hood, we stopped by the car wash, and cleaned up the cars. if anyone knows me, they know I wash my car less than I drive it. my car exterior is always dirty, but I use my cars. not a toy, etc. sees track time, I expect the chips, and etc. so I know if I worry about dirt and chips like some do, as much as I use my car, i'll never be happy. and if I'm not happy, I lose interest in whatever that may be. But I got my monthly wash done due to the abrasive dust needing to be cleaned off and all.    Overall, this was pretty easy to do. The one casualty I had was due to a cheap part failure, and to me, I barely notice it. i'llget the touch up paint in a few days and try it. not gonna bother me one bit though either way. my hood NOW LETS OUT HOT AIR   in the words of which I stole from Samuel L Jackson......SH*TCHYEAA!!! That was my main goal to be honest. I got a quote from a few places for an SS hood, which was 800$ unpainted, but shipped. paint is another 3-400$ locally for hoods, and the vents were 100$ shipped. Thank you Camar05 for the sale on the vents!  But I'd still be at about 1300$ for a new SS hood, and no guarantee on color matching with the new paint, not that I care. (Once again, I'm not particular unless I ask for HBM and you give me Blue Ray Metallic.) But I'd still be at about 1300$ for a new SS hood, and no guarantee on color matching with the new paint, not that I care. (Once again, I'm not particular unless I ask for HBM and you give me Blue Ray Metallic.)There's also a HBM SS hood on eBay. 499$ but local pickup about 2.4 hours from here, so I'd have to find a way to take this hood off, drive up without a hood and get that one...legally through 3 states. too much of a risk for me. So the hood vents (100), dremel discs (23) and the cheap cutting discs (12) and a converter I needed (16)...roughly 150$
__________________
 Don't sit around and watch everyone else live YOUR dreams...DO SUMPT'N Don't sit around and watch everyone else live YOUR dreams...DO SUMPT'NWhen I see posts asking "whats the best intake, exhaust, etc" .... the answer to that is like a grandfather telling his grandkids "if you put salt on a birds tail, it'll let you catch it" #ThinkAboutIt "Winning Tip: Don't take my (or anyone else's) word for it. GO TEST IT!" - Dennis Grant Last edited by PolynesianPowerhouse; 06-12-2017 at 10:04 AM. |

|

|
|
06-10-2017, 02:45 PM
|
#2 |
 Drives: Nightfall, 2SS, A8, MRC, NPP,RE-71R Join Date: Jul 2016
Location: United States
Posts: 250
|
WOW .. You are a brave man. It looks great good job. I'd be afraid to try that.
Last edited by NCSD; 06-10-2017 at 04:17 PM. |
|
|
|
|
06-10-2017, 03:51 PM
|
#3 |
 Drives: 2016 Black 1SS Join Date: Aug 2016
Location: New Jersey
Posts: 53
|
Looks good
|
|
|
|
|
06-10-2017, 04:29 PM
|
#4 |
  
Drives: 2020 Camaro 2SS Join Date: Aug 2009
Location: Sherman,Texas
Posts: 844
|
Nice job. Looking forward to the write up. Looks great.
|
|
|
|
|
06-11-2017, 08:27 AM
|
#5 |
|
Drives: 2020 Camaro 2SS Join Date: Aug 2009
Location: Sherman,Texas
Posts: 844
|
So i'm guessing you just used some 3M tape to hold them down?
|
|
|
|
|
06-11-2017, 08:44 AM
|
#6 | |||
|
Big Samoan ina little car
Drives: 2016 camaro Join Date: May 2014
Location: Tofiga Island
Posts: 1,872
|
Quote:
 Quote:
each vent would use 2 strips. one coming from the left side of each vent, and one coming from the right side. the same way it is on the stock SS hood. so that would be 4 strips total. I may put some foam tape under there, like a one sided tape. we talked about the 3m tape though. apparently some have said that's how it comes from the factory. so I haven't ruled that out yet. 
__________________
Don't sit around and watch everyone else live YOUR dreams...DO SUMPT'NWhen I see posts asking "whats the best intake, exhaust, etc" .... the answer to that is like a grandfather telling his grandkids "if you put salt on a birds tail, it'll let you catch it" #ThinkAboutIt "Winning Tip: Don't take my (or anyone else's) word for it. GO TEST IT!" - Dennis Grant Last edited by PolynesianPowerhouse; 06-11-2017 at 09:00 AM. |
|||
|
|
|
|
06-11-2017, 08:58 AM
|
#7 | |
|
Drives: 2020 Camaro 2SS Join Date: Aug 2009
Location: Sherman,Texas
Posts: 844
|
Quote:
|
|
|
|
|
|
06-11-2017, 09:31 AM
|
#8 |
|
Retired from Car mfrs....

Drives: 2LT RS/HR-V Join Date: May 2013
Location: /Fort Lauderdale
Posts: 10,048
|
That looks real nice........I know the feeling, you kinda hold you breath when cutting the hood:
 
|
|
|
|
|
06-11-2017, 04:43 PM
|
#9 |
|
Account Suspended
Drives: 2016 NFG 2SS Join Date: May 2017
Location: Around
Posts: 113
|
Takes some serious balls to do that shit to your car, especially on the hood. ���� Looks awesome.
|
|
|
|
|
06-12-2017, 10:04 AM
|
#10 | |||
|
Big Samoan ina little car
Drives: 2016 camaro Join Date: May 2014
Location: Tofiga Island
Posts: 1,872
|
Quote:
Next goal is to ooen up the drip tray a bit You shouldnt have any probs though. From doing it on another car itll all come back Quote:
Quote:
__________________
Don't sit around and watch everyone else live YOUR dreams...DO SUMPT'NWhen I see posts asking "whats the best intake, exhaust, etc" .... the answer to that is like a grandfather telling his grandkids "if you put salt on a birds tail, it'll let you catch it" #ThinkAboutIt "Winning Tip: Don't take my (or anyone else's) word for it. GO TEST IT!" - Dennis Grant |
|||
|
|
|
|
06-12-2017, 10:07 AM
|
#11 |
|
Retired from Car mfrs....
Drives: 2LT RS/HR-V Join Date: May 2013
Location: /Fort Lauderdale
Posts: 10,048
|
I have cut two hoods now and if you arm yourself with one fresh bimetallic blade per opening, the hood really does cut almost like butter.....
|
|
|
|
|
06-12-2017, 10:23 AM
|
#12 |
|
Blessed ❤️

Drives: 2017 1LT RS I4 Join Date: Sep 2016
Location: Indiana
Posts: 2,577
|
Very nice job!!!!
__________________
2017 1LT RS I4 A8 BLACK ON BLACK
Kindness and compassion #OthersFirst |
|
|
|
|
06-15-2017, 08:40 AM
|
#13 |
|
Probably doesn't like you

Drives: 2022 WCT ZL1 M6 Join Date: Jun 2015
Location: Boston-ish
Posts: 1,252
|
1) This is pretty awesome in terms of DIY!
2) Where the hell do you find pants to contain your giant brass balls?!  Nice work man, really!
__________________
I hope the 6th gen Camaro has a melodious horn trumpet. I'll tootel it at the ladies, yelling out "Hi hi." - RenegadeXR
كافر ΜΟΛΩΝ ΛΑΒΕ железобетонное очко Quod gratis asseritur, gratis negatur. There is an unequal amount of good and bad in most things, the trick is to work out the ratio and act accordingly. |
|
|
|
|
06-27-2017, 10:02 PM
|
#14 |
 
Drives: 2020 2SS Join Date: Oct 2016
Location: Greenville, SC
Posts: 36
|
I'm about to do this to my LT. Any tips?
|
|
|
|
|
|
|
|
|
Post Reply
|
|
|


