You are browsing camaro6 
|
||
| View our official forum sponsors list. |
|
Post Reply
|
|
|
Thread Tools |
 10-17-2019, 02:11 PM
|
#1 |
 Drives: 2016 SS 6 Spd Join Date: Jul 2009
Location: Ohio - www.rpidesigns.com
Posts: 3,053
|
Camaro Aluminum Gas Brake and Dead Pedal Covers
2016-2019 Camaro Aluminum Gas Brake and Dead Pedal Covers Starting at $79.00
https://www.rpidesigns.com/shop/item...-pedal-covers/ A great way to give you Camaro a more aggressive race car feel is with a set of these 2016-2019 Camaro Aluminum Gas Brake and Dead Pedal Covers. These racing pedals, designed and manufactured exclusively for the 2016-2019 Camaro, are made from CNC Machined aircraft quality billet aluminum and machined for the ultimate style and finish. Available in multiple different machined finishes these pedals equate to the ultimate in both style and function. Machined for ultimate grip, and designed for a premium race-car like shifting experience, these pedal sets are designed to improve the racing drivability of your Camaro while also giving it a fantastic interior finish and appearance. Available for both Automatic and Manual Transmission Camaros. Also available with the Deluxe option that includes a dead pedal/footrest made of matching billet aluminum. These pedals are available in several finishes Shiny Smooth Frosted Smooth Shiny Anti-Slip Frosted Anti-Slip 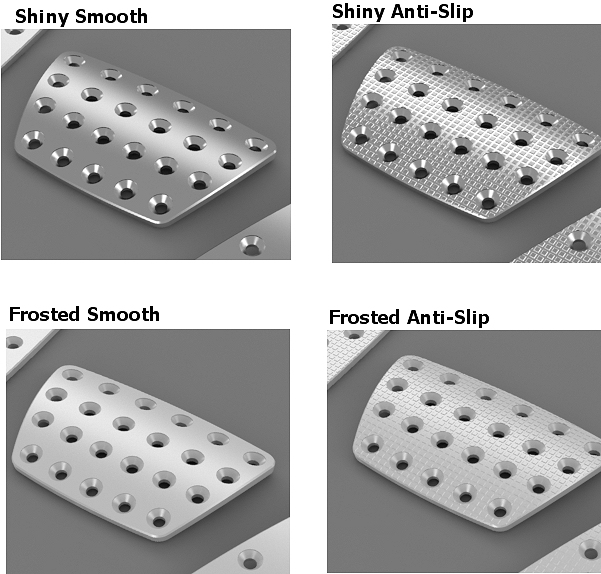 The frosted pedals have a fine sandpaper-like finish to them to keep your shoes from slipping. The anti-Slip pedals have a grid or waffle finish machined into them for the ultimate in grip. We do not recommend the shinny pedals due to them becoming very slippery when wet which could cause your shoes to slip off the pedals. Install Information: When installing these pedals you do have to drill holes into your factory pedals. Once installed, these pedals are a part of your car with no chance of coming off. All hardware is stainless steel and provided. The instructions below are applicable to most cars. However, some cars will have a slightly different installation procedure. These differences should be noted on the pedal page for the vehicle. The typical installation time is 30 minutes to 1 hour. Your results may vary. If you ever decide to remove your SRP pedals, the factory rubber covers can be put back on the brake and clutch to cover the holes. The holes you drill into the gas pedal and footrest are really small enough to not be noticed unless looked at closely. Tools required: Drill - 3/16" drill bit Phillips head screwdriver - 1/16" drill bit 9mm wrench - Center punch Warning: Make sure you wear safety glasses during this installation. 1. Remove any factory rubber or factory metal/plastic sport covers or any other aftermarket pedal covers from the brake, clutch and/or gas pedal when and if applicable. Most factory rubber covers will pull right off. Some factory metal/plastic sport pedal covers have rivets which must be drilled out (do not drill thru pedal yet) with a 1/8 drill bit to remove the cover. 2. Put masking tape on the brake and clutch and mark the mounting holes using the aluminum pedals as a template. Make note of where the rod is welded to the backside of the pedal pad in relationship to the holes in the billet cover. Align the billet covers in such a way that after you drill through the pedals there will be room to install and hold the nuts on the backside of the pedals. 3. Use your center punch and hammer and punch your mounting holes marked on the brake and clutch. Use the 1/16 drill bit to drill pilot holes, followed by the 3/16 bit. Mount the brake and clutch using machine screws and locknuts. 4. Put masking tape and the gas pedal and footrest. Using the aluminum cover, mark your mounting holes. Remove the aluminum cover. Drill pilot holes with 1/16 drill bit. Tap the holes with the pointy self-tapping screws. Remove screws, put pedal into position, and attach using self-tapping screws. ·Check that all pedals are securely attached using all mounting locations. ·Make sure all pedals have adequate clearance between adjacent pedals and floor covering. ·After driving, recheck all pedals to make sure they are secure. Because of the custom nature of these pedals, production time can sometimes run 3-4 weeks and up. Please allow this lead time for shipping 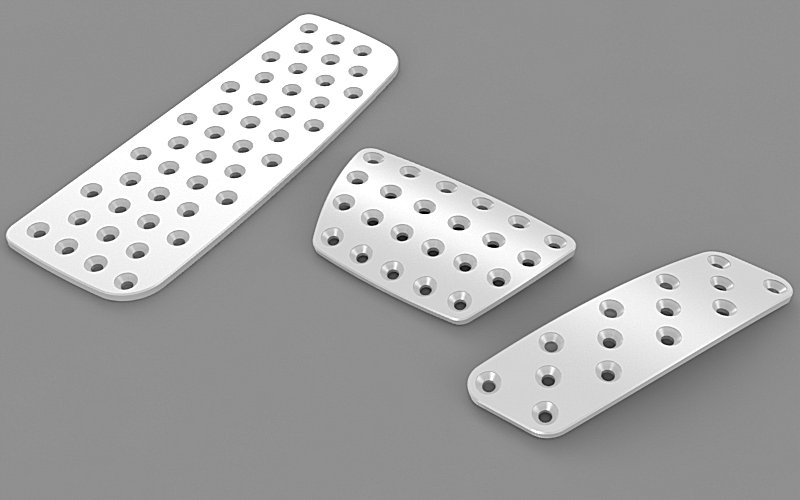 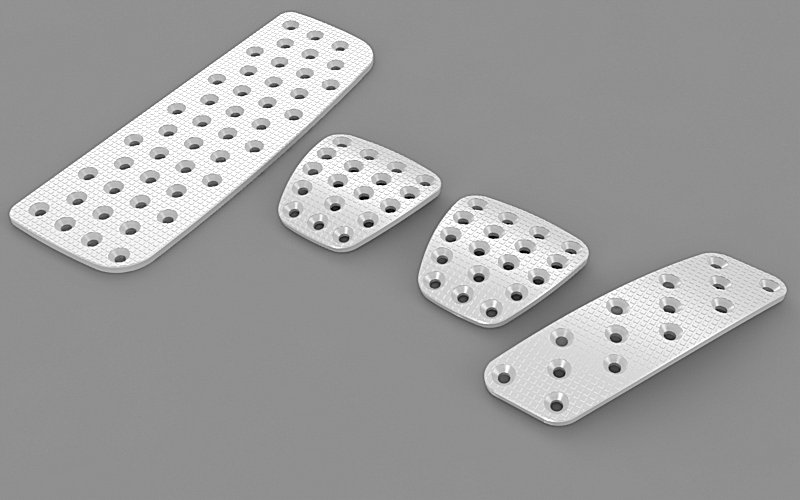 https://www.rpidesigns.com/shop/item...-pedal-covers/ |

|

|
|
Post Reply
|
| Thread Tools | |
|
|


