You are browsing camaro6 
 09-07-2022, 01:19 AM
|
#71 |
 Drives: 2020 SS 1LE Join Date: Aug 2020
Location: NorCal
Posts: 661
|
Adding photos and a few learnings along the way…
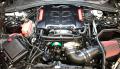
1) You’ll need to disconnect the passenger side O2 sensor. It’s a bit tricky. First unlock the white tab. Then insert a pic or flat head screwdriver to separate the internal mating point. You can then pull it apart. 2) If you choose to hang your subframe, this longest available metric bolt I could find locally in M12 1.75 size was 6.5 inches long ~ 150mm. That gave plenty of working space. 3) Tin foil is a cheap and effective way to protect sensitive parts. 4) 1/2” (or was it 3/4”) grade 8 bolt, spacer and nuts worked great for pressing in bushings. 5” length is perfect. “Not what she said” 5) Mark your bushings in advance. You don’t want to second guess whether you’re installing them in the right spot. Once they go in, they’re not coming out! 6) Purchase a short 7/8” wood dowel to use for aligning the subframe with the chassis. You’ll do this before fully tightening the subframe bolts. The close up pic shows 3 rings. The black is the bottom and top portion of the subframe. The deeper silver ring is the chassis hole. This is what a perfectly aligned subframe looks like. (You’ll still need an alignment of course) 7) Lastly, at the start and finish of this job you’ll remove and reinstall the exhaust. Be sure to pry open this slip joint clamp by pulling down the lower section. The top is welded and won’t budge. If you do not open it enough, it makes reassembly a pain in the ass! I think that’s it! Everything else was well covered previously. I just wanted to share areas that slowed me down. Now it’s time to get on the track and see if this made any difference! Lol. *Apologies for some upside down pics. Apparently this happens when using an iPad to upload photos. Last edited by Dabjbr; 09-07-2022 at 02:02 AM. |

|

|
|
09-07-2022, 08:50 PM
|
#72 |
|
Petro-sexual
|
Many KUDOS for probably the best cradle bushing thread I can remember.
I'd also add ( and I could've missed this elsewhere), that it might be necessary to unclip the cooler lines from the chassis. It didn't take to long nor was it difficult. It made maneuvering the rear cradle a lot easier, and it was just another mess I didn't have to clean up. Some of the plugs were a little difficult to get at, but I just took my time. Leaving the driveshaft attached kinda' helped with getting the cradle back in, too. I totally forgot about the alignment dowls, but got luck enough by eye-balling the bolt-to-bushing alignment that my thrust angle as as close to perfect as could be. I was fortunate. The driveshaft helped a little, too.
__________________
 '20 ZL1 Black "Fury" A10, PDR, Exposed CF Extractor Magnuson Magnum DI TVS2650R // RFBG // Soler 103 // TooHighPSI Port Injection // THPSI Billet Lid // FF // Katech Drop-In // PLM Heat Exchanger // ZLE Cradle bushings // BMR Chassis-Suspension Stuff // aFe Bars // Diode Dynamics LEDs // ACS Composites Guards // CF Dash // Aeroforce // tint // other stuffs |
|
|
|
|
09-07-2022, 10:43 PM
|
#73 | |
|
Drives: 2020 SS 1LE Join Date: Aug 2020
Location: NorCal
Posts: 661
|
Quote:
|
|
|
|
|
|
|
|
|
|
Post Reply
|
|
|


