You are browsing camaro6 
 10-20-2022, 03:29 PM
|
#1023 | |
   
Drives: 22 1SS 1LE Summit White Join Date: Sep 2016
Location: Milwaukee WI
Posts: 1,144
|
Quote:

__________________
#53 F Street
2022 Sponsor autocrossdigits.com Autocrossing Videos https://www.youtube.com/channel/UCm-...3tiMt0KOg_2Aag Instagram: apexit_53 2022 Rapid Blue 1SS 1LE 2019 D Street national champion (2019 civic Type R) |
|

|

|
|
11-01-2022, 11:48 PM
|
#1024 | ||
Drives: 2017 Blue Camaro 1SS 1LE with PDR Join Date: Sep 2018
Location: Houston, TX
Posts: 962
|
Quote:
Quote:
I agree that it was a pain. The tools I used were: 5/32" socket (correct specialized star socket would probably seat better but 5/32" socket worked fine), 10mm deep socket 1/4" drive, 1/4" universal joint (aka swivel), 1/4" ratchet, about 5 extensions, and a trim clip remover tool. I ran out of 1/4" extensions so I used a 1/4" to 3/8" adapter and a long 3/8" extension and 3/8" ratchet instead of only the 1/4" ratchet and extensions for some things. A magnetic pickup tool and spare 5/32" socket are a good idea too as you could easily drop things but thankfully I managed not to. Steps I took: - Take a picture of the markings and numbers on 2 opposite sides of the new module since it looks the same as the old one so you don't confuse them. You could also put a sticker or tape or somehow mark the new module so it is easy to tell them apart at a glance. - Remove 10mm windshield washer filler neck bolt. - Pull windshield washer filler neck to the right and set aside (remove excess fluid first if yours is completely full to avoid making a mess, thankfully mine wasn't). - Remove the engine bay fuse box cover and pull the purple 60A ABS pump fuse (was in position F1 according to diagram on the lid of the engine bay fuse box in my car) using the wider jaws of the white plastic fuse puller in the fuse box. - Release and rotate brake module electrical connector 90 degrees upward (not sure exactly how I managed this but you can push on the circle of plastic that sticks out on the side to help rotate it once it is released) and tuck it out of the way. - Remove 3 plastic cowl clips with a trim tool or thin metal object like a flathead screwdriver and place something under the corner of the cowl so it is lifted up (a clothespin worked for me) for an extra fraction of an inch of clearance that you need to reach the back nut and so the corner doesn't constantly scrape up your arm. One of these clips is visible in the attached picture taken before I removed it. - Loosen the 10mm ground bolt and tuck the ground cable out of the way so there is enough clearance to get your hand in there. The bolt has a retainer that keeps it attached to the cable. - Grab the black plastic clip that holds the wiring harness onto one of the studs and pull up on it, then tuck it out of the way. - Loosen the 3x 10m nuts (requires 10mm deep socket) holding the ABS pump bracket onto the car to near the top of the studs. I attached a picture of the extensions and universal joint that I used for the hardest to reach one in the back. There is no need to take them all of the way off because the brake lines prevent you from lifting it enough to touch the nuts at the top of the studs. It might be faster to use your fingers for loosening these after you break them loose with a ratchet initially if you can fit your hand far enough in there. - Loosen the 4x bolts holding the brake module onto the ABS pump with the 5/32" socket and note the minimal amount of force required to try to match it when installing the new module later. They can be removed and reinstalled with only the 1/4" ratchet and 5/32" socket with no extensions which I didn't realize at first. If you use extensions, the socket will probably jump off of the bolt but you can turn just the 5/32" socket by hand to speed it up once you loosen them initially (or maybe use a thumb ratchet but I don't have one so not sure) but be careful not to drop anything. - ***Key point: lift up as much as possible on the ABS pump/bracket, then push down on the ABS pump cylinder with your other hand so you have just enough room to wiggle the old module off and do the same thing to put the new module on. On my first attempt to install the new module, I didn't do this and bent one of the two metal prongs that stick out the farthest so they were touching but I was able to straighten it back out with a clothes pin since I didn't try to force it in deeper. Once the longest part with 2 metal prongs is in the hole, then you can align the remaining holes and gently wiggle/slide it into place. The lifting and pushing gives just enough clearance to get the corner of the module past the shock tower without bending anything on the module. - Reinstall the 4x bolts with the 5/32" socket and 1/4" ratchet to match how tight they were originally. I used an X pattern to tighten them. Make sure not to over-tighten...I imagine you could crack the plastic around the bolts which could let moisture get into the module and cause problems. - Tighten the 3x 10mm ABS pump bracket nuts. - Connect the electrical connector to the new module and rotate the lock 90 degrees down until it locks (verify it can't be moved back upwards). - Reinstall the 10mm ground cable nut. - Put the black plastic wiring harness clip back onto the stud. - Replace the 3 trim clips after removing the object that was holding the corner of the plastic cowl up. - Reinstall the 60A ABS Pump fuse (position F1 on my car) using the white plastic fuse puller, put the fuse puller back into its designated spot in the fuse box, and replace the fuse box cover making sure it is securely clipped in place. - Reinstall the windshield washer fluid filler neck by hand. - Reinstall the 10mm bolt holding the windshield washer fluid filler neck. - If I missed anything else, reinstall it and make sure there are no leftover tools or fasteners lying around before you shut the hood. - Scrub your hands thoroughly with Fast Orange liquid hand cleaner with pumice (or something similar) and wash them to get all of the dirt off. I don't think it would be a good idea to use gloves for this job since you need a good feel in areas that are hard or impossible to see and gloves would reduce/eliminate that and probably increase the likeliness of dropping something into the engine bay. Sorry if I missed anything; I went from memory since I didn't take notes while I worked. The steps were straightforward but it was a tedious job due to lack of visibility and lack of space to work. If your forearms are large you might have problems getting your hand far enough in there. Mine are not unusually large and it was a very tight fit. My car started right up afterwards on the first try with no lights on the dash and no need to disconnect/reconnect the battery...probably because of the ABS pump fuse pull. Not sure how DaveC113 managed to flex it enough loosening only two of the 10mm nuts. I had to loosen all 3 and it was still very tight. After a short drive, I noticed no issues and still no error/warning lights on the dash. Valet mode with PDR video recording still works and Teen Driver is selectable although I have never tried to set it up. Both of those require the car to be stopped...they are grayed out while you are driving. Maybe that is what you saw that made you think they stopped working? Also where are the rear view mirror camera controls? I did not see them appear in my settings but the backup camera option where you can enable/disable gridlines remains. I will test the new module at Harris Hill tomorrow. I got ice mode once and ended up in the grass the last time I was there due to the bump at the start of the braking zone before turn 7 but I will probably not know for sure that ice mode is improved/eliminated by the new module until I am back at MSR Houston going clockwise where I got ice mode several times on 2 different visits due to bumps while braking before the launch on the inside line (plus while braking on the pit straight before sugar and spice while on SC3Rs). I might be back at MSRH later this month or maybe not until the end of January. Last edited by cdrptrks; 11-02-2022 at 12:07 AM. |
||
|
|
|
|
11-12-2022, 05:13 PM
|
#1025 |
 Drives: 2002 Chevrolet 2ss 1le Join Date: Jun 2022
Location: North carolina
Posts: 13
|
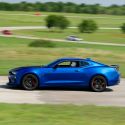
Went out today in my 22 ss 1le and autocrossed for the first time on a 305 square set up. Man the car felt so much better balanced and loved the long wide sweepers.
Step 1 is seat time. I placed well, but I left ALOT of time off the table. Step 2 is I’d like to build the car for cam, what is the general upgrade path to really get this thing set up well for cam? Do dealers still offer the autocross e-lsd tune for the 22s? Last edited by Nc1le; 11-12-2022 at 05:17 PM. Reason: . |
|
|
|
|
11-13-2022, 09:43 AM
|
#1026 | |
   
Drives: 2018 Camaro 1SS 1LE Join Date: Sep 2018
Location: Front Range, CO
Posts: 1,868
|
Quote:
Alignment... ~3.7f/2.5r camber, zero ft toe and ~.1 toe-in rear. Requires Vorshlag camber plates and SPL toe links. Roll Bars... Hotchkis ft/ZLE rear. Both on middle settings so far. GMPP AutoX tune for rear diff GMPP ZLE rear cradle bushings For next year, DSC Sport magride controller + custom stiffer/lower springs. Will post more about the springs when I get a price and lead time, should be soon! IMO, no real need for power upgrades, the car is competitive as is. I'd love to do head/cam/lifters but it costs a fortune on these cars. Hope those AFM lifters don't go out... Alignment and bars work well on track too, maybe a bit much ft camber but not too far off, and I'm getting very even wear out of RT660 AX tires vs stock track alignment.
__________________
 |
|

|
|
|
11-13-2022, 03:43 PM
|
#1027 | |
|
Drives: 2002 Chevrolet 2ss 1le Join Date: Jun 2022
Location: North carolina
Posts: 13
|
Quote:
I do currently have the track alignment with -2.7/2.5 (I wish this was even and will get it done again eventually) front and -2.0 rear. Also any reason for the zle rear vs the pair of Hotchkiss bars? |
|
|
|
|
|
12-23-2022, 09:49 AM
|
#1028 | |

Drives: 2017 Camaro 1SS Join Date: Mar 2019
Location: Florida
Posts: 35
|
Quote:
Either you want to have the best performance on the track, or you want to save tires, but having both is hard to do |
|
|
|
|
|
01-17-2023, 12:14 PM
|
#1029 | |
 Drives: 2017 1SS 1LE Join Date: May 2013
Location: Kennewick, WA
Posts: 92
|
Quote:
|
|
|
|
|
|
01-17-2023, 12:26 PM
|
#1030 | |
|
Drives: 2018 Camaro 1SS 1LE Join Date: Sep 2018
Location: Front Range, CO
Posts: 1,868
|
Quote:
3.7 is way too much for good street tire wear and even too much for track. It's about right for autox, but I may go down to 3.2 as I plan on doing more track days. Will also likely go to 2.2 rear. Your current setup is ok if you drive on a lot of curvy roads, but for highway you'll get uneven wear. ZLE bar is softer. SLE is setup pretty stiff in the rear vs front, it gives it a particular feel which I think they were going for... the rear wants to step out, but for autox this is an issue, the rear end needs a lot more room to avoid hitting cones in slaloms and corner exits. With my current setup the rear stays in line with the front a lot better, I can take tighter lines and it'll put power down better.
__________________
|
|
|
|
|
|
01-17-2023, 12:27 PM
|
#1031 | |
|
Drives: 2018 Camaro 1SS 1LE Join Date: Sep 2018
Location: Front Range, CO
Posts: 1,868
|
Quote:
__________________
|
|
|
|
|
|
01-23-2023, 09:37 AM
|
#1032 | |
Drives: 2019 ZL1 1LE Join Date: Sep 2010
Location: Bastrop, TX
Posts: 438
|
Quote:
|
|
|
|
|
|
01-30-2023, 10:47 AM
|
#1033 | |
|
Drives: 2018 Camaro 1SS 1LE Join Date: Sep 2018
Location: Front Range, CO
Posts: 1,868
|
Quote:
__________________
|
|
|
|
|
|
01-30-2023, 10:48 AM
|
#1034 |
|
Drives: 2018 Camaro 1SS 1LE Join Date: Sep 2018
Location: Front Range, CO
Posts: 1,868
|
So... CAM-C PAX is now .827. I hope you're all at min weight and running full aero!

__________________
|
|
|
|
|
01-30-2023, 10:57 AM
|
#1035 | |
|
Drives: 2019 ZL1 1LE Join Date: Sep 2010
Location: Bastrop, TX
Posts: 438
|
Quote:
|
|
|
|
|
|
02-06-2023, 12:50 PM
|
#1036 |
 
Drives: 17 1LE, 17 BMW 340, 18 F-150 Join Date: Nov 2017
Location: Calgary, AB
Posts: 238
|
Sold my SS 1LE last fall as I was getting a bit bored of it (4 auto-x seasons in the same car) plus I had the chance to sell it for more than I paid for it
 At the time I sold my car I had a deposit on a '23 MT Supra and the odds of me getting one seemed quite good. Sadly, now it's not looking as promising so I'm starting to consider alternatives. What would you fine folks recommend? I'm down to two: At the time I sold my car I had a deposit on a '23 MT Supra and the odds of me getting one seemed quite good. Sadly, now it's not looking as promising so I'm starting to consider alternatives. What would you fine folks recommend? I'm down to two:BMW M2C Arguably not thee car to have in BS, but should still be in the noise. Mustang Mach 1 I'm trying to get a good handle on whether or not this car is as fast or faster than an SS 1LE on an autocross course. Can't seem to get any relevant autox specific info from this thread (https://www.camaro6.com/forums/showthread.php?t=590653). Wider front wheels, zero ice mode (I had a 2017) and better outward visibility, but it's far more expensive than a 1LE and also heavier. Anything else? For reference the car will be mostly an autocross car, with a couple track days a year and an occasional jaunt to work.
__________________
2017 - SS 1LE
2015 - 2SS, RS, NPP, 1LE - Sold |
|
|
|
|
|
|
|
|
Post Reply
|
|
|


