You are browsing camaro6 
 08-26-2016, 05:37 PM
|
#785 | |
 
Drives: 2016 2SS Join Date: Feb 2013
Location: Irvine CA
Posts: 201
|
Quote:
Once I am done with that, I am going to find a way to wrap the instrumental bezel and the bottom part where the logo is on the steering wheel without having to take the whole steering wheel apart. If anyone has any info on this is I would greatly appreciate it. |
|

|

|
|
08-26-2016, 05:54 PM
|
#786 | |
|
Banned
Drives: 2016 Camaro 2SS 6M Nightfall Gray Join Date: May 2016
Location: Western MA
Posts: 522
|
Quote:
4-5 coats of Plasti-dip and put it back together. Oh, also vacuumed and cleaned it all while it was apart. |
|
|
|
|
|
08-26-2016, 06:02 PM
|
#787 | |
Drives: 2016 Camaro 1LT Join Date: Apr 2016
Location: Phoenix, AZ
Posts: 648
|
Quote:

|
|
|
|
|
|
08-26-2016, 06:35 PM
|
#788 |
|
Banned
Drives: 2016 Camaro 2SS 6M Nightfall Gray Join Date: May 2016
Location: Western MA
Posts: 522
|
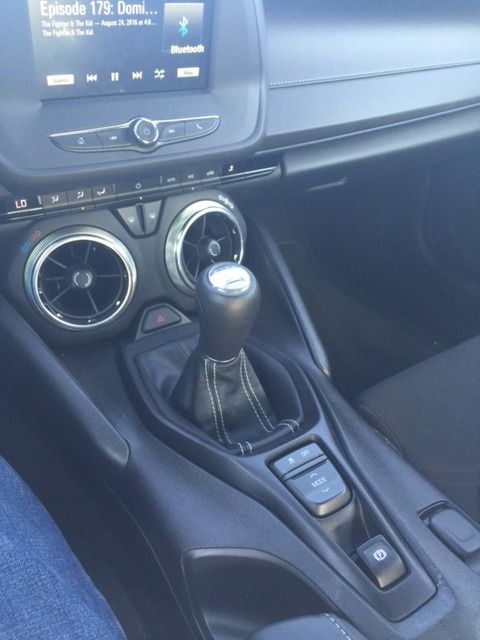
Not my pics but they show it very well. This is the tab by the parking brake. To unclip it from the bezel you push it forward, in the direction of the arrow.
|
|
|
|
|
08-26-2016, 06:37 PM
|
#789 |
|
Banned
Drives: 2016 Camaro 2SS 6M Nightfall Gray Join Date: May 2016
Location: Western MA
Posts: 522
|
This is the corresponding part on the bezel.
|
|
|
|
|
08-26-2016, 06:47 PM
|
#790 | |
|
Drives: 2016 Camaro 1LT Join Date: Apr 2016
Location: Phoenix, AZ
Posts: 648
|
Quote:
|
|
|
|
|
|
08-26-2016, 08:13 PM
|
#791 | |
|
Banned
Drives: 2016 Camaro 2SS 6M Nightfall Gray Join Date: May 2016
Location: Western MA
Posts: 522
|
Quote:
That tab is actually pretty pliable compared to a lot of other manufacturers. Mercedes and Volvo suck, Fords make me wanna drink and Kia is just retarded. The more you do, the easier it is. Even if you break that tab, the other clips are plenty to hold it in. |
|
|
|
|
|
08-27-2016, 12:12 AM
|
#792 | |
       Drives: 2016 2SS M6 Mosaic Blk Met-SOLD Join Date: Jun 2016
Location: KY
Posts: 2,934
|
Quote:
 Lit up at night:  daytime: 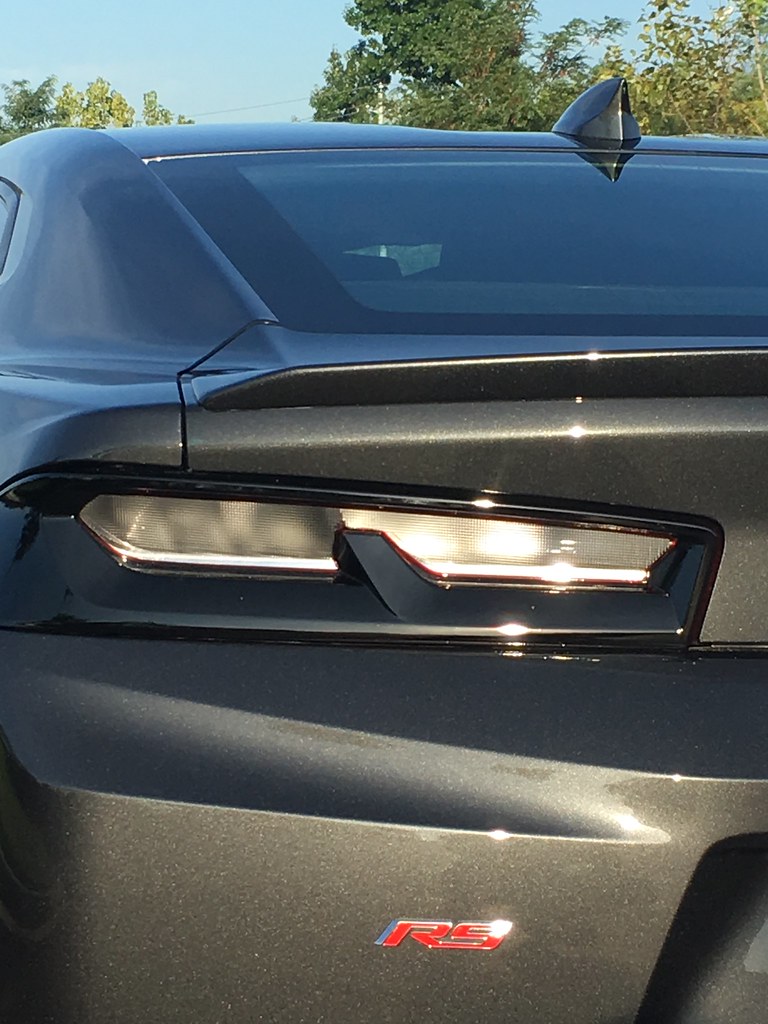 Looks killer!!!  These pics can't even show how good these look!
__________________
Official Detailer of CamaroFest 8 & 9
https://www.autogeekonline.net/forum...st-8-pics.html https://www.camaro6.com/forums/showt...=521655&page=1 https://www.camaro6.com/forums/showt...=547470&page=1 https://www.camaro6.com/forums/showthread.php?t=527474 No one on Earth has detailed more Camaros. http://KirkTheDetailer.com |
|
|
|
|
|
08-27-2016, 12:33 AM
|
#793 |
Drives: 16' Camaro E-Force SS Join Date: Jul 2016
Location: Morgan Hill, Ca
Posts: 836
|
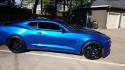
Had new wheels put on today!
 
|
|
|
|
|
08-27-2016, 02:29 PM
|
#794 |
|
Drives: 16' Camaro E-Force SS Join Date: Jul 2016
Location: Morgan Hill, Ca
Posts: 836
|
Back to back posts! Today I took more pics of my new HREs, and did a baseline dyno. It has been a good morning!
 
|
|
|
|
|
08-27-2016, 04:55 PM
|
#795 | |
|
Car Enthusiast

Drives: 2017 Camaro SS FIFTY Join Date: Jul 2016
Location: Naperville, IL
Posts: 163
|
Quote:
__________________
2017 SS Camaro FIFTY
6MT, Nav, NPP, Black Bowties, Mishimoto OCC, Skip Shift Eliminator, GM Footwell Lighting, NGM Splash Guards, GM Blackout Tail Lights (SOLD)  |
|
|
|
|
|
08-27-2016, 05:53 PM
|
#796 | |
|
Drives: 2016 2SS M6 Mosaic Blk Met-SOLD Join Date: Jun 2016
Location: KY
Posts: 2,934
|
Quote:

__________________
Official Detailer of CamaroFest 8 & 9
https://www.autogeekonline.net/forum...st-8-pics.html https://www.camaro6.com/forums/showt...=521655&page=1 https://www.camaro6.com/forums/showt...=547470&page=1 https://www.camaro6.com/forums/showthread.php?t=527474 No one on Earth has detailed more Camaros. http://KirkTheDetailer.com |
|
|
|
|
|
08-27-2016, 06:47 PM
|
#797 |
Drives: 2016 2SS, HBM, NPP, Sun Roof Join Date: Jun 2013
Location: Houston, Tx
Posts: 87
|
Dark tail lamps on,
 
|
|
|
|
|
08-27-2016, 06:54 PM
|
#798 |
|
Banned
Drives: 2016 Camaro 2SS 6M Nightfall Gray Join Date: May 2016
Location: Western MA
Posts: 522
|
One day this week was a bit breezy and blew some sort of stringy, nasty tree droppings onto my car. It was there for maybe half an hour before I noticed and proceeded to clean it off. I don't know what's in that shit, but it started to eat into my clear all over my hood. It looked awful so today we took it off and gave it a good buff and polish.
|
|
|
|
|
|
|
|
|
Post Reply
|
|
|