You are browsing camaro5 

|
 12-21-2012, 05:27 PM
|
#1 | |
|
Drives: 2010 Join Date: May 2010
Location: US
Posts: 1,661
|
Full DIY: ZL1 Diffuser Install
This mod takes awhile, and all the information is spread out all over the place.. with information and pictures missing here and there... so I am putting this together for anyone that doesn't want to spend all day researching on the computer while chopping up your bumper.
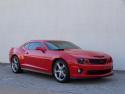
Note: I used a 2010 absorber and fascia, so this DIY will reflect that. Tools needed: - Dremmel - (with 1/8th inch drill bit, diamond wheel bit) - Pop rivet gun - 7mm socket and wrench - T-15 torch socket - Flat head screw driver - Scissors - Tape - All purpose cleaner - Microfiber towels Parts list and required amount: (1) #22894221 Fascia (1) #20957052 Heat shield (1) #20957053 Heat shield (1) #22895336 Mud flap (1) #22895337 Mud flap (1) #20952863 Bracket for mud flap (1) #20952864 Bracket for mud flap (1) #22743862 Absorber bracket (1) #22743863 Absorber bracket (1) #22743864 Absorber bracket (1) #22743865 Absorber bracket (8) #9132667 Pop rivets (2) #11610157 nuts (16) #11570637 7 mm bolts (You will use 6 more from your old diffuser) (14) #11562364 Triangular retainers. (best off ordered from 2SSRS) (1) drilling template (from 2SSRS) First off, big thanks to 2SSRS for a lot of helpful information.  Second off, anyone that says you can do this mod without taking off the bumper- is not doing it the OEM way. I couldn't even get the diffuser off without, let alone the absorber... As I got deeper into the instal, I was damn glad that bumper was not on my car. Taking off the bumper took me 5 minutes. Doesn't require removal of wheels or even jacking the car. Here's the video I used: Next, you'll need to take off the diffuser, here is the thread I used for that (my tabs got trashed taking it off, but the diffuser had already melted so I didn't care.) http://www.camaro5.com/forums/showthread.php?t=153221 1. Remove the absorber. It is held on the sides by one clip each, and two in the middle. Just fiddle around with the ones on the side with a screw driver to get them out. I didn't un plug anything, I simply set it on the ground. 2. Line up and tape the template onto the bottom of the fascia. Using a 1/8th bit, drill the holes. Take the template off, flip it over, and repeat for the other side. 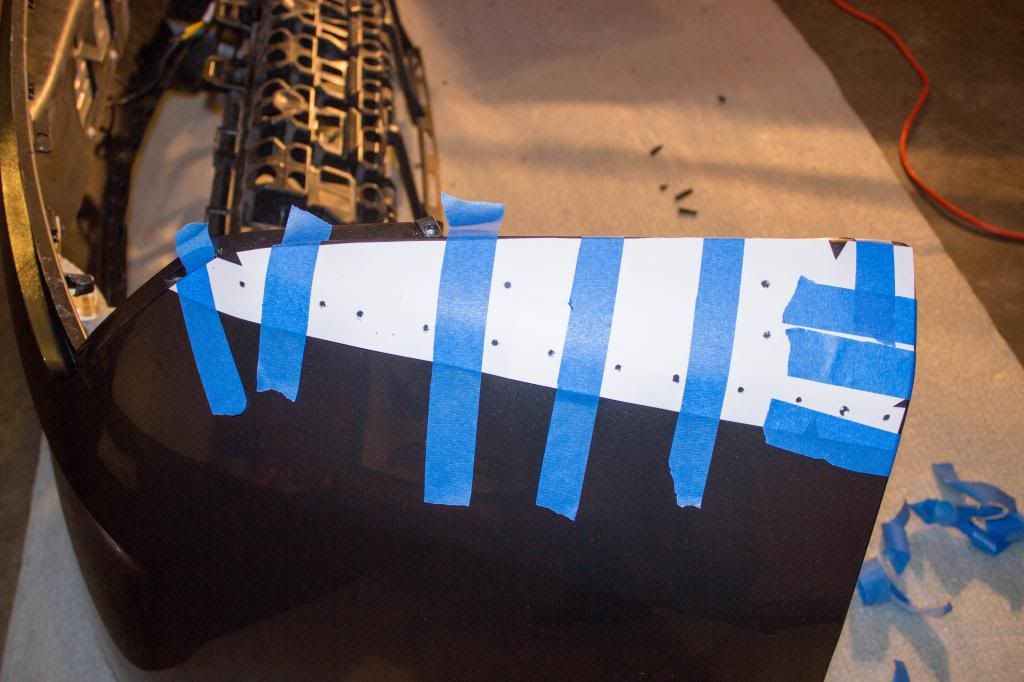 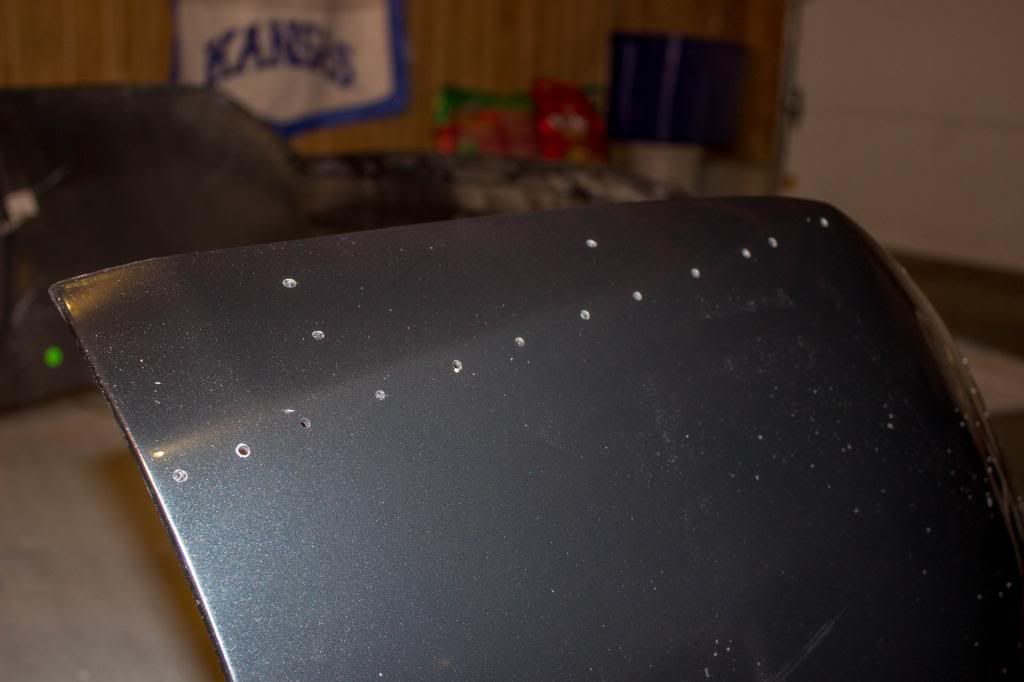 3. Use the diamond wheel bit to cut the lines required for the tabs to slip through. I used a bottle of touch up paint and went around the inside of all cuts, just in case. Note: clean/clay your bumper.. you don't want that bottom piece to forever be dirty once the diffuser is over it. 4. Using (6) 7mm bolts, attach the two mud flap brackets to the bottom of the fascia. Pay special attention that all of the screws are going into the retainers and not just pushing the bracket down. This will put the bracket at a weird angle and the holes won't match up with the diffuser.  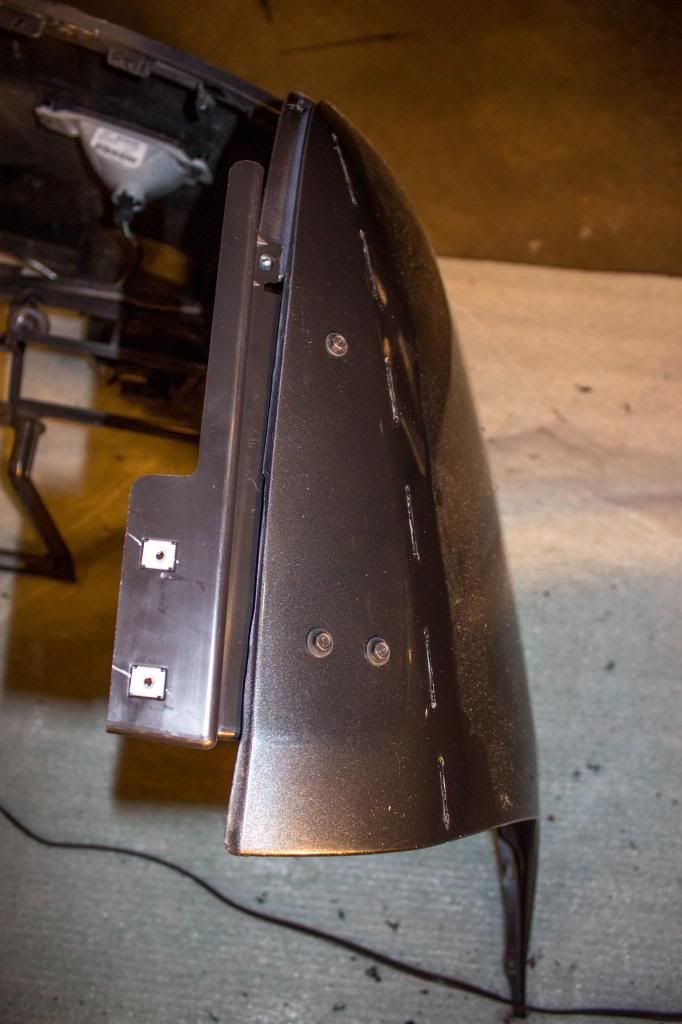 5. Get out the diffuser. Place (6) U shaped retainers on the diffuser. Using (6) 7mm bolts, fasten the heat shields to the diffuser. 6. Now you're ready to put the diffuser on the fascia. Having someone hold it steady for you helps a lot! Start with the corner tabs on the back that snap into place, and work your way across. Place the "wrap around tabs" into the fascia last. Don't put the triangular retainers in the tabs yet, the mud flap must be on first. 7. Get your mud flaps. Be sure to clean the inside of the bumper first or the 3M tape will not stick! I used Adam's All Purpose Cleaner followed by ISP alcohol just to be sure. 8. Line up the slit on the mud flap with the tab on the diffuser. Peel the 3M backing and put the mud flap in place. Use (2) 7mm bolts to hold each mud flap to the bracket with the holes that lined up. I had 2 (#11610157) nuts to put on the back of the bracket that gave the screws something to grab onto. The rest of the screws will hold it in place when the bumper is put back on. 9. Use the (14) triangular retainers to slide between the inside of the tabs, and the fascia. Refer to the post in the step 11 for pictures. 10. Using (4) 7mm bolts, screw the bottom sides of the diffuser into the mud flap bracket. 11. Now you must modify the absorber brackets so they fit on the 2010 absorber. Simply cut off the locating tabs, and drill a second hole for the second rivet. This post has a lot of good information on it: http://www.camaro5.com/forums/showpo...&postcount=274 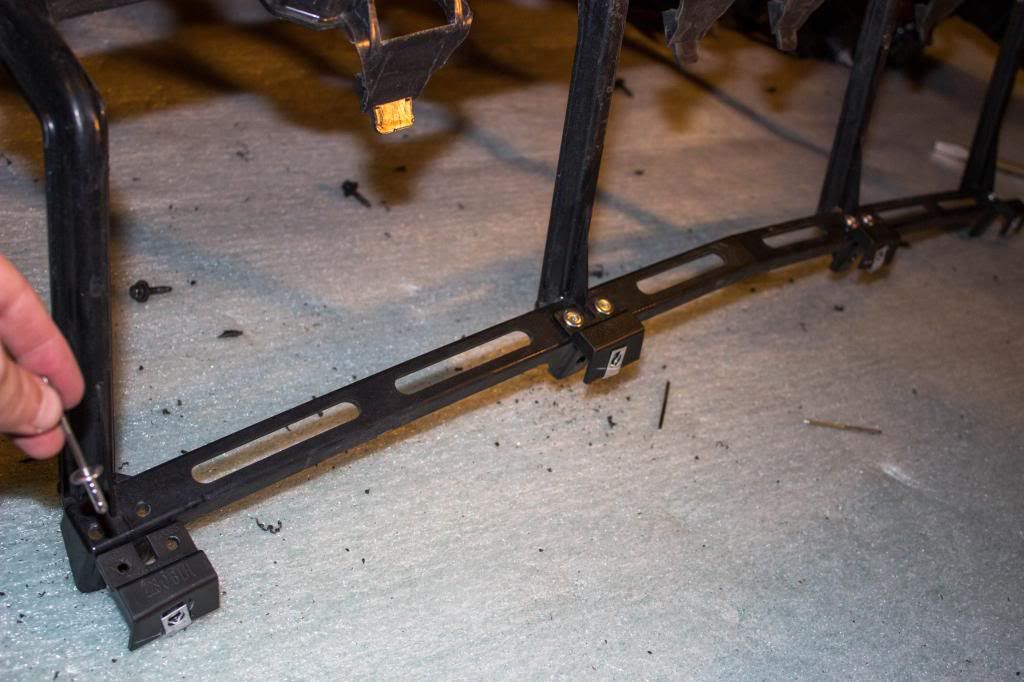 12. using your pop rivet gun, attach the brackets to the absorber. 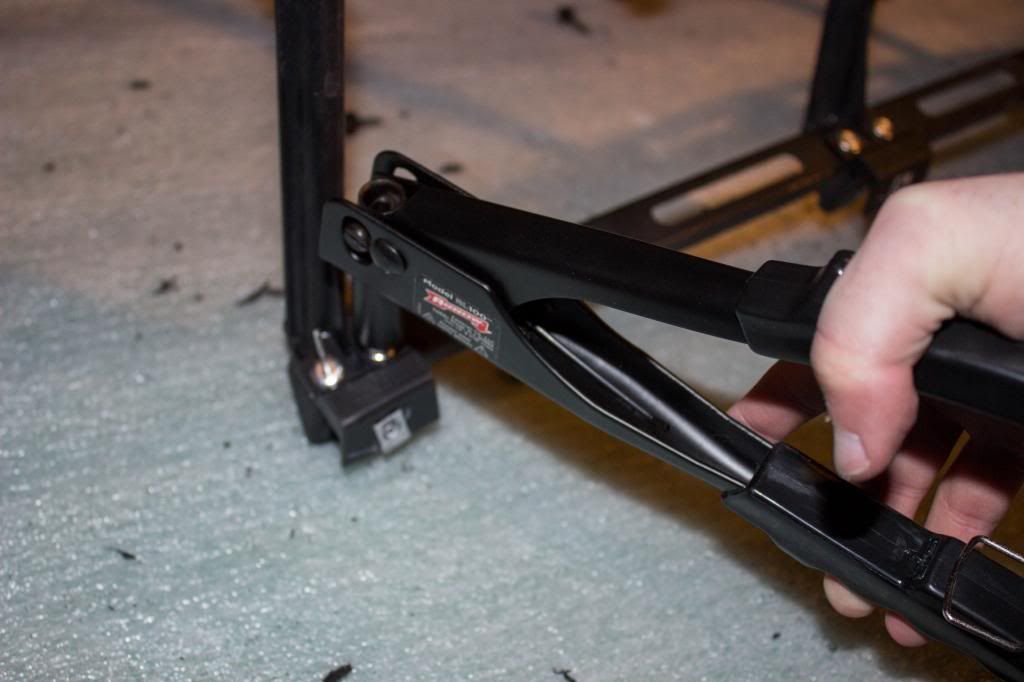 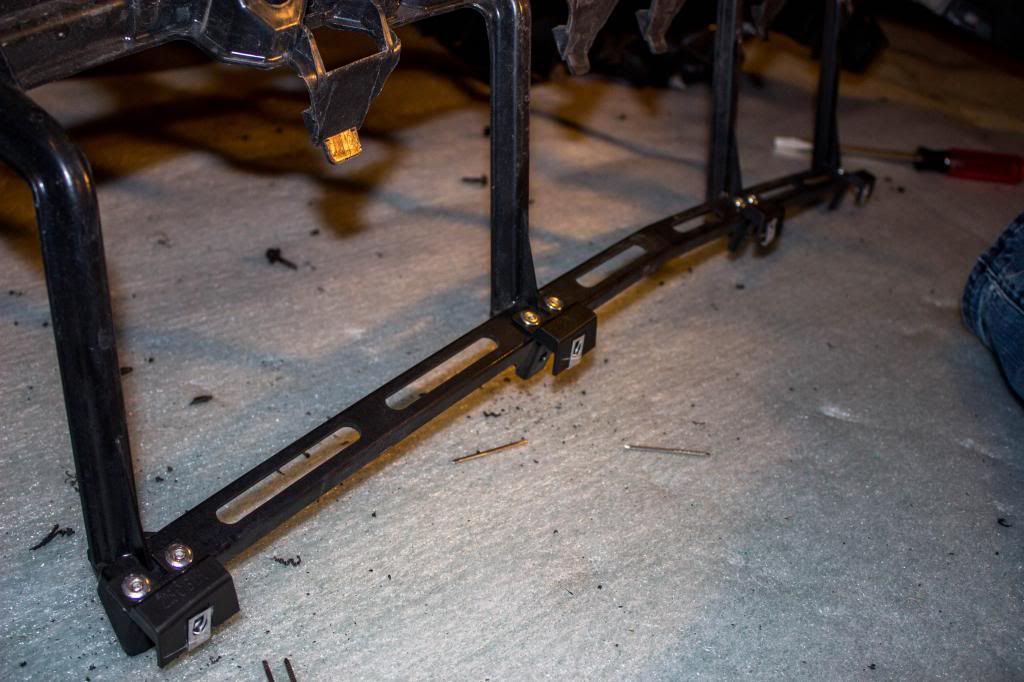 13. Reinstall the absorber to the fascia. 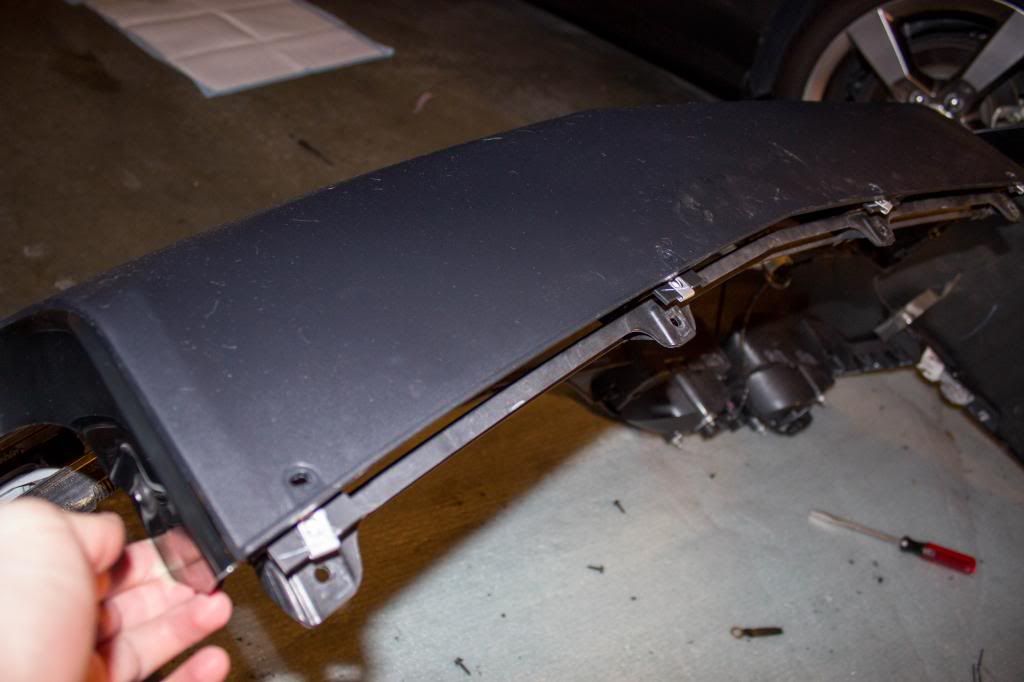 14. Use (4) 7mm bolts from your old diffuser and attach the bottom of the diffuser to the brackets.  15. Reinstall your bumper and you're good to go ! My car had MRT V.2 on it when I installed the diffuser. They were hitting up against the heat shield so I put a cut up mouse pad in between them to keep them from rattling until I got the quad tips put on. 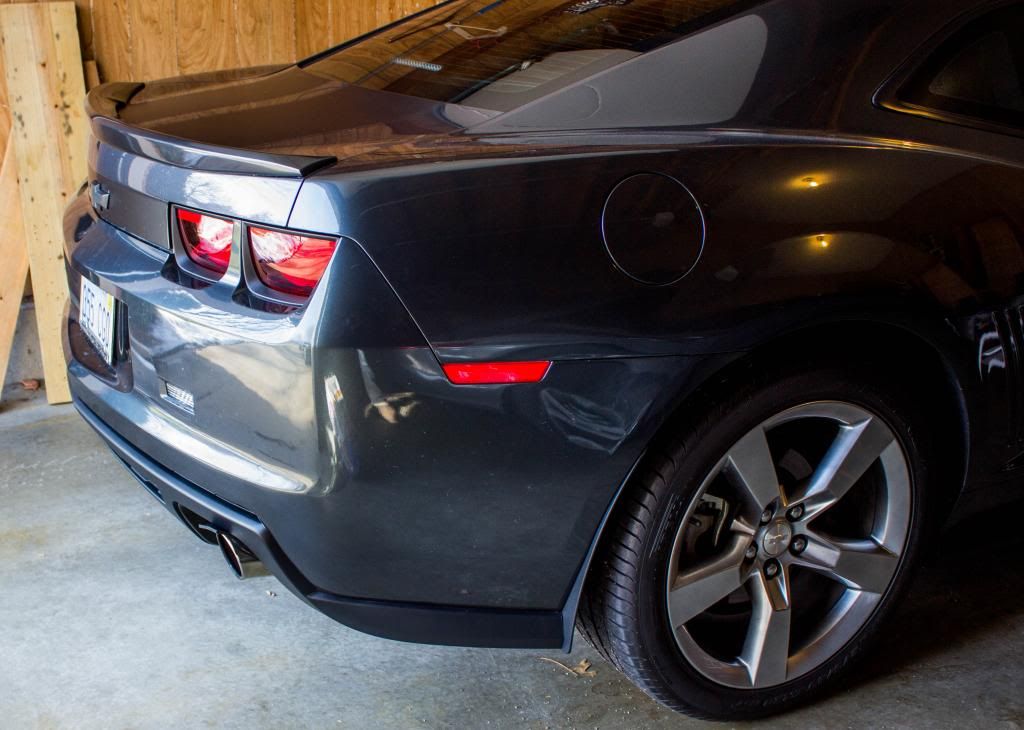 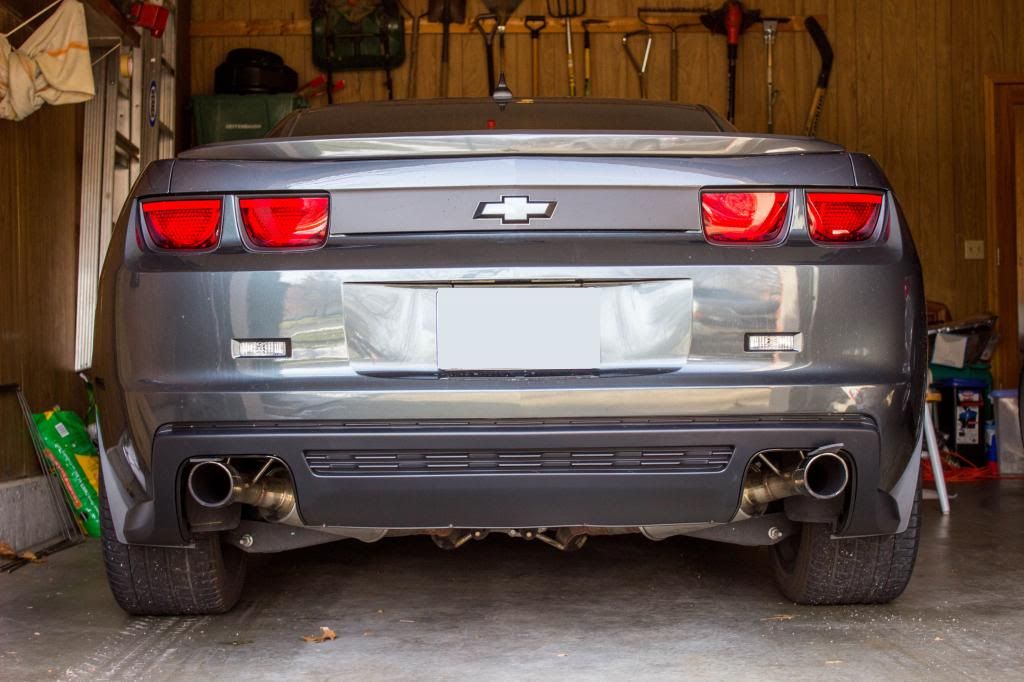 Here is how mine looks with my quad tips welded on:   Well guys there you have it. Please let me know if there is something I left out or doesn't make sense. Also note: I am not a professional mechanic by any means. This is not the only way or maybe even the correct way to install the diffuser. This DIY is only what I used and how I installed the ZL1 diffuser. Last edited by tjk_art; 12-27-2012 at 03:37 PM. Reason: Added pictures |
|

|

|
|
12-22-2012, 12:09 AM
|
#2 |
|
Account Suspended
Drives: 2011 camaro LT RS Join Date: Oct 2012
Location: US
Posts: 207
|
great job sorting this thing out
 2 questions whats the part number for the Triangular retainers and how can i get the drilling template ? thanks |
|
|
|
|
12-22-2012, 01:14 AM
|
#3 | |
|
Drives: 2010 Join Date: May 2010
Location: US
Posts: 1,661
|
Quote:
|
|
|
|
|
|
12-22-2012, 08:51 AM
|
#4 |

Drives: 2014 Z/28 #82+#192, 18ZLE 66Nova Join Date: Oct 2008
Location: By the lake in AZ
Posts: 15,719
|
Good work, thank you for the video.
|
|
|
|
|
12-27-2012, 01:51 PM
|
#5 |
|
400HP used to be enough..
Drives: 2010 2SS rs manual Join Date: Aug 2009
Location: Central NC
Posts: 772
|
The retainer part number is 11562364 and you need 14 of them. They are a direct ship item to the dealer, so it could take a week to ten days to get them. You are probably better off getting them from Ofer (2SSRS).
__________________
Build thread: http://www.camaro5.com/forums/showthread.php?t=47925
|
|
|
|
|
12-27-2012, 02:07 PM
|
#6 |
|
Great job! Looks good.
__________________
 |
|
|
|
|
12-27-2012, 03:25 PM
|
#7 | |
|
Drives: 2010 Join Date: May 2010
Location: US
Posts: 1,661
|
Quote:
Last edited by tjk_art; 12-27-2012 at 03:35 PM. |
|
|
|
|
|
01-01-2013, 03:29 AM
|
#8 |
Drives: 2012 2SS/RS black camaro Join Date: Jul 2011
Location: New York
Posts: 516
|
What size are those tips?
|
|
|
|
|
01-01-2013, 10:19 AM
|
#9 | |
|
Drives: 2010 Join Date: May 2010
Location: US
Posts: 1,661
|
Quote:
|
|
|
|
|
|
01-01-2013, 10:33 AM
|
#10 |
    Drives: 2010 Camaro 1SS Join Date: Aug 2009
Location: Lawton/Fort Sill, OK
Posts: 1,632
|
Great write up but who did the quad tips for you?
__________________
2010 Camaro 1SS Inferno Orange Magnusson Supercharger Installed and Tuned by ADM Performance, Roto Fab CAI IOM painted, MBRP Cat Back Exhaust, Barton Industries Short Shifter, Clear Image Headers, Pedders coilovers, BMR Front/Rear sway bars Trailing Arms and End Links, VMax ported TB
|
|
|
|
|
01-01-2013, 11:18 AM
|
#11 |
Drives: 2013 Victory Red 2SS/RS Join Date: Nov 2011
Location: TX
Posts: 307
|
tjk_art, can you show the two dremmel bits you used? I know it seems simple but since I'm cutting on my 2 week old '13. I just want to measure twice and cut once if you know what mean. Thanks for the great write up!
|
|
|
|
|
01-01-2013, 11:36 AM
|
#12 | |
|
Drives: 2010 Join Date: May 2010
Location: US
Posts: 1,661
|
Quote:
http://tips.byethost4.com/dualindividual.html They were welded on by a local shop in Kansas called Tom's Automotive. |
|
|
|
|
|
01-01-2013, 11:49 AM
|
#13 | |
|
Drives: 2010 Join Date: May 2010
Location: US
Posts: 1,661
|
Quote:

|
|
|
|
|
|
01-01-2013, 12:35 PM
|
#14 | |
|
Drives: 2010 Camaro 1SS Join Date: Aug 2009
Location: Lawton/Fort Sill, OK
Posts: 1,632
|
Quote:
__________________
2010 Camaro 1SS Inferno Orange Magnusson Supercharger Installed and Tuned by ADM Performance, Roto Fab CAI IOM painted, MBRP Cat Back Exhaust, Barton Industries Short Shifter, Clear Image Headers, Pedders coilovers, BMR Front/Rear sway bars Trailing Arms and End Links, VMax ported TB
|
|
|
|
|
|
|
|
|
 |
|
|


