You are browsing camaro6 
 12-15-2016, 12:36 PM
|
#1 |
 |
The job is fairly simple, but I always like to know what I'm in for before beginning any project. I didn't find one here so I figured I would write one as reference point for anybody interested in this. 10-15min
Tools: 7mm socket T-15 torx Long screwdriver (or a plastic putty knife could also do the trick) 1. On either side of the fascia there are 4x 7mm bolts and 2x T-15 torx readily visible and can be quickly removed.  2. Looking underneath you will spot another 2x 7mm  3. Now, this little hidden bolt on the inside of the bumper/fascia assembly is the reason i decided to do a write up. There is one 7mm bolt per side and you need really work with this one. I recommend just letting your hand cramp and working through the pain  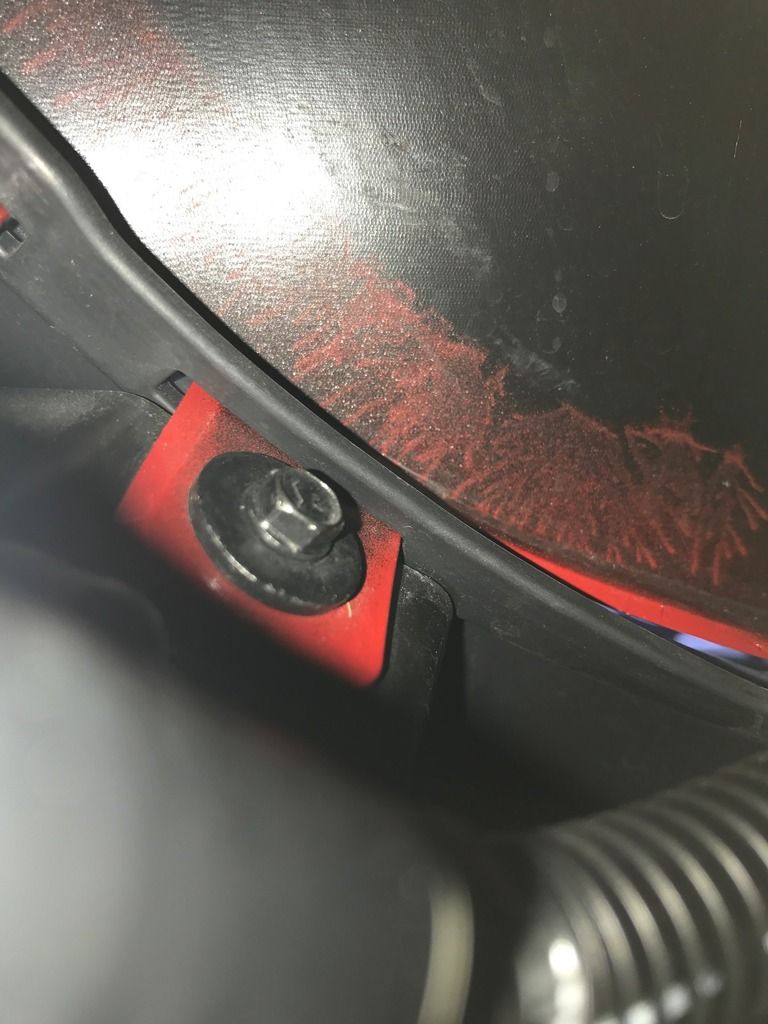 I would say its roughly about here:  4. With all the 7mm bolts removed the rest of the job is decently quick. There are 4x bumper-tabs per side that can be pulled away from the fascia pretty quick and easy  5. Starting on either side with all bumper-tabs removed for that side you can access and remove the first (largest) fascia-tab. The first one has a metal retainer clip in place so it is a little stronger than the others. I was able to reach behind and wiggle mine until it popped free. Repeat for other side.  &&  6. The method i used which seemed to work with little to no damage to anything was to work on the outsides inward by releasing one fascia-tab at a time. Pulling the fascia away from the bumper creating enough space/tension to touch the clippy part of the fascia-tab to pop free  7. There are three more of those metal retainer clips dead center, no way to access them, no tabs or anything I just pulled and they popped free.  Here is a bonus view of those reflectors. one single Phillips screw each side for removal 
|

|

|
|
12-15-2016, 01:10 PM
|
#2 |

Drives: 16 Camaro Join Date: Jan 2016
Location: Portland, OR
Posts: 177
|
Thank you! this is so helpful!
|
|
|
|
|
12-16-2016, 12:17 AM
|
#3 |
   
Drives: 16 2SS 6MT NPP MRC / 15 K1300S Join Date: Mar 2016
Location: NW of Austin
Posts: 1,034
|
Sure is thanks!!
__________________
 Rohana RFX-5 10/11, M/T 275/305, Eibachs, Hellwigs, Hurst SS, DMS LT4 SC 596HP/589TQ, DMS Low-side, Kooks 2LTs, MBRP Race, Rotofab, MMS CC |
|
|
|
|
12-16-2016, 08:32 AM
|
#4 |

Drives: 2017 Camaro 2LT-217CI Join Date: Aug 2015
Location: Wantagh, NY
Posts: 170
|
7mm bolts
interesting observation that Chevy uses 7mm bolts to hold items on car.
years ago they were 10mm bolts. so reducing bolt sizes reduces weight. very smart, and im sure all bolt sizes were reduced. nice, every little bit counts. |
|
|
|
|
12-16-2016, 05:50 PM
|
#5 |
 
|
Very helpful Viewska!
|
|
|
|
|
12-21-2016, 12:55 PM
|
#6 |

Drives: 2016 Camaro 1LT Join Date: Apr 2016
Location: Phoenix, AZ
Posts: 648
|
Was the purpose of the removal to take out the reflectors? If so, can you not get to them without removing the entire fascia?
|
|
|
|
|
12-21-2016, 05:20 PM
|
#7 |

Drives: Summit White 1LT RS I4 M6 Join Date: Oct 2016
Location: Portland OR
Posts: 125
|
Very helpful... thanks much. I always wanted to have it painted gloss black and this article is very helpful.
__________________
 2016 1LT RS Summit White M6 10/2/2016 - 3 Miles on ODO - Delivered 11/1/2016 - All around light Black out kit from Phastek 11/15/2016 - OEM Splash guards and all weather mats from ShopChevyParts.com 12/16/16 - 977 Miles. Borla S-type Axleback Planned - CAI Injen, hood wrap, Sema rocker stripes, Sema trunk balckout, Caliper Paint, Reverse LED |
|
|
|
|
12-21-2016, 05:33 PM
|
#8 |
      
Drives: 2016 Camaro 1LT Join Date: Jan 2016
Location: California
Posts: 3,522
|
Wouldn't this be the same for any non-npp camaro?
not sure what about it is V6 specific. |
|
|
|
|
12-22-2016, 06:49 AM
|
#9 |
|
|
Yes, I guess it isn't trim specific, I just posted it in here, maybe a mod can move it to where it needs to be
|
|
|
|
|
12-29-2016, 11:11 AM
|
#10 |
 Drives: 2016 Camaro 1LT RS Hyper Blue Join Date: Nov 2016
Location: San Antonio
Posts: 41
|
This was definitely very helpful. I changed mine out last night, and I would say it took around 4 hours to fully complete. I was probably being overly cautious and wasn't really in a rush. Now to decide what quad tip exhaust to go with.
|
|
|
|
|
|
|
|
|
Post Reply
|
| Thread Tools | |
|
|


