I have a 2017 black 2LT without the convenience option -but have really wanted to have the door LEDs, because really, WHO WOULDNT want some additional bling?

Unfortunately, after checking online and seeing that the spectrum LED kit through GM retails for $795, I decided I could live without it. And then I went on eBay... No, I didnt find a cheap spectrum kit, but I DID find a pair of door panels from a wrecked 2016 SS that had the door sill plates with the LEDs and light pipes in them. And both doors were only $200. That got me thinking...

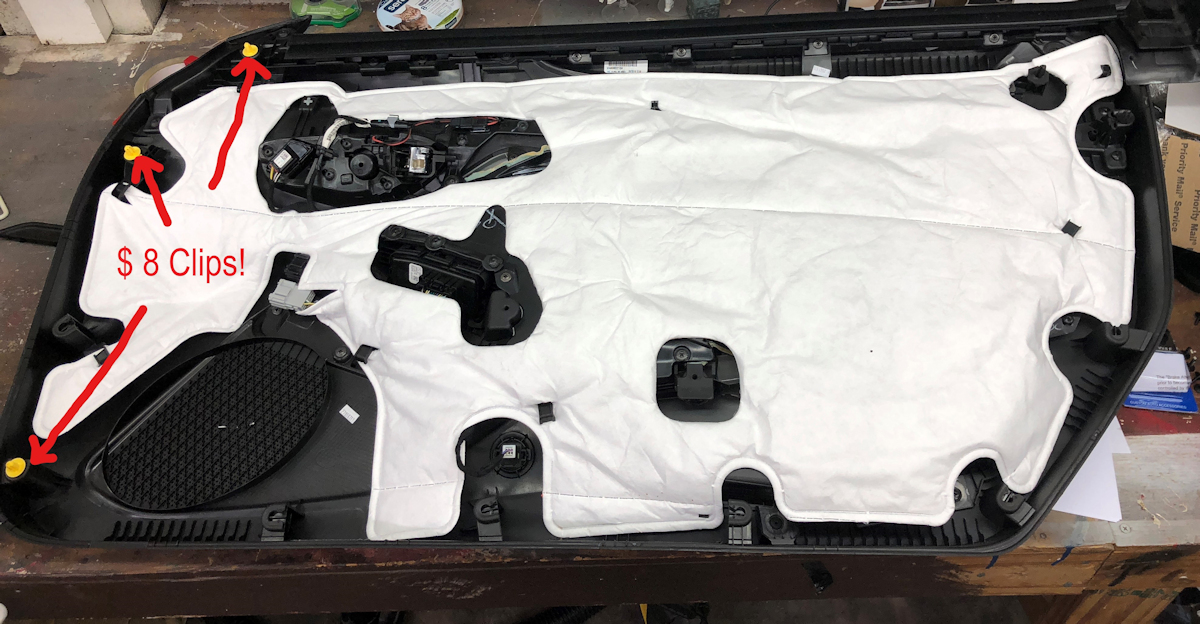
Moving the LED sill plates over to my doors was easy enough. This forum has several posts with how-tos on taking the door panels off and there are also numerous ones on YouTube. The official GM instructions say that you need to replace the plastic clips on the door once you pull the panel off, so I went to my Chevy dealer in advance to get replacement clips. They quoted me approx $8 PER CLIP! (for a tiny plastic tab!!!!) so I told them no thanks, and that I would come back and get them if I ended up needing them. So let me tell you now, dont worry about replacing the clips. I had to pull my panels off several times during this project as I tinkered with things and I am still using the original clips with no issues whatsoever.
My initial thought on the project was that I would move the sill panels over as well as the wiring harness, hook it in, and then get the BCM flashed at the dealer. In fact, I called the dealer and asked about this, and they said sure. HOWEVER, after looking at Hyper1SS post on installing the expensive package:
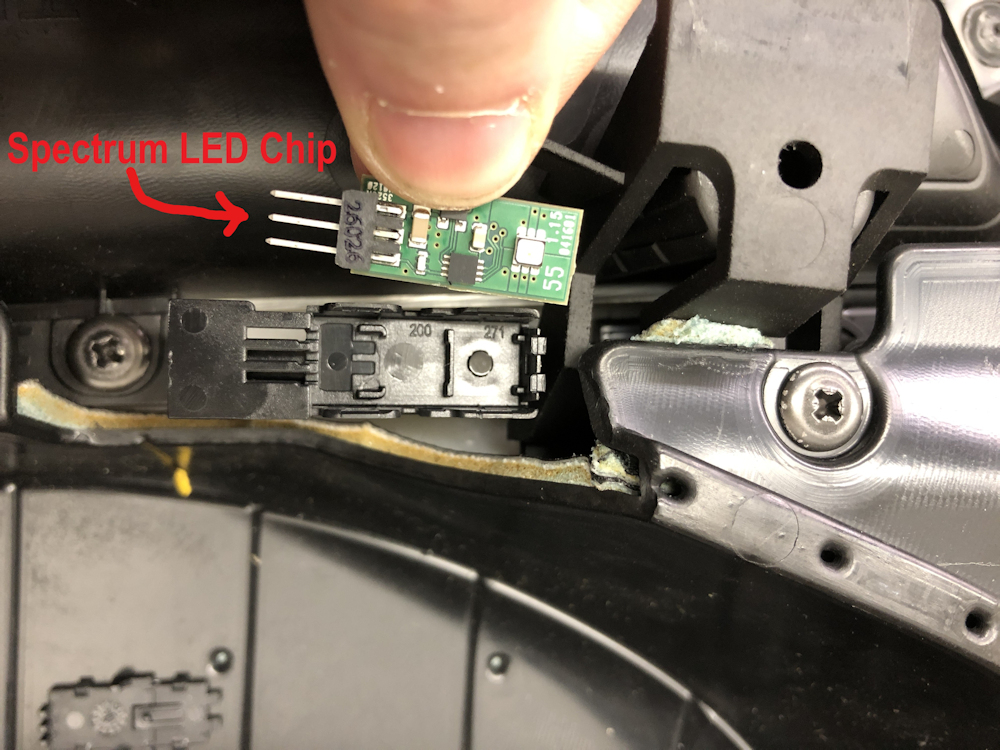
https://www.camaro6.com/forums/showthread.php?t=444999 I realized there was a lot more involved than just having the LEDs in the door and flashing the computer. IE, lots of wiring and an additional module. So I decided to analyze how I could light it in a simpler fashion. I decided, the color I wanted was white, because all of the night-time interior lighting in the door and dash and radio light bar are white -and since my car is black I thought white would make a good accent for the LEDs as well. I tried applying 12 volts to the spectrum LED to see how it would light, assuming white would be the default, but I got no response from the chip at all, so at that point, I decided the best course of action was to get it lit myself rather than rely on the GM electronics.
For this, I turned to Gen5 Concepts whom I discovered on YouTube.
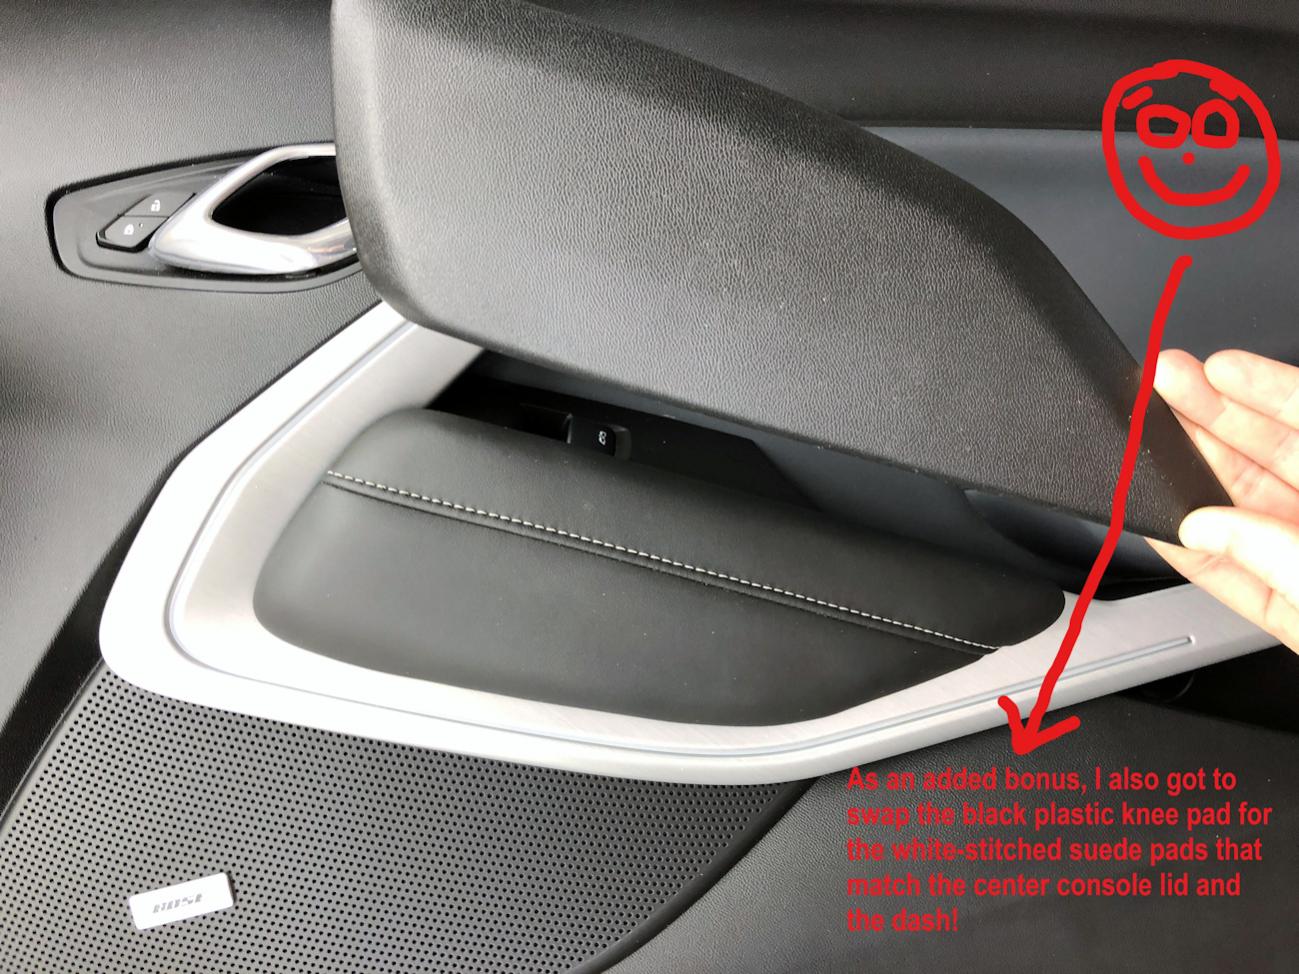
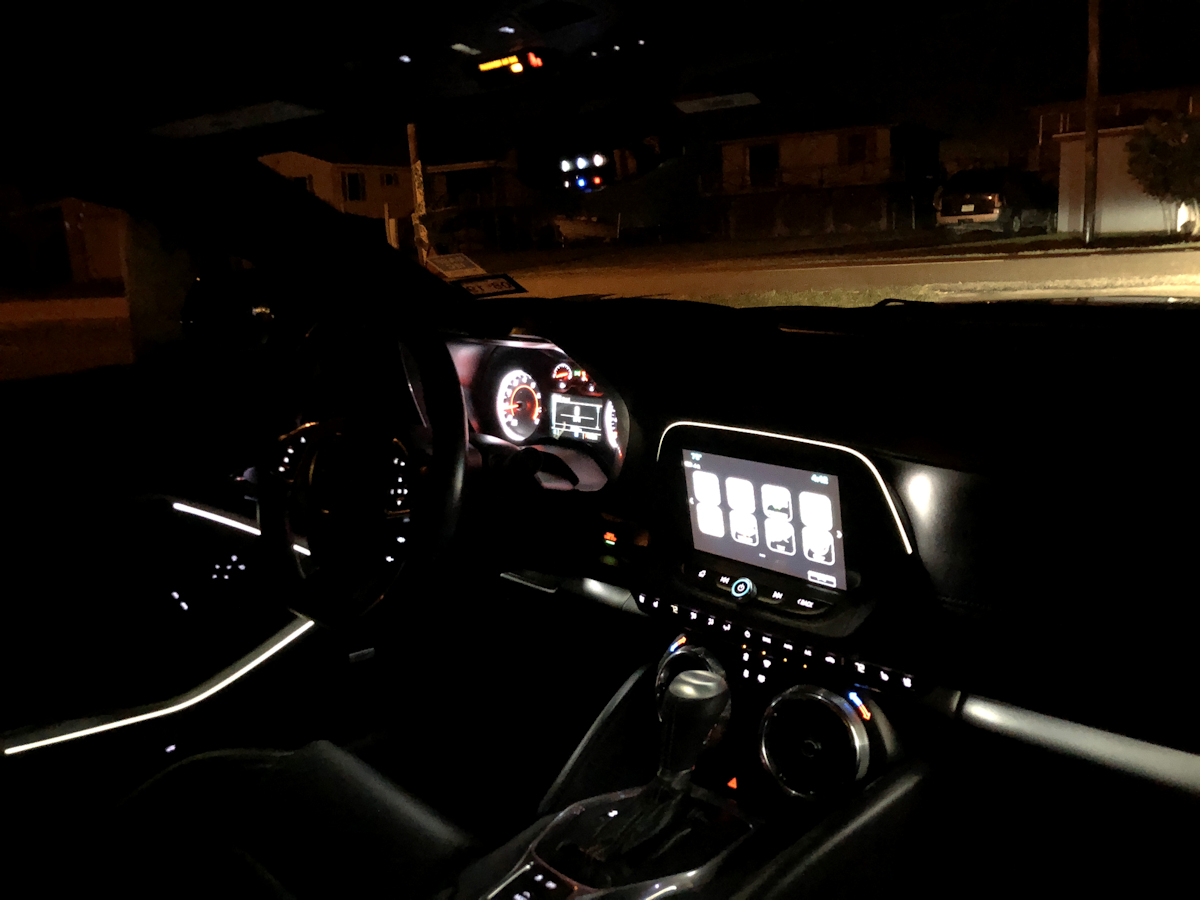
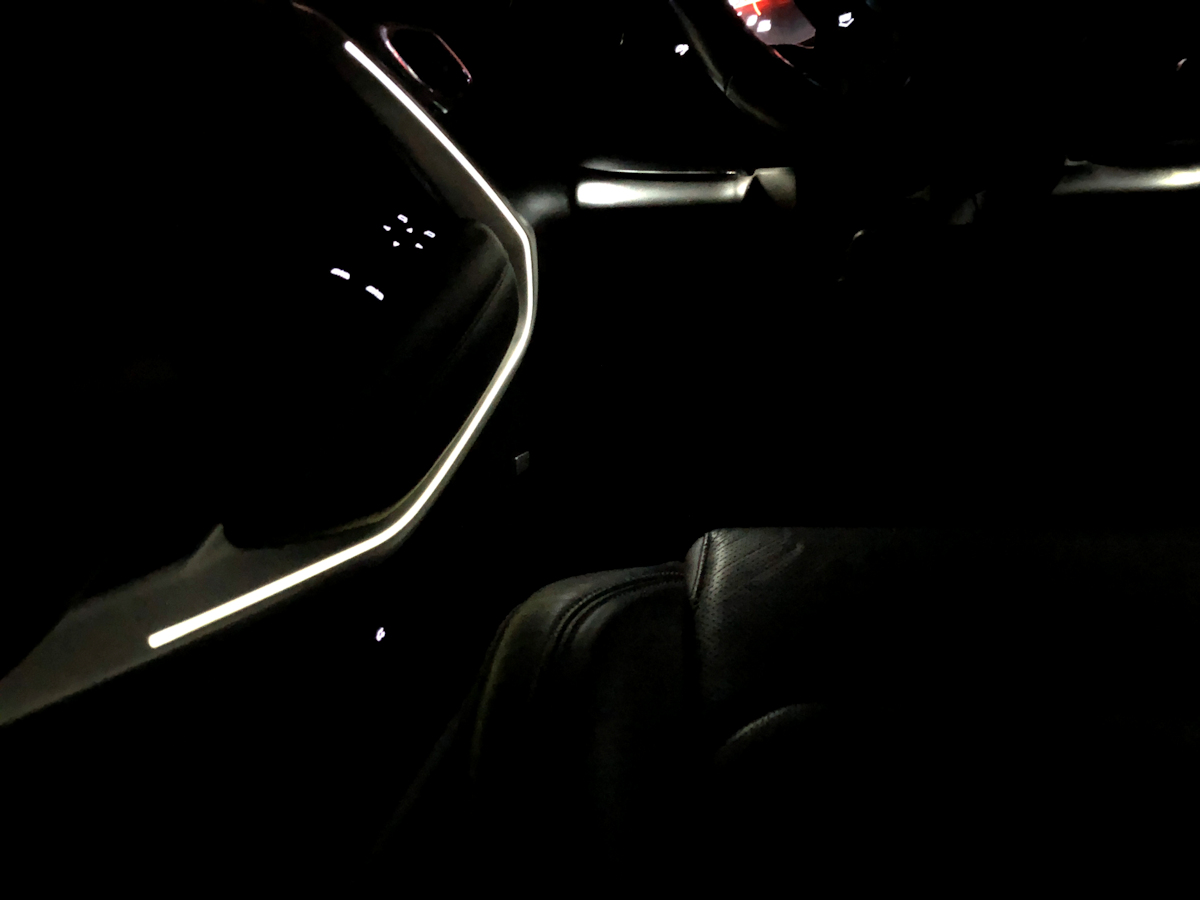
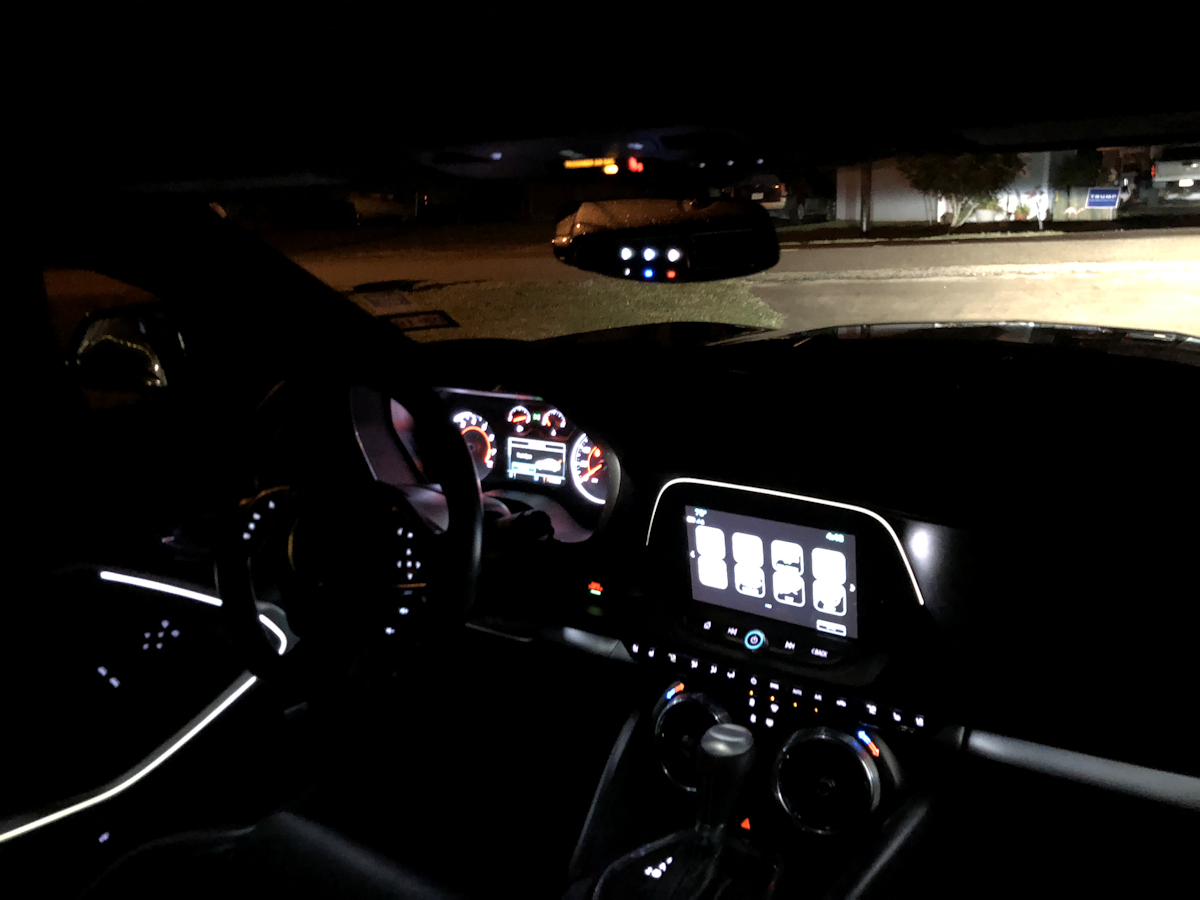
Scott, the Gen5 guy has created an LED door and dash kit for non-LED Camaros using their existing equipment. Was about to buy his door kit when I got the eBay idea. I thought his kit would probably work well with what I needed to do. His existing kit involves using a light pipe that is mounted in a gap created under the doors knee pad and secured using rubber bumpers to create an ambient glow. The light pipe is powered by two LEDs (red or blue) that you wire into the 12 volt power supply at the trunk release button. Thus you get the functionality of them powering on with car entry and headlights as well as the cool fade-off when you first get in or get out of the car. I contacted Scott via facebook (Gen5 Concepts) and asked if he could create a kit using white LEDs (he previously only did blue and red) and custom made jumpers for my two door panels. He was up for the challenge and had the kit sent to me within a few days. (Kudos to Scott who had a family emergency but worked overtime to get the kit done and delivered in the timeframe hed promised).

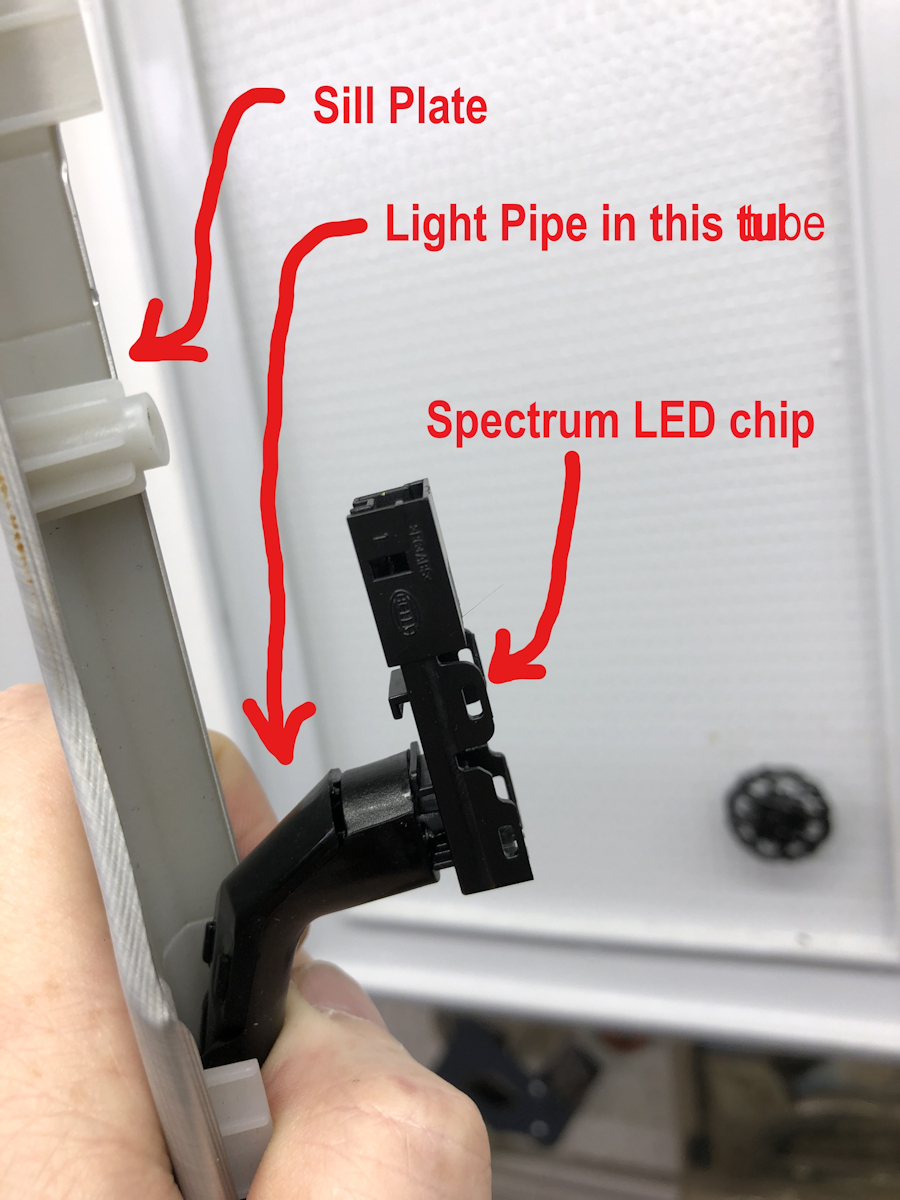
These jumpers had the LED inside of a flexible rubber sleeve designed to slip over the end of the light pipe. First, I had to remove the GM fitting so that I could get at the light pipe in the sill.
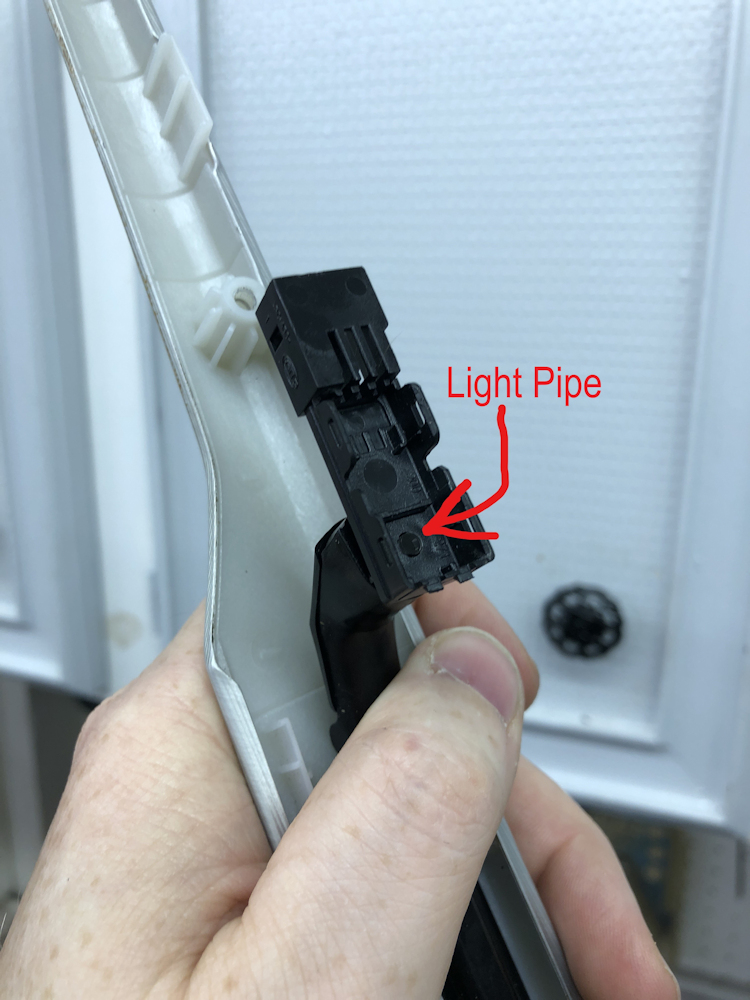
I cut away the chip holder and part of the protective pipe covering -it didnt look pretty when I was done, but the goal was to get at the light pipe (without breaking it) so I could attach the new LED.
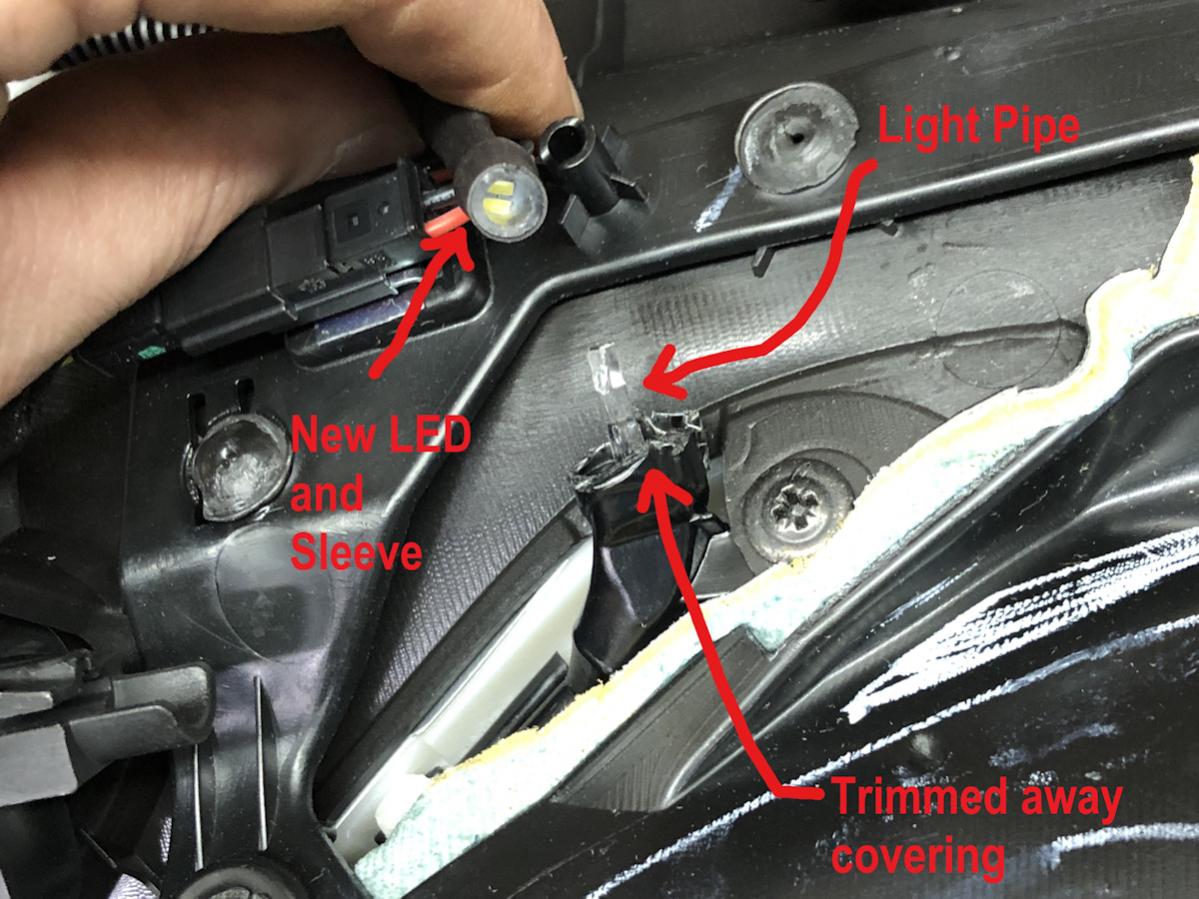
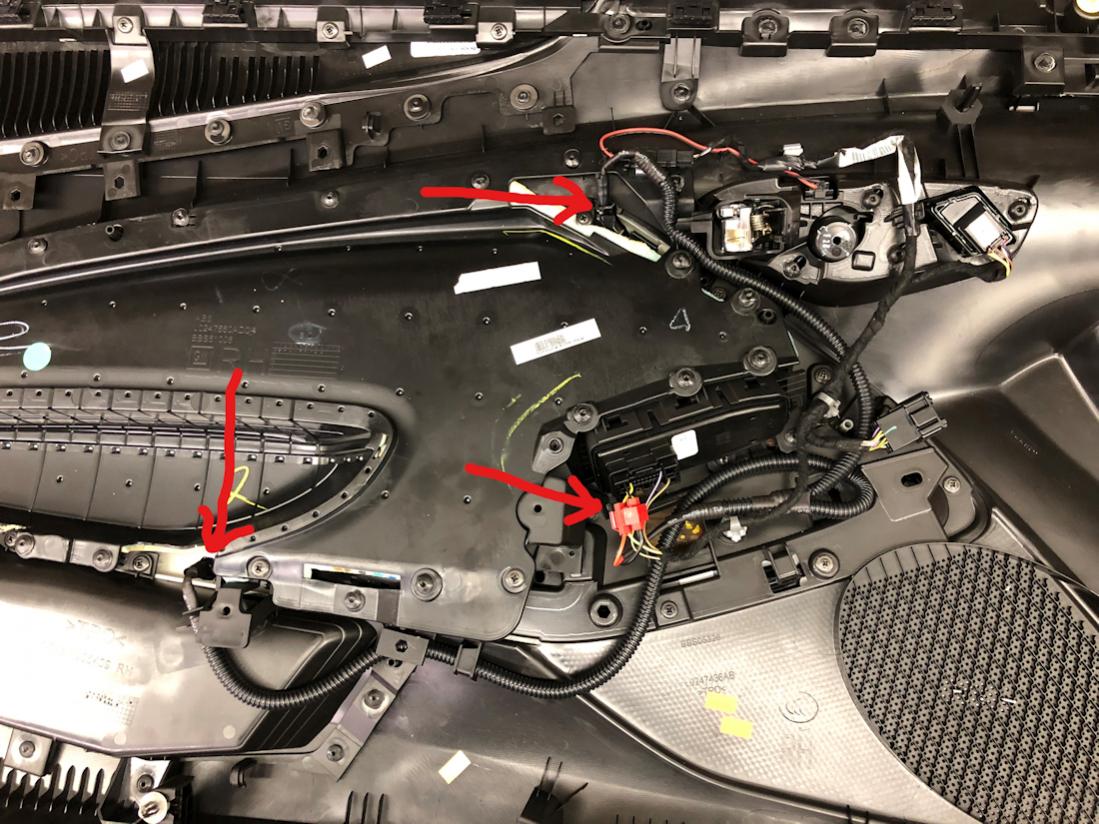
After attaching, I ran the harness (which was much nicer than the GM harness -ha!) and tapped into the trunk release switch (red wire to GM yellow 12v, and black wire to GM black ground).


And did the same with passenger door, except this one I tapped into window switch (also yellow and black wires).
I also added the Gen5 Concepts dash kit, which Scott made for me in white to complete the look. This involved 3 separate light pipes and LEDs placed in a small gap under the dash panel to create a cool looking ambient glow across the bottom of you dash. A long one on passenger side, a small one between climate controls and steering wheel, and a small one between steering wheel and drivers door.
Here is how it turned out for me:
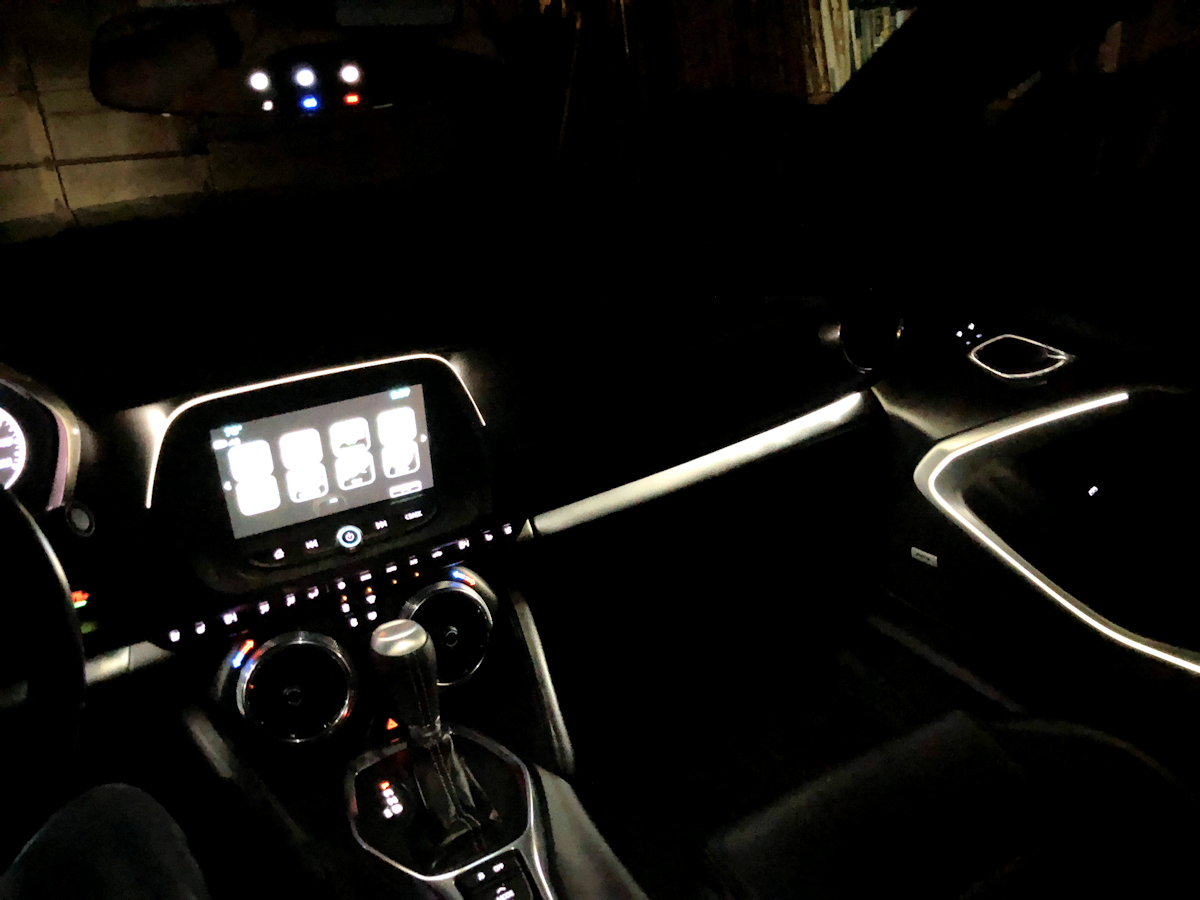

Overall, Im very impressed with how it turned out. All said and done, the project cost me about $350. However, I plan on getting some of that money back because I am re-listing the door panels I bought (now with non-LED sill plates) back on eBay.

So I estimate this will bring the project cost down to about $200 once those sell! If anyone wants to do LEDs in their Camaro on the cheap, then I think this would be the way to go. Also, the Gen5 Concepts kit is a VERY inexpensive way to get a very cool LED glow in your cabin -even without the sill plates, on both doors AND dash -Scott has a cool way to light the door, so I recommend you check that out on his Facebook page/YouTube.
Next project is to attempt to install the cup holder light pipe (GM Part 84013236) with a white LED in that as well. Part has been ordered. We shall see how that goes!