This has been a popular topic lately and it seems to be very misunderstood as well. Why and when do you "time" your bushings? This isn't a new practice, it has just been given a new name recently. We have always referred to it as re-clocking or re-indexing the bushing. In the following post I will explain the whens and whys of this procedure and hopefully put to rest the mystery that surrounds it.
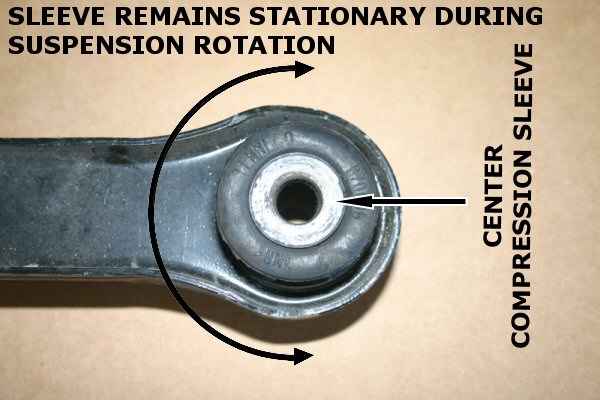
The majority of suspension components hinge on rubber bushings. All bushings have a center steel sleeve (or ferrule, compression stop, etc.) that prevents you from over-tightening the bolt and compressing the bushing. The sleeve also provides an established width for thrust loads on the bushing to minimize bind. These inner sleeves are actually bonded to the rubber bushing and, in many cases, to an outer sleeve as well. When this connection is tightened, the sleeve remains stationary in the mount while the suspension component rotates by twisting the bushing.
For years we have told our customers to tighten all suspension components with the vehicle at rest and the suspension loaded. This means that the vehicle is at ride height (static height), not with the suspension hanging. Tightening a bolt with the suspension hanging puts the bushing in a pre-loaded state since the bushings will already be "twisted" when the vehicle is set to static height. This can create irregular ride heights, premature bushing wear, and even inconsistent handling tendencies.
Lowering your car creates the same problem. All of your bushings are already tightened in the OE position. When you lower the car, the suspension rotates to the new lowered position while your bushings are still "clocked" in the original position. Loosening the bolts and bouncing the car a few times will "re-clock" or "time" the bushing to the new position.
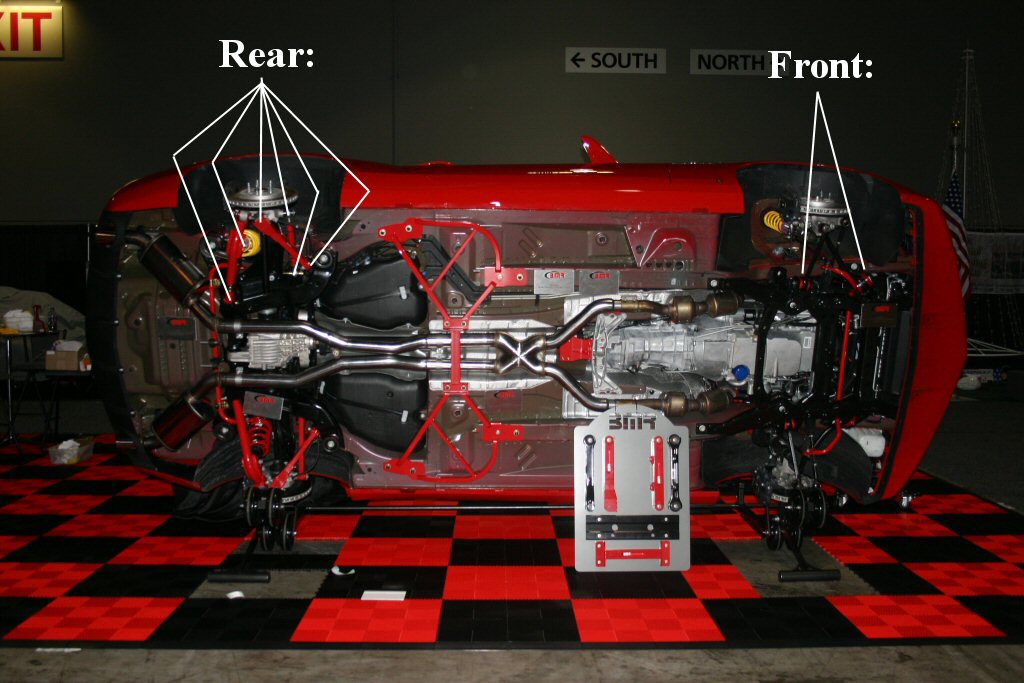
So which bushings do you need to re-clock? Basically every component in the front and rear suspension that rotates on a rubber bushing. This includes the following:
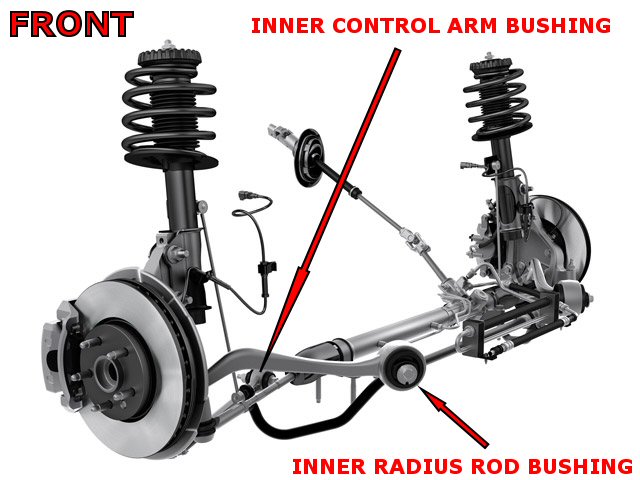
FRONT:
Inner control arm bushings
Inner radius rod bushings
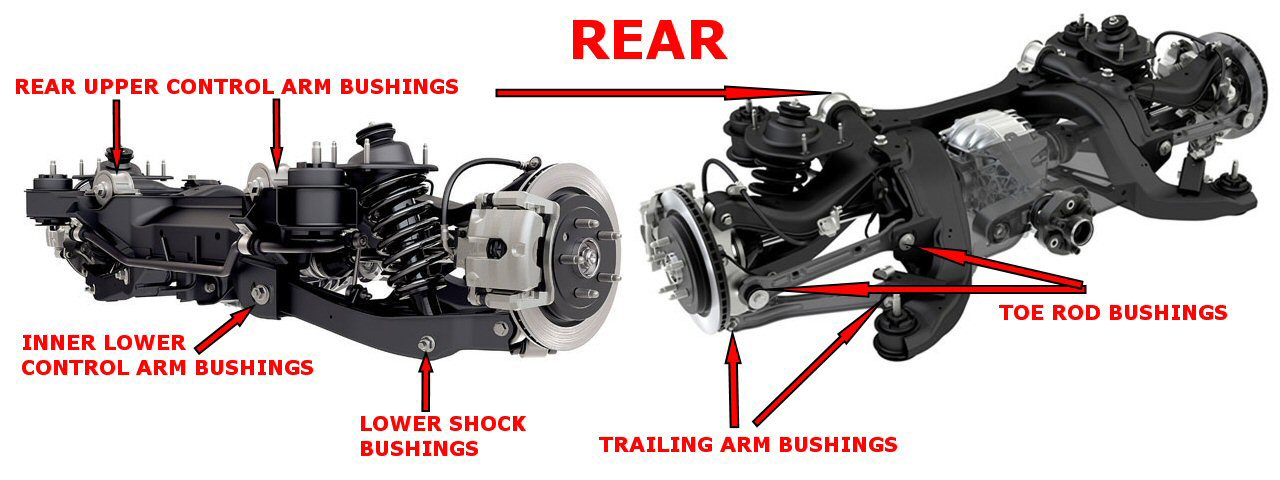
REAR:
Inner and outer toe rod bushings
Inner and outer trailing arm bushings
Inner control arm bushings
Lower shock mount bushings
Rear upper control arm bushings
With the vehicle resting on the suspension, loosen these bolts up loose enough to spin the nut by hand. Bounce the car up and down to pop any sticking bushings loose from the mounts, then re-tighten the bolts.
Certainly this is not an easy task to perform at home. Getting the car up high enough to access these bolts while keeping the weight on the tires definitely requires some work. Many are using transitioned ramps to get the car high enough. Regardless, after installing springs, an alignment is necessary to correct toe and camber. This means that not only will the car already be on a drive-on lift but most of the bolts will already be loosened for adjusting the alignment. It doesn’t take much more effort from your alignment technician to loosen a few more bolts while he is setting the alignment.
We have seen cars change ride height by as much as 3/8" by simply re-clocking the bushings after a spring install. In a multi-link suspension such as the Zeta platform, this condition becomes even more pronounced because of the multiple links. More links means more bushings and more bushings means more potential for pre-load if not setup properly.
In summary, re-clocking the bushings should be as much a priority as aligning your car after a spring install. Hopefully this has been helpful to those that were not understanding why or how to do this procedure.