3D modeling and printing:
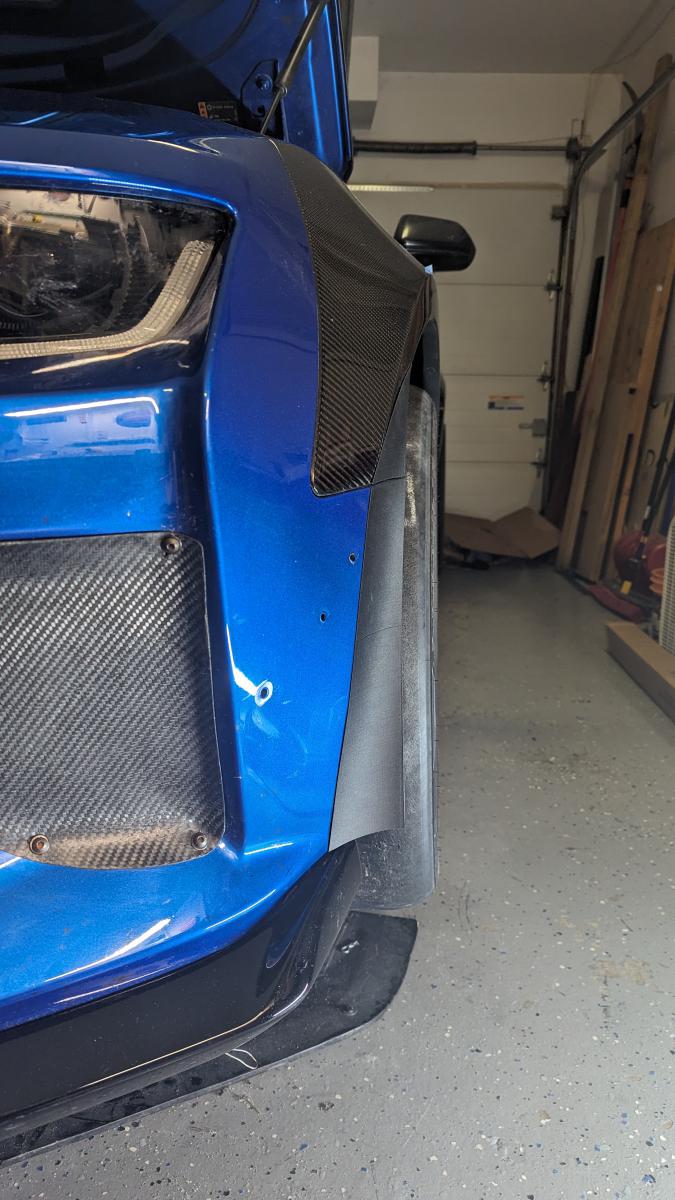
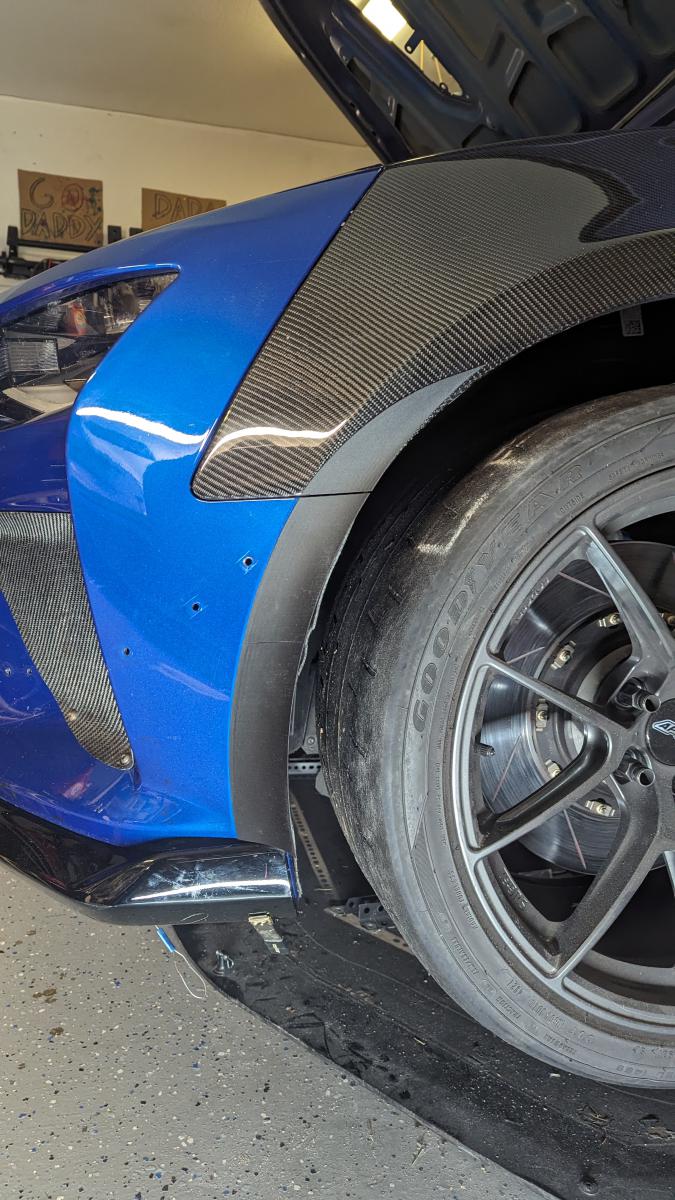
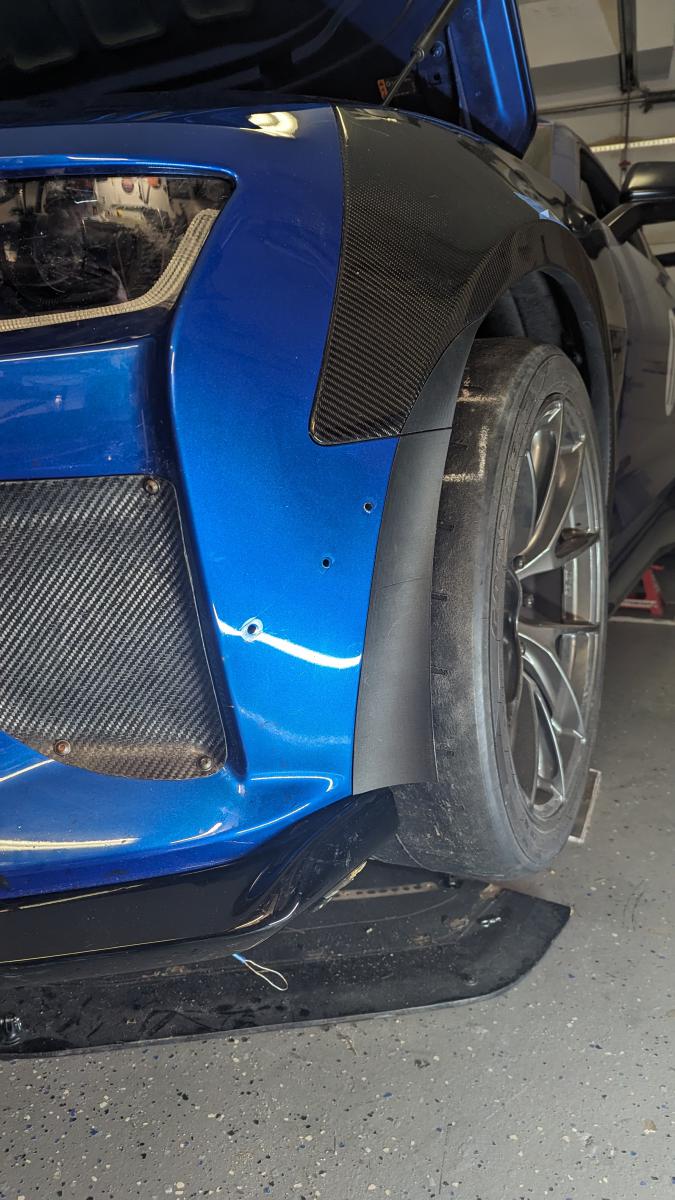
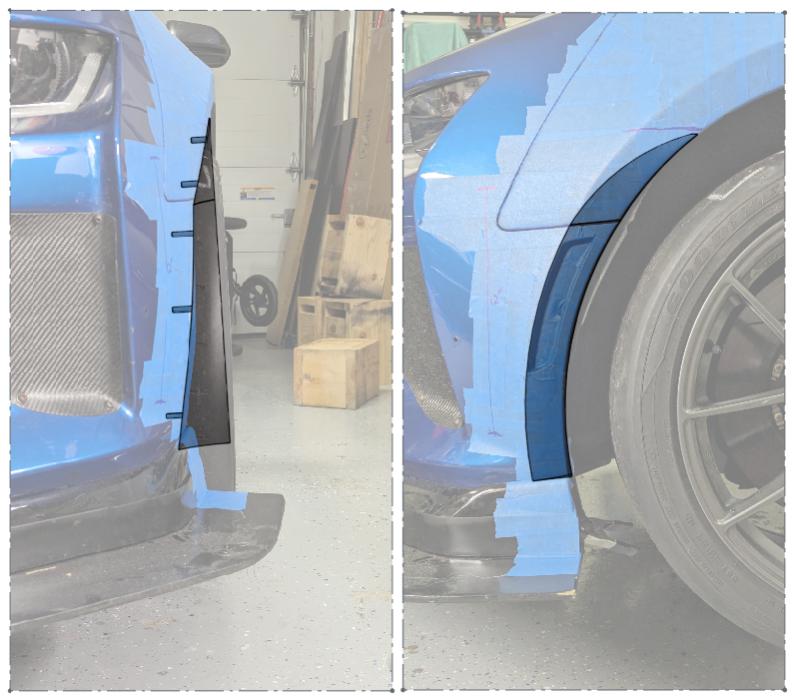
The tire blockers I designed are a little different than the air dam types typically seen. My design is triangular and mounts to the bumper and fender just ahead of the wheel, and smoothly directs the airflow from along the bumper out away from the side of the car. The bumper/fender has a slight "flat" area around the wheel well. Perfect for mounting a deflector. Only it's not "flat". It is very curved.......
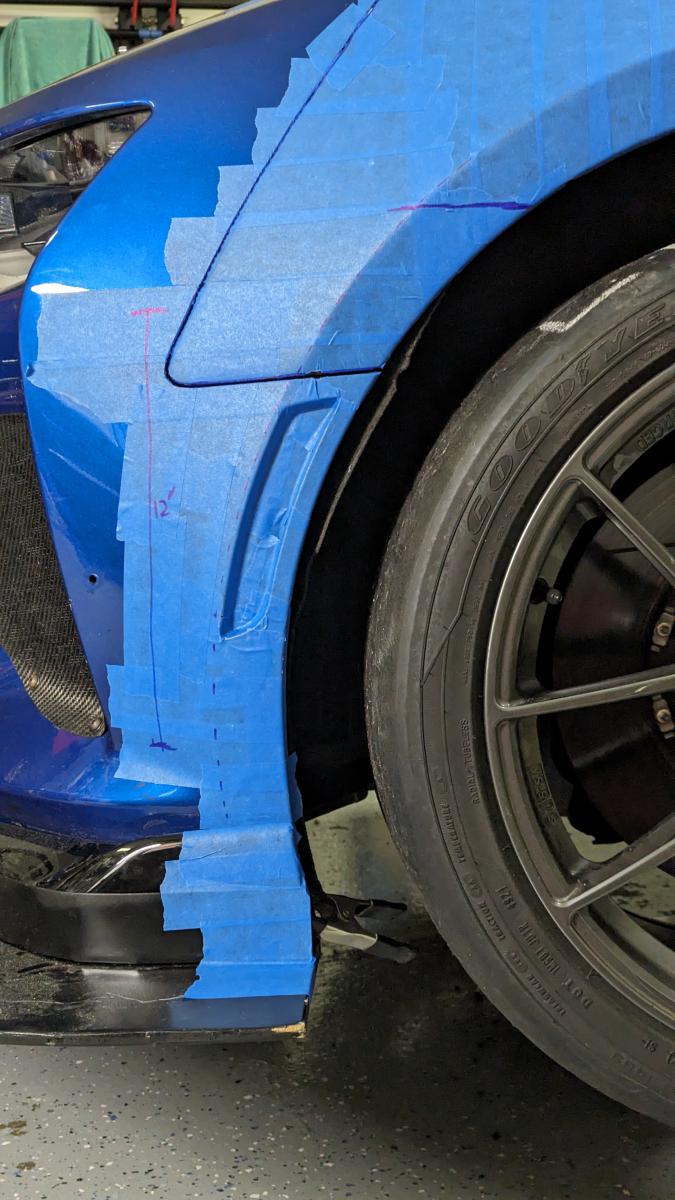
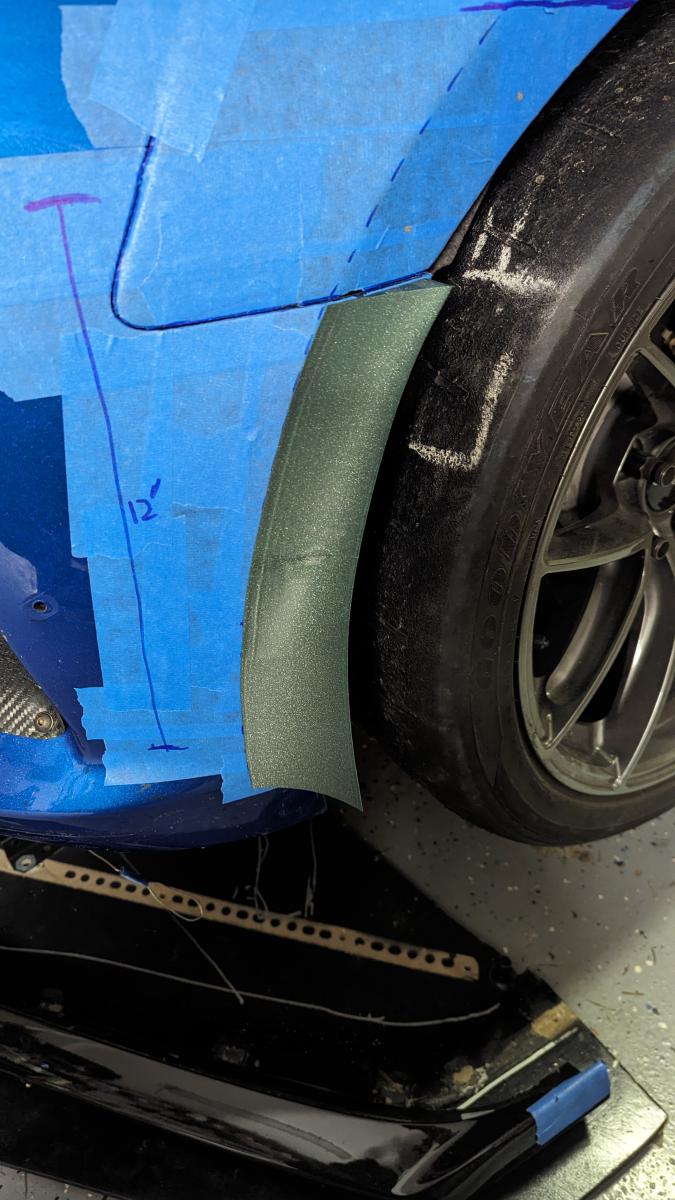
To model the tire blockers, I taped off the area around the mounting location and drew on the approximate area that would be covered by the deflectors. I then took a pair of orthogonal images of the area. One from the front and another from the side.

I then created a new project in OnShape(free online cad software) and imported those images as reference images in the front and right planes. What made the modeling particularly difficult(at least to this novice modeler) was the fact that the bumper is curved in all three directions. There is*the curve of the bumper front to back, top to bottom and along the arch of the wheel well. I sketched up the curves I had drawn on the bumper in the right plane to get the lateral profile. I then sketched 2 curves in the front plane. One for the rear profile(rear edge of bumper to the outer edge of the tire) and one for the front profile(front most line drawn on bumper to outer edge of tire).
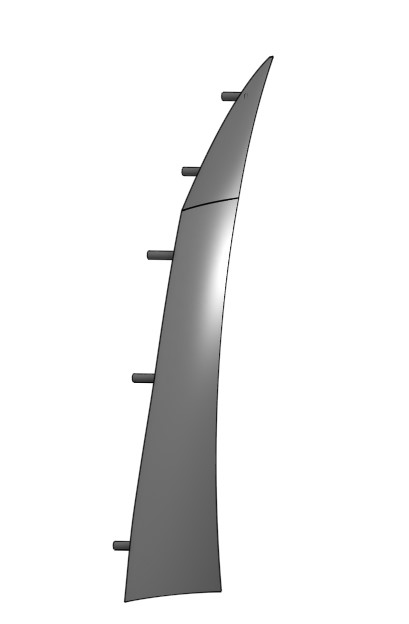
Using these three curves I created a couple of extruded structures and combined/subtracted/intersected them until I had 3 specific 3-dimensional curves. One that traced the rear edge of the bumper along the wheel well opening, a second that traced the front edge of the "flat" area ahead of the wheel well opening and a third that followed the same curve of the wheel well but stood out from the side of the car enough to block most of the leading edge of the tire.
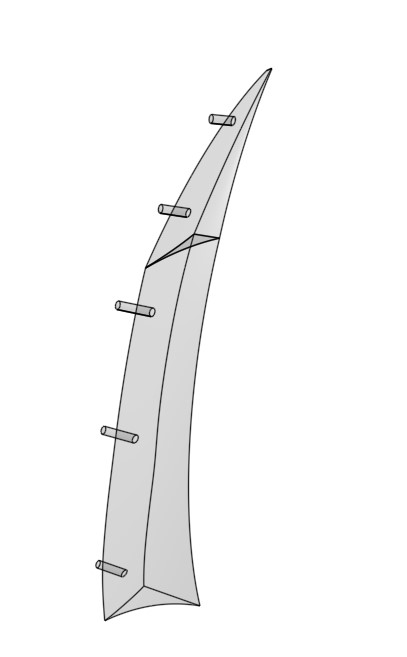
I then sketched a triangular shape that connected the bottom of each curve and another connecting the tops. I then lofted the two triangles together using the 3 curves as guides. This initial part was just from the bumper/fender seam down to the top of the 1LE lip. I repeated this whole process for a smaller piece that went upwards from the bumper/fender seam and ended at a point a few inches up the fender. The result of the two parts was this wickedly curved shape.
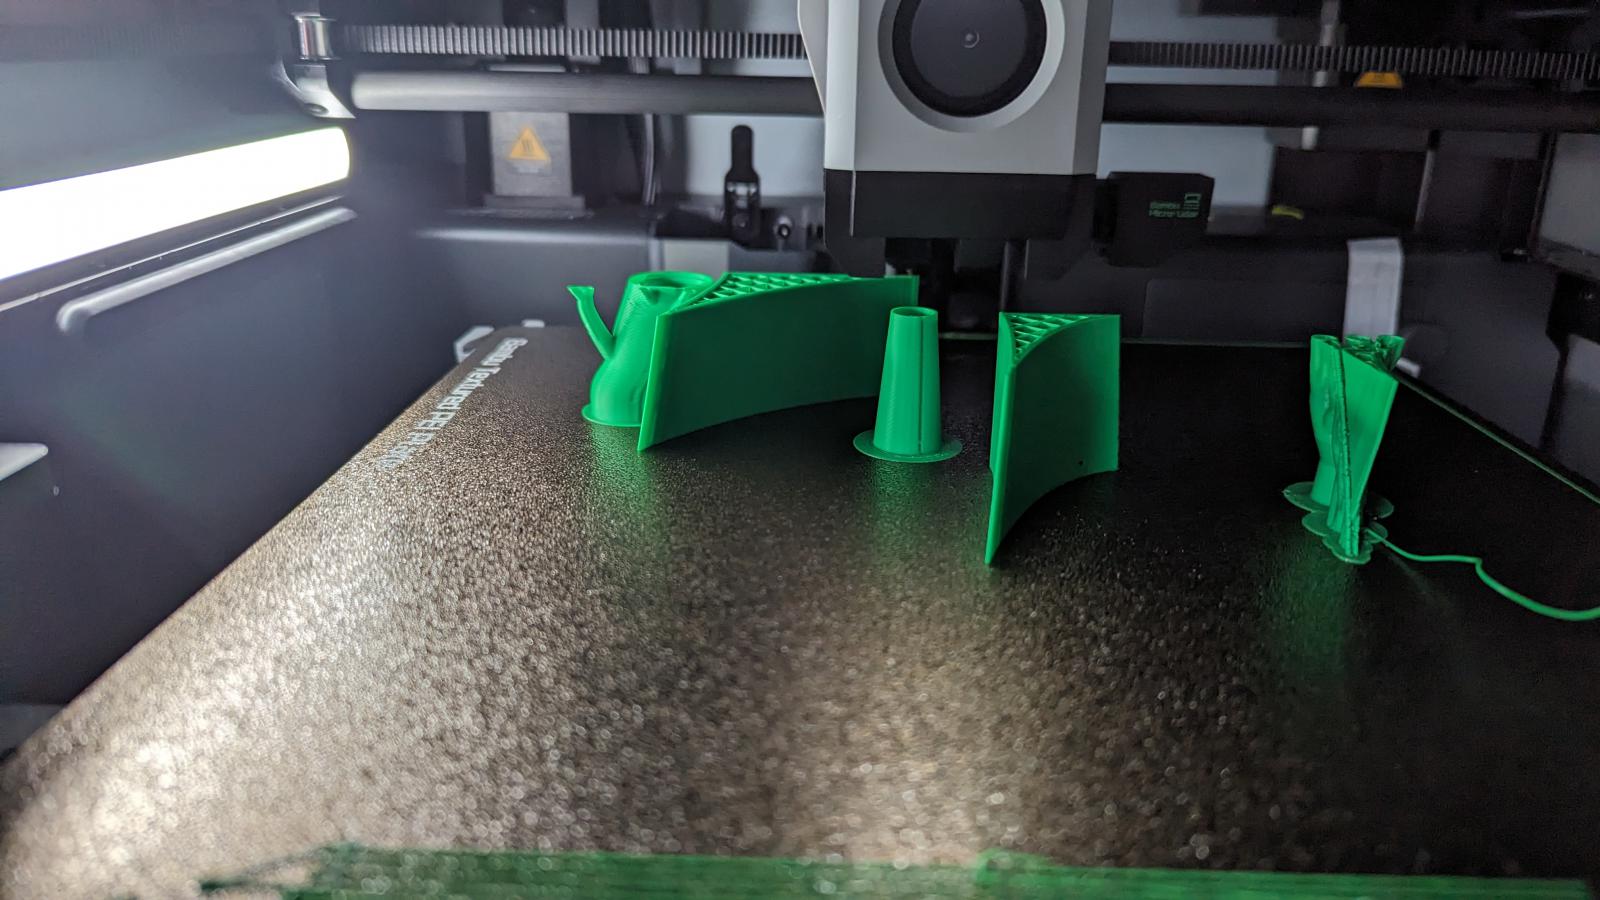
The printer I bought is a Bambu Lab X1 Carbon that I got with the AMS system on a decent black Friday deal. I could have gone cheaper, but I felt all the automation and safety features of the X1 would be worth it. I was worried that if I bought a cheaper system, not only would I have to spend time manually tweaking/adjusting/fixing things but that the wasted time would turn me off from the whole hobby and I would get frustrated and not use the printer at all. Plus the capabilities of the X1 include the ability to print carbon fiber impregnated filament. PLA-CF, Pet-CF and even PAHT-CF and PA6-CF for higher temp applications.
I dumped the STL files into my 3D printer's slicer and cut the lower portion into 2 pieces since it was too tall for my printer. I figured I'd probably have to adjust a couple things so I printed it in some cheap PLA to start. The initial fit was close but I must have mis-scaled it somewhere, as it was about a half inch short. Also I didn't think about it initially but the side abutting the "flat" area around the wheel well needed to be curved front to back(I had modeled that side of the triangle as flat.). I tweaked the model to make that edge slightly concave and scaled it up a few percent and hit re-print.
 https://youtu.be/GqOfO7-v0GA
I also thought maybe I could fold a piece of CF around the wedge to make the final part out of CF, but the complex shape and very sharp leading edge would make that difficult. I might still try this, but for now I decided to add mounting posts to the part. I removed the side marker in the front bumper and measured the distance and dimension of its mounting holes. I then added two posts to line up with those dimensions and a third post near the bottom. Two more posts on the upper fender piece and print again to ensure post locations fit the existing holes. This took 2-3 iterations to get the locations just right.
I started going down a rabbit hole trying to add threads to the posts in the model and modeling nuts to screw onto them, but then had an idea. I grabbed my cheapo tap and die set and found an M7 thread fit snugly around the post. I printed out some solid infill "nuts" with a smooth bore and with a quick twist of a tap, M7 nuts for my M7 threaded posts!
Drill a quick hole in the bumper and fender for the other mounting posts, final print in PETG-CF, and wham-bam wadda-ya-know!! A nice looking tire deflector!!