You are browsing camaro5 

|
 07-04-2010, 12:22 AM
|
#1 |
|
I am the Stig

Drives: Black w/ IOM stripe 1SS Join Date: Jan 2010
Location: Saskatoon, SK, CAN
Posts: 1,312
|
BMW Headlight Conversion *OMG IT'S DONE*
It's done! Heres a sneak peak at the finished result. See how I got there by reading along.
 *************************************** Hey folks, thought I'd put up some pictures of the conversion I did this weekend. I got the idea from the Trans Am conversions that the guys at Ottobody (member name here) were doing. I contacted them and they were kind enough to send me some information and specialty parts they use. They sent me some mounting brackets that I didn't end up using because they didn't have any instructions and didn't seem to fit anywhere. I just ended up making my own mounting brackets with some aluminum. But they did also send me some BMW trim pieces that fit under the headlights with an LED signal bar in them that now serve as my indicators. They look fantastic and fit like a glove. So I'll try to make sure I hit all the steps here (mabye this would be better in the DIY section, so mods feel free to move me if you want, not that you need my permission haha) starting out with a set of BMW 3 series E46 4-door headlights. I went with the all halogen setup for a couple reasons. A) They're MUCH cheaper and B) I wanted a quad headlight setup, all 4 lights on low beam, all 4 on high. I got a set with the "Angel Eye" halos that we all love on the 5th gens, but now I have 4 instead of 2!!! The tricky bit here with the halogens is that in the BMW setup you have one light for low and the other for high. And stock bulbs in the BMW setup are H7's. None of which fits into my plan. So I got out the handy dandy dremel and sanding bit. I disassembled the lights, which BMW actually makes very easy. Everything just clips right together and you can disassemble the whole thing. I dremeled out the lense projectors to fit the H13 HOD bulbs I got from AAC. I picked them up because they fit my plans with their dual filaments, and they little harness extensions they come with came in REALLY handy when I built my wiring harness. As I cut them apart and used them for other parts of the harness. Here's the projectors with the HOD bulbs mounted in. 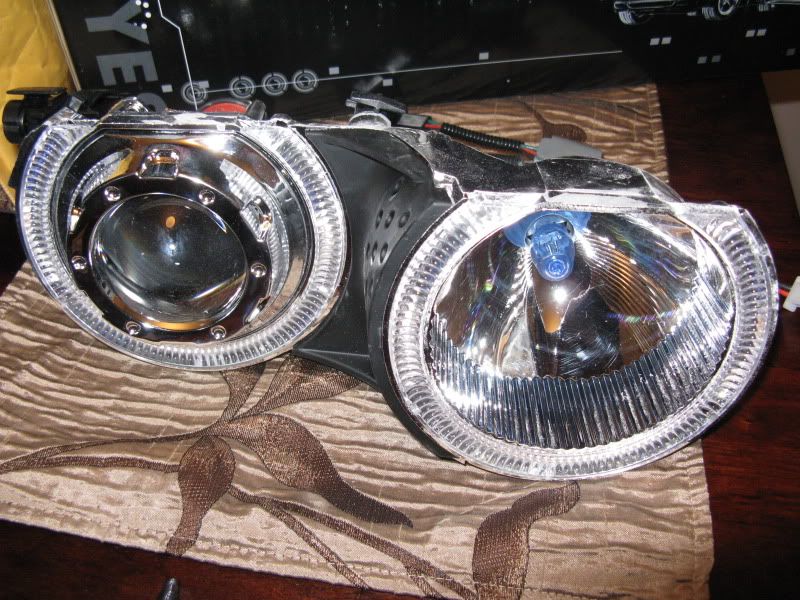 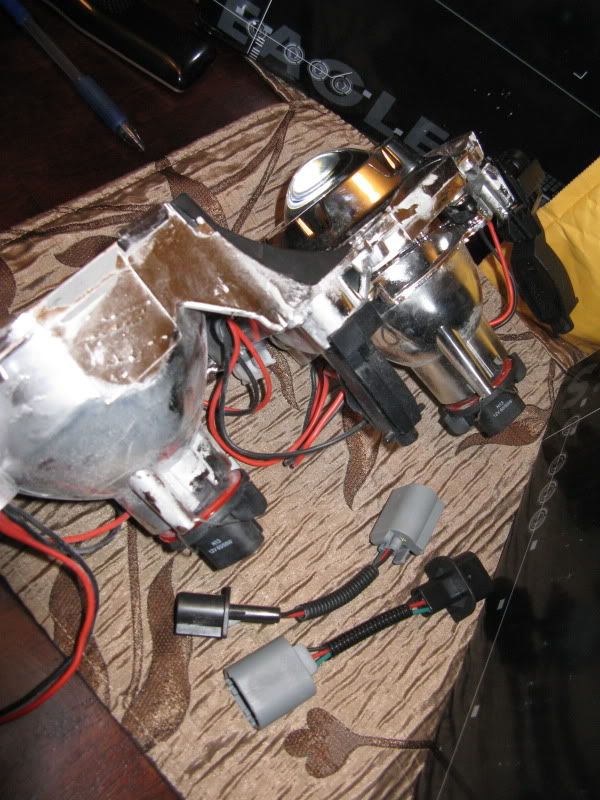 the dissassembled BMW light  Putting it all back together 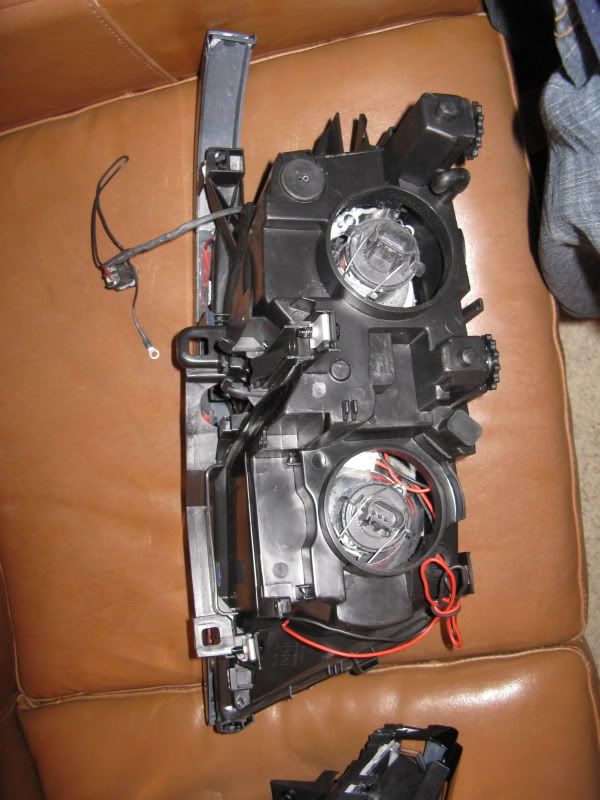 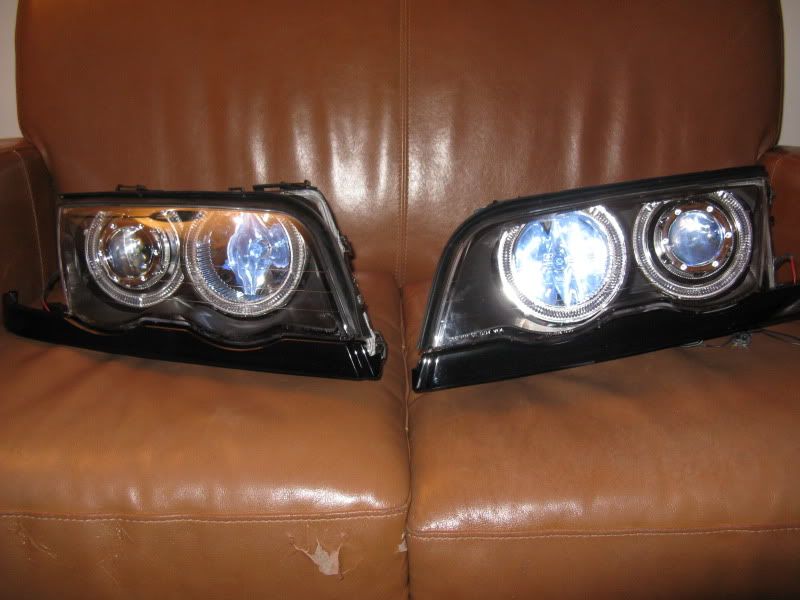 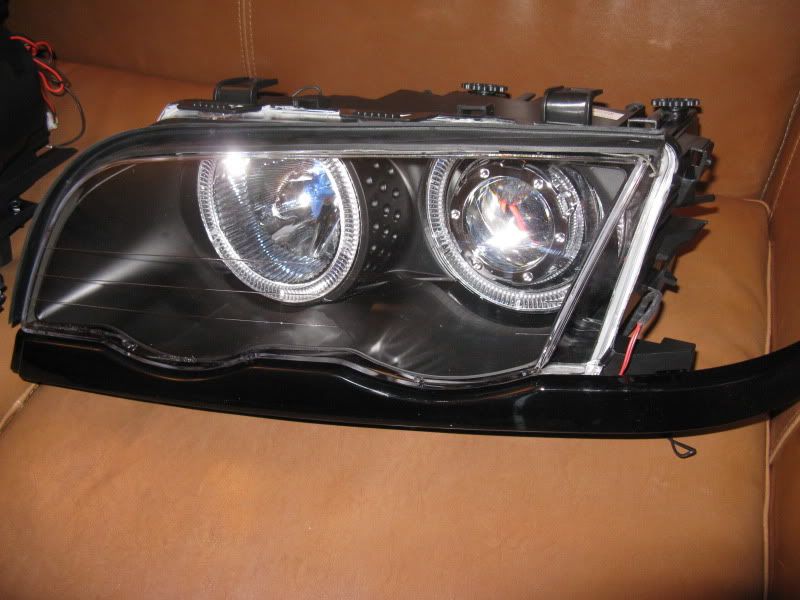 So now the lights are ready to go on the car, but the next step is the wiring harness. Basically I am running a 30A dedicated switching circuit to handle all the extra power from these bulbs. Since I'm more than doubling the power on each side compared to the stock setup. Here's the harness I built. I ended up zip tying the relays to the air box near the driver side fender. I may relocate it to the fender with some self tapping screws later on when the mood strikes me. 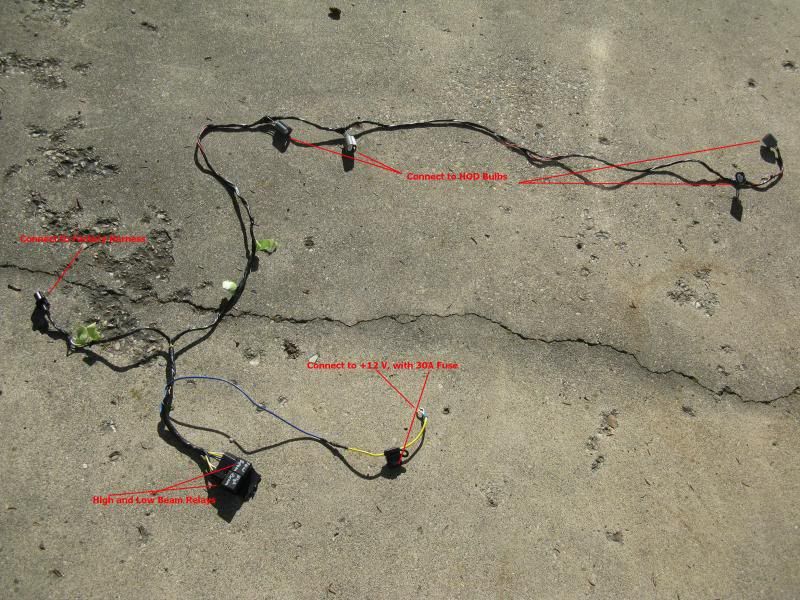 Taking power right from the battery terminal. 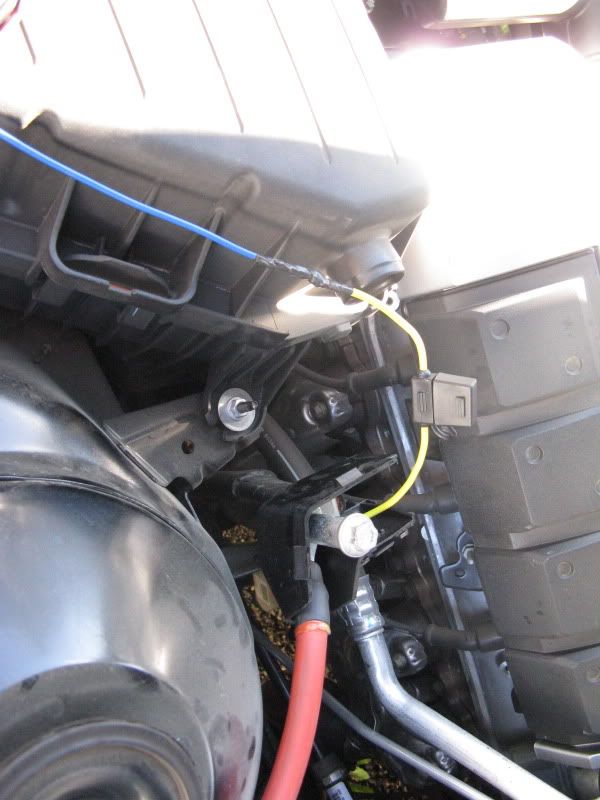 Then plugging into the stock headlight pigtail with my own harness.  I am using the High beam and Low beam signal wires to signal my relays to switch. (both 30A automotive relays. 5 pin w/ pigtails. I'm only using 4 pins on each) 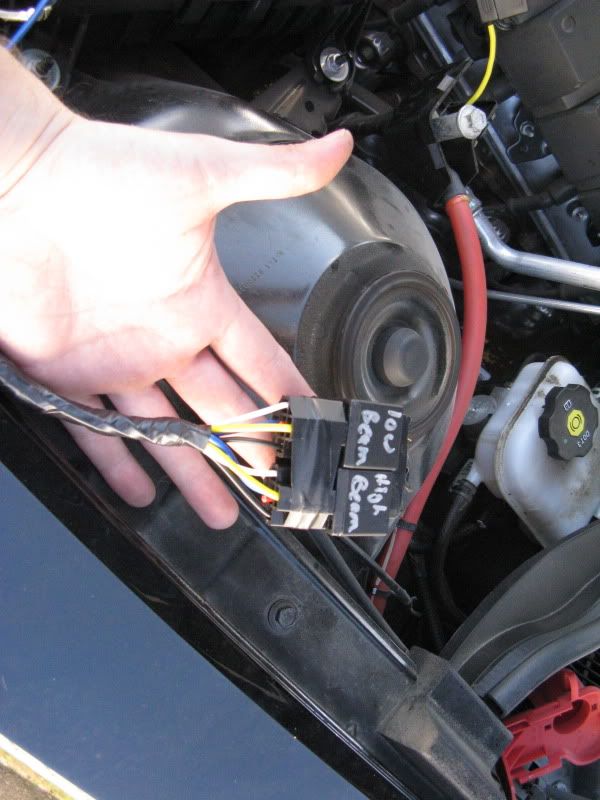 I did some testing and the factory harness doesn't seem to ever power both at the same time (as expected) so this way I keep all my stock controls. They still work with the "Auto" function, but the relays buzz (switching really fast) on that setting. The BCM must be cycling to run the drls, I'm not sure, so I just flick it to park light or low beam setting and it works as expected. No big deal to me. then I ran the harness to the lights 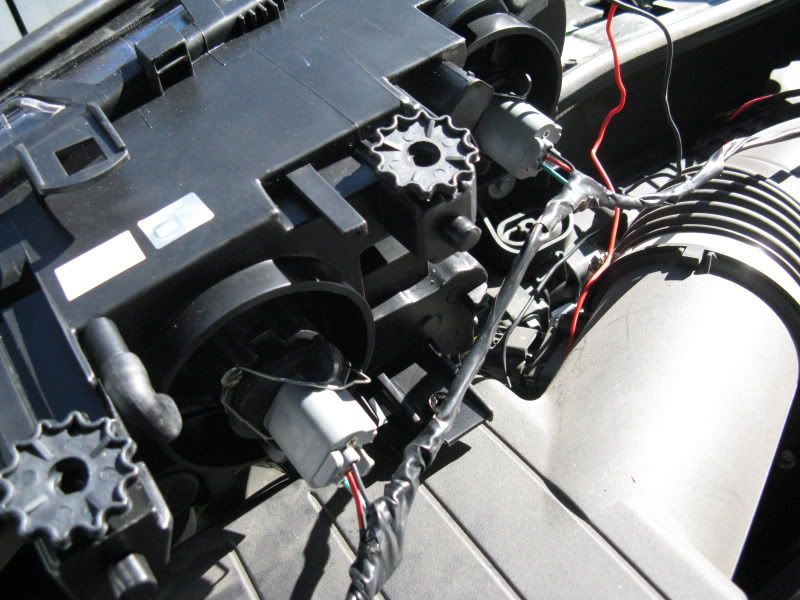 I'm only taking the signals from the driver side factory headlight plug. and running the wires across the top of the radiator (there's a nice little wiring tray there) to the passenger side lights. The bulbs are all in paralell so they see equal voltages. The passenger side factory harness I just taped up and hid in the fender. Snapped on some of that black wiring harness cover stuff and it looks factory. So I sat the lights in the engine bay and hooked up the harness and tested everything out. and it all worked according to plan!... for once haha I have a video of the testing that I can put up but I gotta get it loaded to photobucket first. 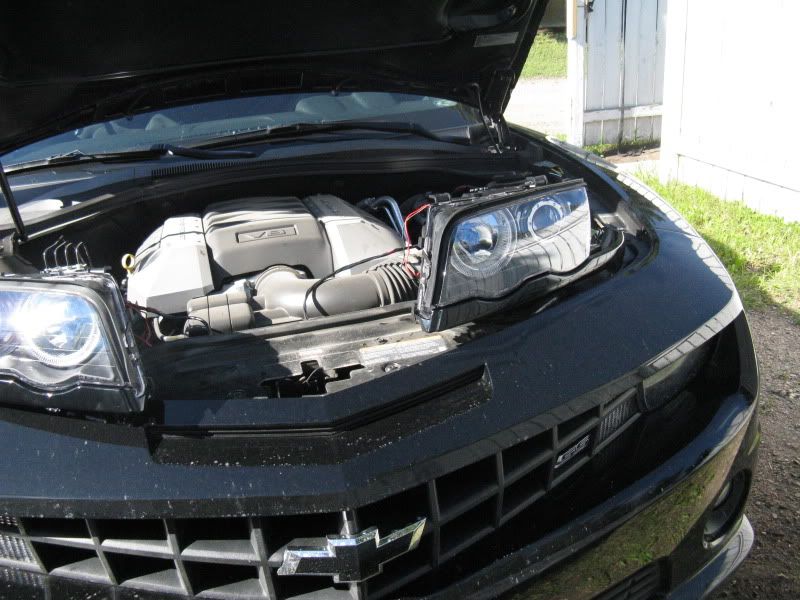 So the next step was to mount them on the car. This part was a little scary because you have to modify your bumper cover. But I always say.. "if you're afriad to F**k it up.. you'll never have anything cool"  So I got to tearin' down. So I got to tearin' down.Here's a picture of the stock light and the new ones side by side for a size comparison. Roughly the same width, but the BMW's are sleek and sexy lookin'. 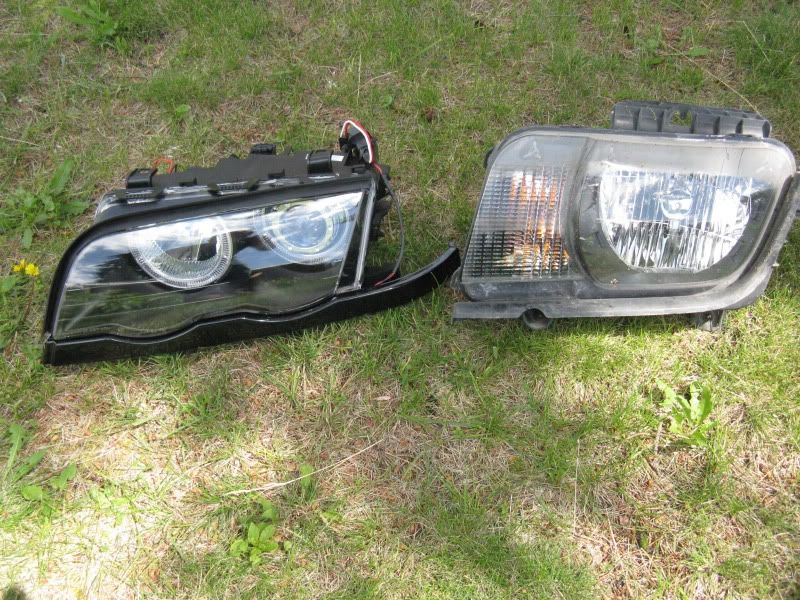 Pulled off the front cover and took off the factory housings. set the new lights in a ballpark position and test fitted the cover back on. This part was tedious, because you dont want to trim too much of the cover off and leave a big gaping hole, but you want them to fit. I probably took the cover off and on 100 times just setting it in place and evauating what needed to be trimmed. Just take your time if you want to do this, you'll be happy you did. I also popped out the grill, as it will need trimming too, but I did all the test fitting without it because it would have been much more difficult with that in there. I made the bumper cover fit, and then set the grill in to make adjustments to it. 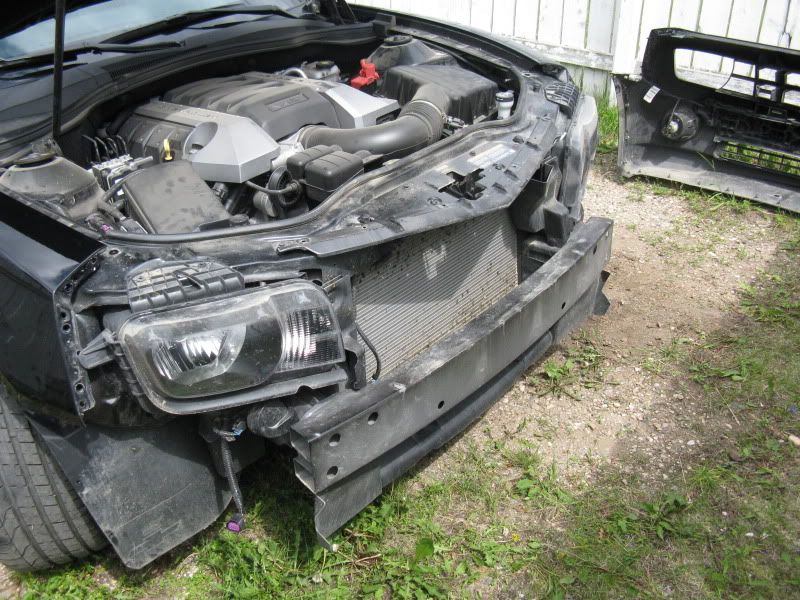 as far as the headlight positioning worked out here's how I mounted the top. Well close to it, I forgot to take a picture of the final mount. Basically I slid it towards the outside of the car another 1/2" and put the tabs under the lip instead of hooked over top. I also made another bracked from some aluminum angle stock, but I forgot to take a picture of that. Its supporting the bottom of the light running straight back to the rad support. 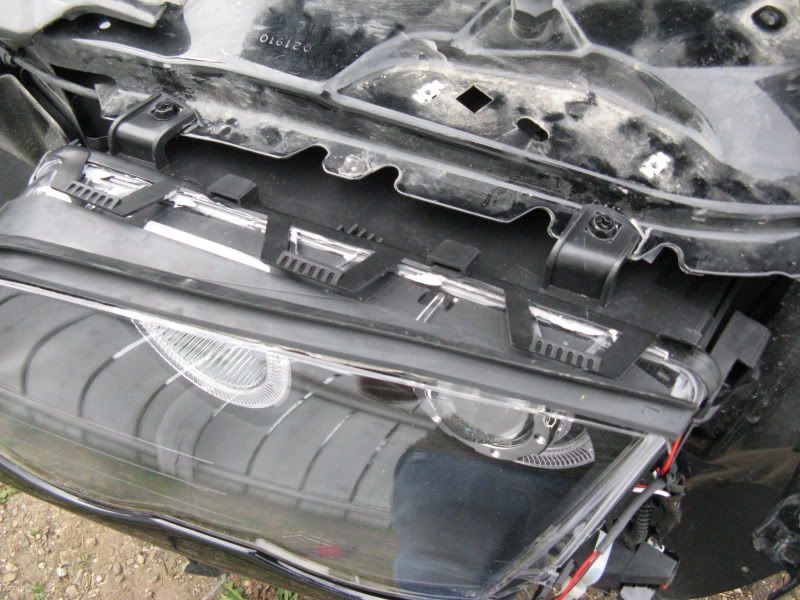 Then after enough fiddling and trimming I finally got 'er all back together. As far as the grill trimming is concerned, I only had to trim off the part that would have covered the signal lights on the factory halogens. Worked out very nicely. 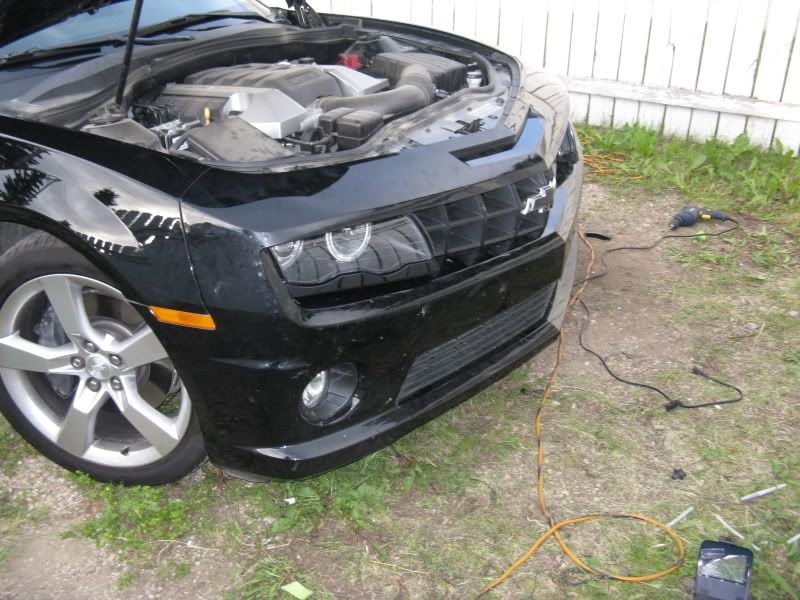 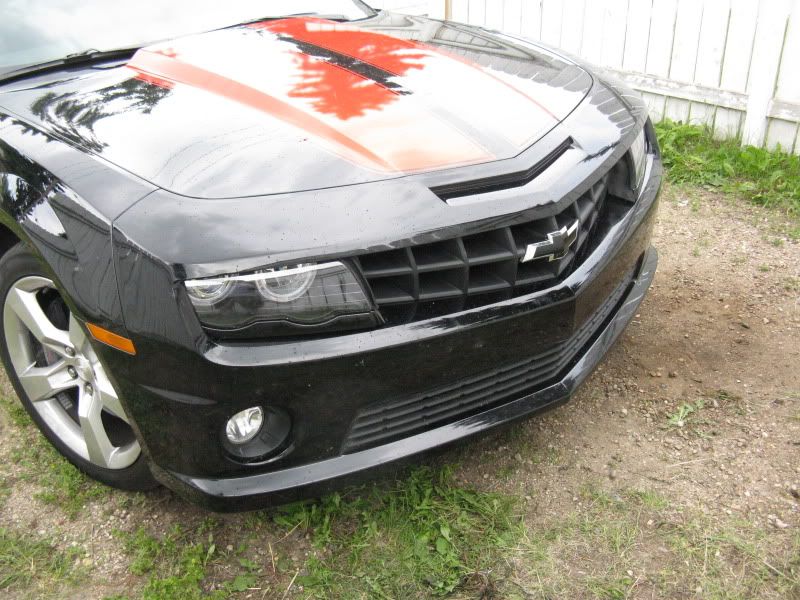 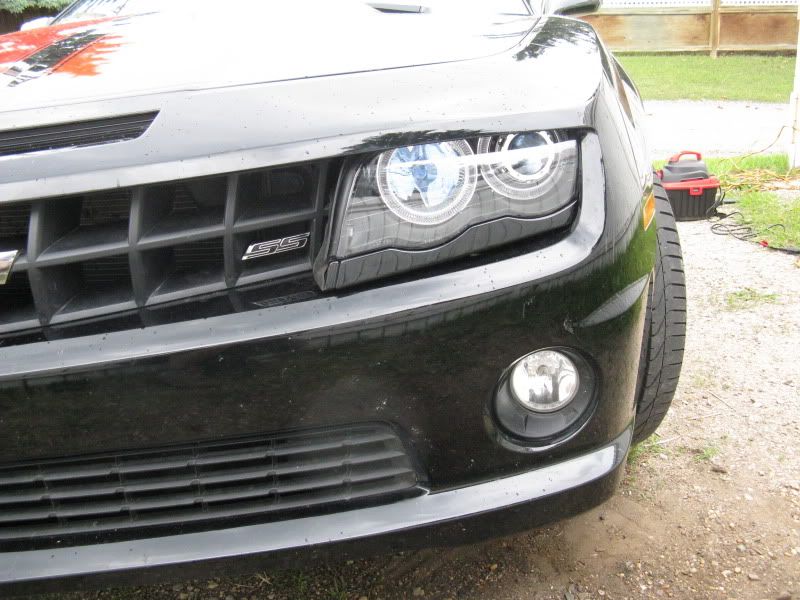 and of course, I waited for it to get a bit darker and got the money shot!! 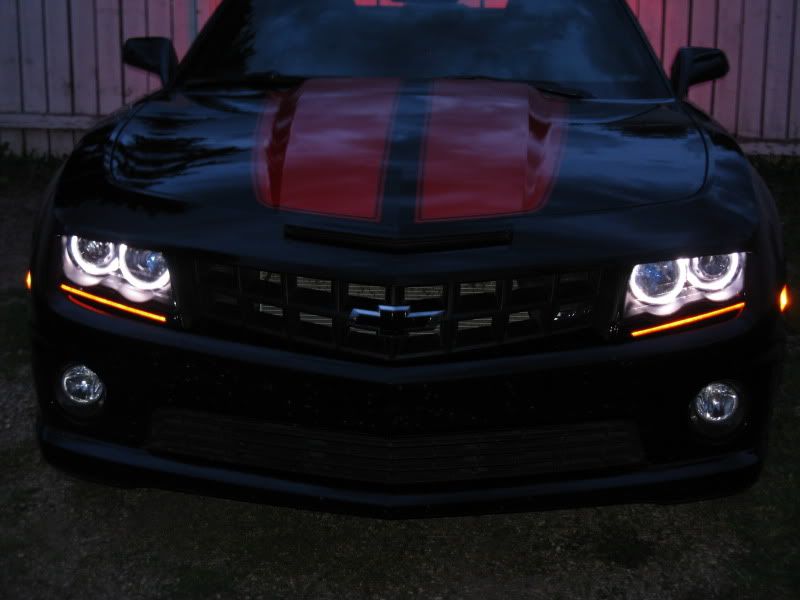 I absolutely could not be happier with how she looks. I think it totally changes the look of the front end. Not that it was bad before haha but I like to be a little different. If anyone has any questions about something I missed please give me a shout I'd be happy to sort it out for you. Overall this probably took me a solid 14-15ish hours to complete. More if you count the planning time and such. So it's not for the faint of heart, but if you really want a unique car, you really gotta go for it. Heres a video I made of when I was testing my wiring harness. 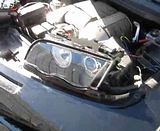 ****New pics Another C5'er suggested that it might be a good idea to consolidate the new pictures into the first post so that people don't need to wade through a few pages to get all the info. I totally agree, so here we go. not too many to report at the moment because progress has been slow, but here is the beginnings of the new custom grille I'm building. Using a street scene billet grill and another stock grill, I've trimmed them both and grafted them together. I didn't like the look of just bolting the billet grille over top and still being able to see the stock one behind it. So the top bar is screwed/bolted together and the bottom is epoxied. This way I'm still utilizing all the stock grille mounting points, and it's essentially the same as installing a stock replacement at this point. This way I can also go back to my current one if i manage to screw this up too badly haha. here's the 2 grilles grafted together.  Here is the new hybrid mounted inplace of the old stocker. I like the look of the set back grille and you'll see how I'm going to tie the front together in the next picture. 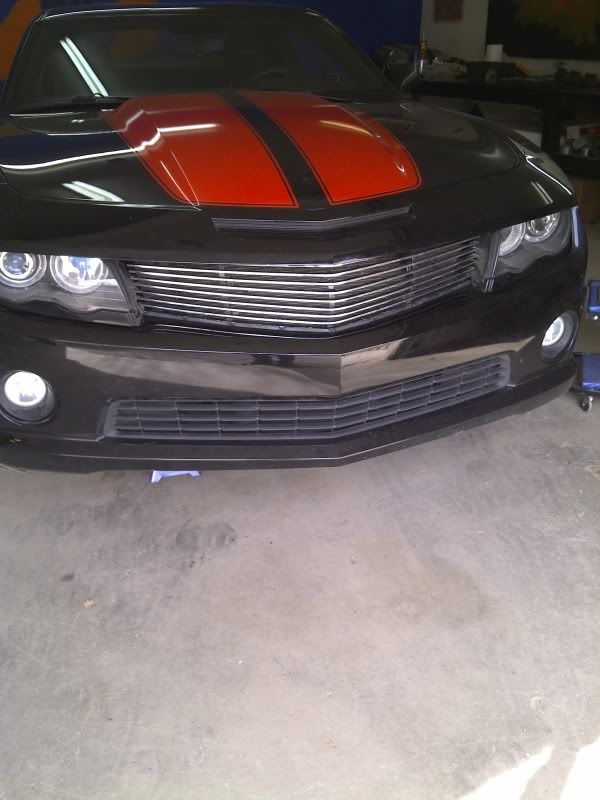 I've just set the emblems in place for now to get an idea of what it's gonna look like in the end. This was exciting because it's the first real life glimpse of the idea in my head haha. The cowl insert is cardboard painted black at the moment, I thought it would help with the whole visualisation more than seeing Sprite and Ice Cream Sandwich written on it haha. 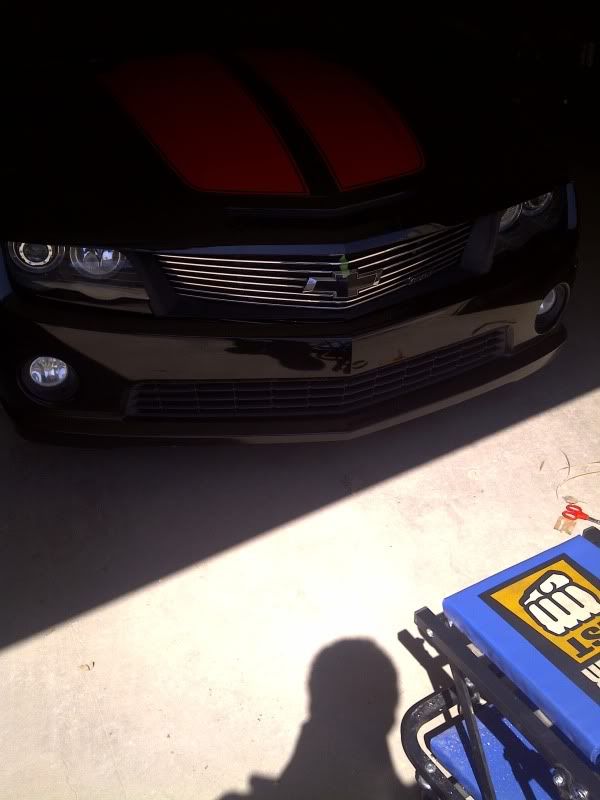 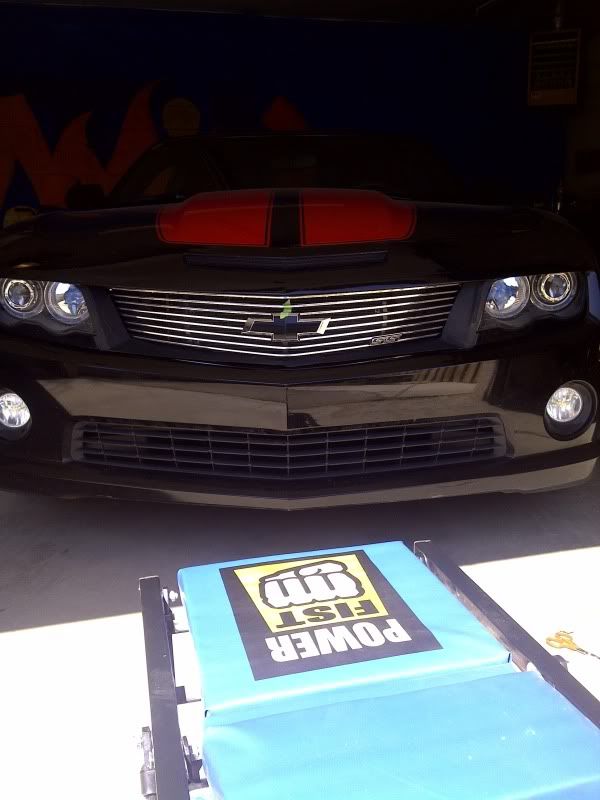 and that's where I'm at today. Next I'll make that cardboard template into a fibreglass piece, mount it, paint it, mount the emblems, and I'm done! So close, yet so far.
__________________
2010 Camaro - 1SS, Black w/ Orange stripes
 Last edited by wylde1; 05-28-2013 at 06:46 PM. Reason: Lots of them |

|

|
|
07-04-2010, 12:37 AM
|
#2 |
 
Drives: 2010 CamaroSS2 Join Date: Nov 2009
Location: San Clemente, CA
Posts: 283
|
wow...
did you want them to sit so far forward? or is that the only way they would fit in there? i am also glad to see our wireing harness works with HID light systems |
|
|
|
|
07-04-2010, 12:41 AM
|
#3 |
|
I am the Stig
Drives: Black w/ IOM stripe 1SS Join Date: Jan 2010
Location: Saskatoon, SK, CAN
Posts: 1,312
|
Kinda the only way they fit in there. I actually like it though. Fits with the angular pointy shape of the front end I think.
__________________
2010 Camaro - 1SS, Black w/ Orange stripes
|
|
|
|
|
07-04-2010, 12:42 AM
|
#4 |
|
LVL 50 Troll Stomper

Drives: 2010 Camaro Join Date: Feb 2008
Location: Indianapolis
Posts: 3,463
|
Very unique, that is for sure
__________________
 |
|
|
|
|
07-04-2010, 12:46 AM
|
#5 |
      
Drives: 2010 Camaro 1LT RJT Join Date: Feb 2010
Location: San Diego, CA
Posts: 1,951
|
Im sold. This just looks awesome. Congrats on the clean install, it looks great!
__________________
 |
|
|
|
|
07-04-2010, 12:50 AM
|
#6 |
|
Drives: 2010 Camaro 1LT RJT Join Date: Feb 2010
Location: San Diego, CA
Posts: 1,951
|
Is it just the angle, or is the lens coming off, or sticking out, on the passenger sides lamp? in the 3rd to last picture.
__________________
|
|
|
|
|
07-04-2010, 12:50 AM
|
#7 |
|
I am the Stig
Drives: Black w/ IOM stripe 1SS Join Date: Jan 2010
Location: Saskatoon, SK, CAN
Posts: 1,312
|
Thanks! It was tricky haha but worth the effort I think
My only complaint is that the halos are really not all that bright. You can't really see them in the daytime. I should be able to fix that with some LED halos, but I'll have to build up a few more bucks in the bank first
__________________
2010 Camaro - 1SS, Black w/ Orange stripes
|
|
|
|
|
07-04-2010, 12:52 AM
|
#8 | |
|
I am the Stig
Drives: Black w/ IOM stripe 1SS Join Date: Jan 2010
Location: Saskatoon, SK, CAN
Posts: 1,312
|
Quote:
Just the angle I think. You're talking about the white line across the top right? I think it's just a reflection. they're definatly on there solid, there's about 7-8 clips on the housing to hold them in.
__________________
2010 Camaro - 1SS, Black w/ Orange stripes
|
|
|
|
|
|
07-04-2010, 12:57 AM
|
#9 | |
|
I am the Stig
Drives: Black w/ IOM stripe 1SS Join Date: Jan 2010
Location: Saskatoon, SK, CAN
Posts: 1,312
|
Quote:
__________________
2010 Camaro - 1SS, Black w/ Orange stripes
|
|
|
|
|
|
07-04-2010, 01:14 AM
|
#10 |
|
COTW: 12/13/10

Drives: 1969 Camaro Join Date: Feb 2008
Location: Orange County, CA
Posts: 7,880
|
 Thats awesome, I could never do something like that. I like it a lot, but it would look better if it sat flush with the grill. It kinda reminds me of a charger headlights.
__________________
 "Are you one of those boys who prefer cars to women? - I'm one of those boys that appreciates a fine body, regardless of the make." 1969 CAMARO JOURNAL: http://www.camaro5.com/forums/showthread.php?t=341239 | FACEBOOK: http://www.facebook.com/taylor.ryan.apt | GRAPHIC DESIGN: www.aptdesigns.net |
|
|
|
|
07-04-2010, 01:18 AM
|
#11 | |
|
I am the Stig
Drives: Black w/ IOM stripe 1SS Join Date: Jan 2010
Location: Saskatoon, SK, CAN
Posts: 1,312
|
Quote:
I'm actually toying with the idea of just making a new grill that will come out flush with the lights. but I havn't really decided yet. I kinda like the pointyness of it. It's pretty tough to get them to sit any further back towards the rad support without severly modifying the rad support or the housing itself.
__________________
2010 Camaro - 1SS, Black w/ Orange stripes
|
|
|
|
|
|
07-04-2010, 12:47 PM
|
#12 |
|
Banned
|
eh i rather not!. idunno not my style. i mean. just buy AAC halos and such.
|
|
|
|
|
07-04-2010, 08:22 PM
|
#13 | |
|
I am the Stig
Drives: Black w/ IOM stripe 1SS Join Date: Jan 2010
Location: Saskatoon, SK, CAN
Posts: 1,312
|
Quote:
I wanted something that no one else has, because I enjoy projects like that.
__________________
2010 Camaro - 1SS, Black w/ Orange stripes
|
|
|
|
|
|
07-04-2010, 09:33 PM
|
#14 |
|
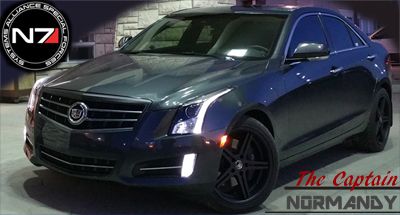
N7 Spectre

Drives: 14 ATS Performance 3.6L AWD Join Date: Jul 2008
Location: Moosomin, Saskatchewan, Canada
Posts: 2,734
 |
Very interesting! But imo your grill should come out the same distance in order to have a bit more of a "finished" look.
And yea, LED Halos are way way brighter then the BMW ones (providing you use enough). I did a CCFL (cold cathode fluorescent light) conversion on my old cobalt. I think i have pics of the difference if you want.
__________________
 |
|
|
|
|
|
|
|
 |
|
|
 Similar Threads
|
||||
| Thread | Thread Starter | Forum | Replies | Last Post |
| Restoring Headlights with Headlight Armor Lighting Protection | HeadlightArmor | Cosmetic Maintenance: Washing, Waxing, Detailing, Bodywork, Protection | 3 | 01-12-2016 11:58 AM |
| Headlight conversion completed!! change your Non RS headlights to a RS Bi-Xenon!! | ottobody | Cosmetics and Lighting Modification Discussions | 150 | 10-28-2010 09:13 PM |
| LT headlight to RS/SS headlight conversion? | SDCamaro10 | Cosmetics and Lighting Modification Discussions | 3 | 06-29-2010 07:25 PM |
| NON-RS to RS headlight conversion kit | ottobody | Exterior Parts & Accessories | 31 | 05-19-2010 11:23 AM |


